The Ultimate 7-Step Rooftop Garden Setup: A Complete Beginner's Guide
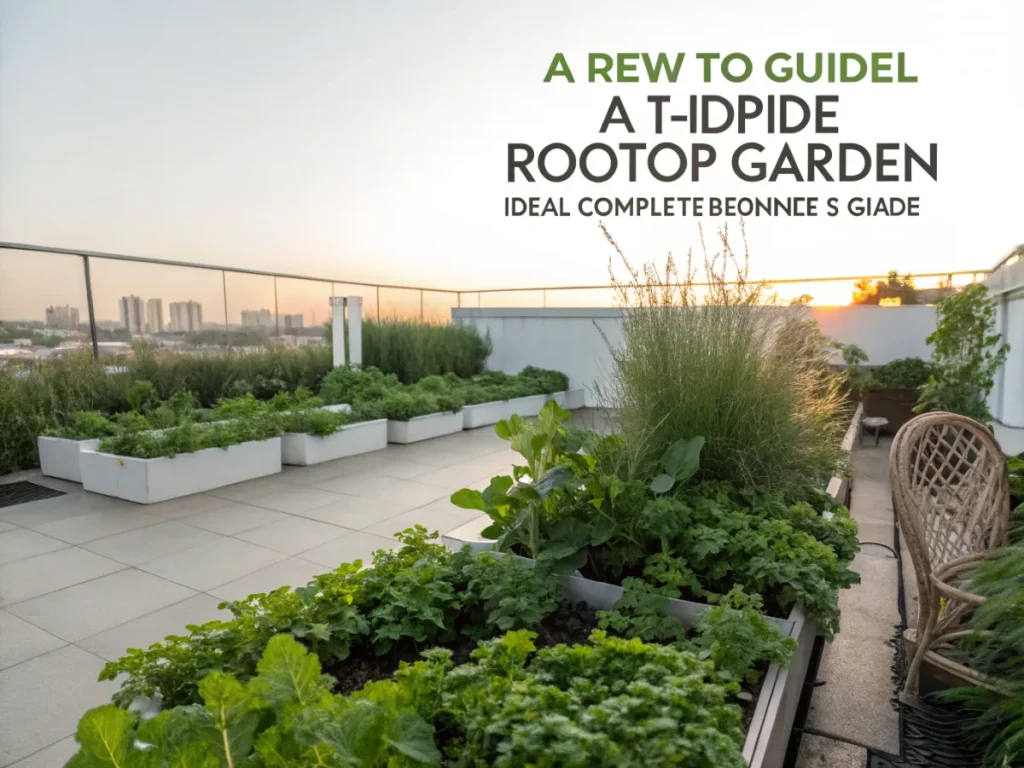
Dreaming of fresh, organic produce in the heart of the city? Imagine stepping out onto your rooftop and plucking ripe tomatoes, fragrant herbs, or crisp leafy greens, all grown by your own hands. A rooftop garden is more than just a green space; it’s a testament to urban resilience, a haven for biodiversity, and a source of sustainable food right where you live. This comprehensive guide will walk you through everything you need to know to transform that often-unused rooftop into a thriving edible oasis, even if you’re a complete beginner.
[lwptoc]
Why a Rooftop Garden Matters for Your Urban Permaculture Journey
In our increasingly urbanized world, space for conventional gardening is a luxury. Rooftop gardens offer an innovative solution, repurposing underutilized areas into productive ecosystems. This isn’t just about growing food; it’s about embracing urban permaculture principles, enhancing biodiversity, and contributing to a healthier city.
Rooftop gardens absorb rainwater, reducing stormwater runoff and easing pressure on urban drainage systems. They can also significantly reduce the urban heat island effect by cooling the building and surrounding environment. This leads to lower energy consumption for cooling your home during hot summer months, making your living space more comfortable and sustainable.
Furthermore, these elevated green spaces provide invaluable habitat for pollinators like bees and butterflies, which are crucial for our food systems but face declining populations. They can also connect you with nature, offering a calming retreat from the urban hustle and bustle, improving mental well-being, and providing a sense of accomplishment as you nurture life.
For those interested in urban permaculture, a rooftop garden represents a critical step. It fosters self-sufficiency, reduces food miles, and encourages a deeper understanding of ecological cycles. You’re not just planting seeds; you’re cultivating a resilient, sustainable lifestyle.
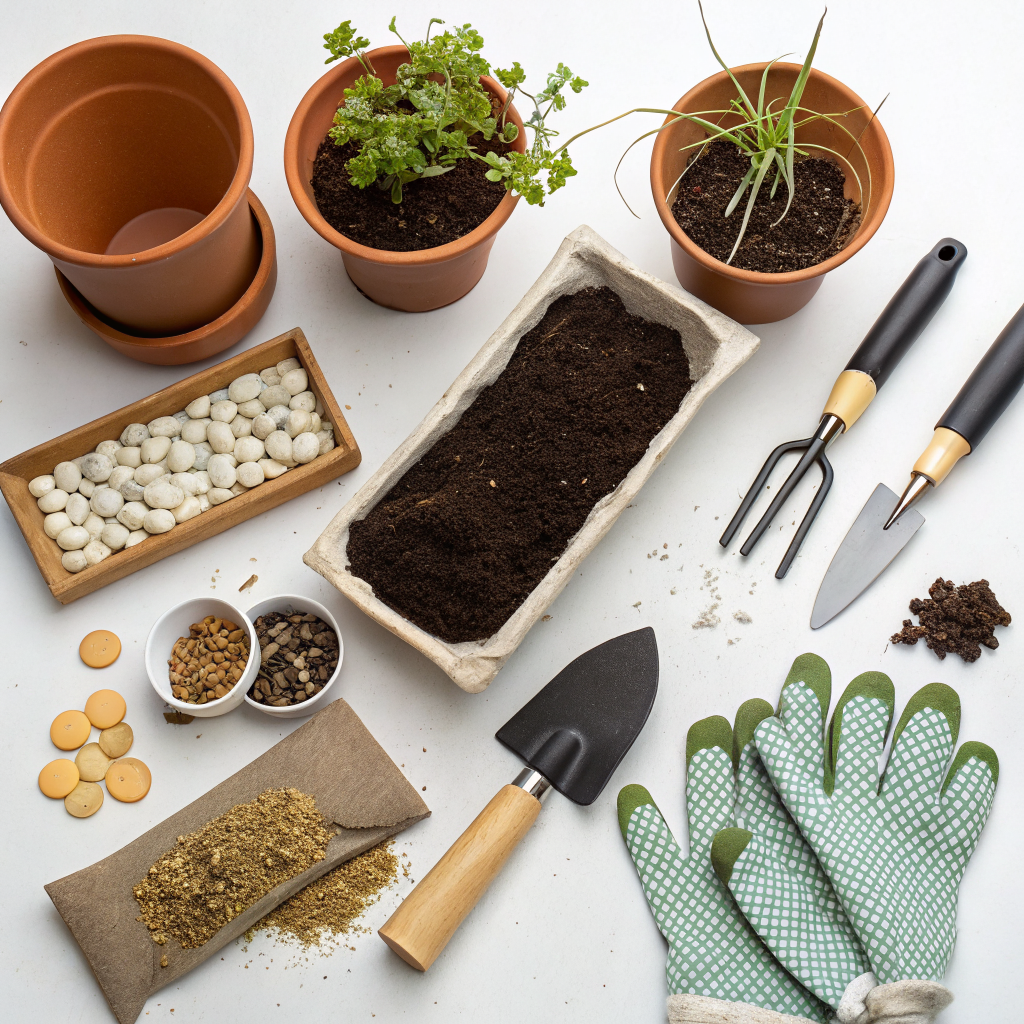
What You Need: Essential Tools, Materials, and Plants
Before you get your hands dirty, it’s crucial to gather the right equipment. Starting with the proper foundation will save you time, effort, and potential headaches down the line. Investing in quality materials, especially for structural components, is always a wise decision.
Tools for Success
- Gardening Gloves: Protect your hands from dirt, thorns, and blisters.
- Hand Trowel and Cultivator: Essential for planting, weeding, and working with soil in containers.
- Watering Can or Hose with Spray Nozzle: For efficient and gentle watering. Ensure your hose is long enough to reach all areas.
- Pruning Shears: For trimming plants, harvesting, and maintaining healthy growth.
- Sturdy Buckets or Wheelbarrow: For mixing soil, transporting materials, and harvesting.
- Tape Measure: For planning and ensuring accurate spacing.
- Safety Glasses: Protect your eyes, especially when dealing with dusty soil or debris.
- Work Gloves: Heavier duty gloves for lifting and moving larger items.
- Brush and Dustpan or Small Broom: For keeping your rooftop space tidy.
- Utility Knife or Scissors: For opening bags of soil, cutting twine, etc.
Materials for Your Rooftop Oasis
- Containers: This is a critical choice. Options include fabric grow bags, terracotta pots, plastic planters, wooden raised beds, or even repurposed items like food-grade barrels. Ensure they have adequate drainage holes. Consider their weight when filled with soil and water.
- Potting Mix/Soil: Do NOT use garden soil directly; it’s too heavy and compacts easily in containers. Opt for high-quality, lightweight potting mix specifically designed for containers. Look for mixes with perlite or vermiculite for better drainage and aeration.
- Drainage Layer (Optional but Recommended): A layer of gravel, broken pottery, or plastic drainage cells at the bottom of containers can prevent waterlogging. However, many modern potting mixes are designed to drain well on their own.
- Waterproofing Membrane/Root Barrier: Absolutely essential if you are building raised beds directly on your roof surface to protect the roof from moisture and root intrusion. Consult a professional for proper installation.
- Trellises, Stakes, or Cages: For supporting vining plants like tomatoes, cucumbers, and beans. This maximizes vertical space and increases yields.
- Fertilizer: Organic, slow-release fertilizers or liquid feeds will nourish your plants. Compost and worm castings are excellent natural amendments.
- Mulch: Straw, woodchips, or shredded leaves help retain soil moisture, suppress weeds, and regulate soil temperature.
- Tarpaulin or Protective Sheeting: To protect your roof surface during construction and planting.
- Watering Solution: If a hose isn’t feasible, consider large water storage containers or even a drip irrigation system for larger setups.
Choosing Your Plants: What Grows Best on a Rooftop?
Success on a rooftop hinges on selecting the right plants. Consider sunlight exposure, wind, and your chosen container size before planting. Prioritize compact, resilient varieties that thrive in containers.
- Herbs: Basil, mint, rosemary, thyme, oregano, cilantro, parsley are excellent, easy-to-grow choices that tolerate varied conditions.
- Leafy Greens: Lettuce (especially loose-leaf varieties), spinach, Swiss chard, kale, and arugula are fast-growing and provide continuous harvests.
- Tomatoes: Bush or determinate varieties are best for containers. Cherry tomatoes are particularly productive.
- Peppers: Bell peppers and chili peppers do well in full sun and containers.
- Bush Beans and Peas: Look for bush varieties that don’t require extensive trellising.
- Strawberries: Ideal for hanging baskets or tiered planters, offering delicious fruit.
- Radishes and Carrots (shorter varieties): Quick harvests and don’t need deep soil.
- Eggplant: Compact varieties can thrive in large containers.
- Squash/Zucchini (bush varieties): Can produce well in very large containers, but choose wisely as many varieties sprawl.
- Flowers (for pollinators): Marigolds, nasturtiums, calendula, and borage not only add beauty but also attract beneficial insects.
Avoid large, sprawling plants or those requiring extremely deep root systems unless you plan for very large, sturdy raised beds. Also, consider the mature size and weight of trees or shrubs carefully before adding them to your rooftop garden.
Step-by-Step Guide: Building Your Rooftop Oasis
This section outlines the crucial steps to bring your rooftop garden vision to life. Each step is vital for the safety, longevity, and productivity of your elevated green space. Do not rush any stage, especially the initial assessments.
Step 1: Structural Assessment and Permission (Crucial First Step!)
This is arguably the most important step. Your roof needs to be able to safely bear the weight of your garden. Soil, even lightweight potting mix, becomes very heavy when wet, and plants, containers, and water add significant load. Consult a structural engineer or a qualified architect. They will assess your roof’s load-bearing capacity and advise on any necessary reinforcements. Ignoring this step can lead to serious structural damage to your building.
Additionally, obtain all necessary permissions from your building owner, homeowner’s association (HOA), or local municipality. Many urban areas have specific regulations regarding rooftop installations. Ensure you have proper insurance coverage before you begin any construction or planting.
Step 2: Planning and Design
Once you have structural approval and permission, it’s time to design your space. Consider sun exposure throughout the day, wind patterns, and access to water. Map out where you want containers, pathways, and seating areas. Think about drainage: where will excess water go without damaging your roof or neighboring properties?
Sketch your layout, considering the size and shape of your containers. Place taller plants where they won’t shade shorter ones, and group plants with similar watering needs. Plan for windbreaks if your rooftop is particularly exposed.
Step 3: Waterproofing and Surface Protection
Protecting your roof membrane is paramount. If you’re building raised beds directly on the roof, a commercial-grade waterproofing membrane and root barrier are essential. This is usually applied by professionals. Even for container gardens, placing rubber mats, interlocking deck tiles, or sturdy plastic saucers under each pot is highly recommended. This prevents water stains, protects the roof surface, and allows for proper drainage.
Step 4: Assembling Containers and Preparing Soil
Set up your chosen containers according to your design. If using raised beds, assemble them now. Ensure all containers have sufficient drainage holes. For larger containers or raised beds, you might consider a layer of lightweight aggregate or drainage cells at the bottom to improve drainage and reduce overall weight (though this reduces growing depth). Fill your containers with a high-quality, lightweight potting mix. Do not use dense garden soil; it compacts too much in containers. Amend with compost or worm castings for added nutrients.
Step 5: Planting Your Garden
Now for the fun part: planting! Carefully transfer your chosen plants from their nursery pots into your containers. Dig a hole slightly larger than the root ball, place the plant in, and backfill with potting mix, gently patting around the base. Water immediately after planting to help settle the soil and reduce transplant shock. Follow spacing guidelines for each plant to ensure they have enough room to grow.
Step 6: Installing Irrigation and Windbreaks
Rooftop gardens can dry out quickly due to sun and wind. A reliable watering system is crucial. For beginners, a good watering can or a hose is sufficient. For larger setups, consider a drip irrigation system with a timer; this conserves water and ensures consistent moisture. If your rooftop is windy, install windbreaks using trellises, sturdy mesh, or even dense shrubs (if space and weight allow) to protect your plants from damage and reduce moisture loss.
Step 7: Ongoing Maintenance and Care
Your rooftop garden will require consistent attention. Water regularly, checking soil moisture daily, especially during hot, sunny, or windy periods. Fertilize according to plant needs and type of fertilizer used. Prune regularly to encourage bushy growth and maximize yields. Keep an eye out for pests and diseases, addressing them promptly with organic solutions when possible. Mulch containers to retain moisture and suppress weeds. Enjoy observing your plants grow and harvesting your fresh produce!
Pro Tips and Common Mistakes to Avoid
Learning from others’ experiences can save you time and effort. Here are some seasoned gardener tips and pitfalls to steer clear of when embarking on your rooftop garden adventure.
Pro Tips for a Thriving Rooftop Garden
- Prioritize Water Management: Rooftop gardens dry out incredibly fast. Invest in a good watering system, whether it’s a reliable hose with a timer-controlled sprinkler or a full drip irrigation setup. Water deeply and consistently early in the morning or late in the evening to minimize evaporation. Consider self-watering containers for some plants.
- Layer Your Soil: While a lightweight potting mix is essential, consider adding a layer of compost or well-rotted manure to the bottom of large containers before filling with potting mix. This provides a slow-release nutrient boost.
- Incorporate Vertical Gardening: Maximise your limited space. Use trellises, obelisks, hanging baskets, and stackable planters to grow upwards. This is perfect for vining plants like cucumbers, pole beans, and even some squash varieties.
- Embrace Companion Planting: Plant beneficial combinations. For example, marigolds deter pests, basil improves the flavor of tomatoes, and nasturtiums can act as a trap crop. Research good companion plant pairings for your chosen vegetables.
- Wind Protection is Key: High winds are a major challenge on rooftops. Use sturdy trellises, create windbreaks with permeable barriers (like lattice or permeable fabric), or strategically place taller, tougher plants to shield more delicate ones. Avoid solid walls, which can create turbulent eddies.
- Think About Weight Distribution: Instead of concentrating heavy containers in one spot, spread them out to distribute the load evenly across your roof’s surface. This is particularly important for large, water-retentive planters.
- Harvest Regularly: Many plants, especially leafy greens and herbs, produce more when harvested frequently. This encourages new growth and prolongs the harvest season.
- Start Small and Expand: Don’t try to grow everything at once. Begin with a few easy-to-grow plants and expand your garden as you gain experience and confidence. This reduces overwhelm and increases your chances of success.
- Monitor and Adapt: Pay close attention to your plants. Are leaves yellowing? Is the soil too dry or too wet? Are pests appearing? Early detection and adaptation are crucial for a healthy garden.
- Utilize Mulch: A good layer of straw, shredded leaves, or wood chips on top of your container soil will dramatically reduce water evaporation, suppress weeds, and regulate soil temperature.
Common Mistakes to Avoid
- Ignoring Structural Assessment: This is the most dangerous mistake. Never assume your roof can handle the weight. Always consult a professional.
- Using Garden Soil: Garden soil is too dense and heavy for containers. It compacts, restricting root growth and drainage, leading to waterlogged or suffocated plants.
- Insufficient Drainage: Containers without proper drainage holes will lead to root rot. If a pot lacks holes, drill several at the bottom.
- Underestimating Wind and Sun Exposure: Rooftops are extreme environments. Plants can get scorched by intense sun or damaged by strong winds. Choose resilient plants and provide protection.
- Neglecting Waterproofing: Skipping or skimping on roof protection can lead to severe and costly water damage to your building.
- Over or Under Watering: Both extremes are detrimental. Feel the soil. It should be consistently moist, not soggy or bone dry.
- Planting Too Close Together: Overcrowding leads to competition for nutrients, water, and light, resulting in weaker, less productive plants and increased susceptibility to disease.
- Forgetting to Consider Access: How will you get water, soil, and plants to your rooftop? Plan for easy access for both materials and ongoing maintenance.
- Using Non-Food-Grade Materials for Edibles: If repurposing containers, ensure they haven’t held toxic chemicals. Stick to known food-safe materials for edible plants.
- Ignoring Local Regulations: Building codes and property rules exist for a reason. Always check with your local authorities and property management before beginning.
Eco-Friendly Variations for a Sustainable Rooftop Garden
Embracing sustainability is at the heart of urban permaculture. A rooftop garden provides an excellent opportunity to implement various eco-friendly practices that benefit both your garden and the wider environment. Integrating these elements will enhance your garden’s resilience and reduce its ecological footprint.
- Rainwater Harvesting: Set up a small rainwater collection system using barrels or tanks. This provides a free, chlorine-free water source for your plants and reduces strain on municipal water supplies. Ensure barrels are securely fastened and prevent mosquito breeding.
- Composting on the Rooftop: Install a small worm farm (vermicomposter) or a sealed composting bin. This turns kitchen scraps and garden waste into nutrient-rich compost, reducing landfill waste and providing excellent soil amendment. Be mindful of weight and odor.
- Native Plants for Pollinators: Dedicate a portion of your rooftop to native plants that attract local pollinators. These plants are often well-adapted to local conditions and require less water and maintenance once established. Consult local nurseries or extension.umn.edu for recommendations.
- Repurposed Materials: Get creative with containers! Old tires (ensure they are food-grade if growing edibles directly in them), wooden crates, food-grade barrels, or even recycled plastic bottles can be transformed into planters. This reduces waste and adds character. Find inspiration on sites dedicated to DIY upcycled planters.
- Solar-Powered Irrigation: For larger rooftop gardens, consider a solar-powered drip irrigation system. This eliminates the need for electricity and is ideal for off-grid or remote rooftop setups, ensuring your plants are watered even when you’re away.
- Organic Pest Control: Avoid chemical pesticides. Instead, rely on natural methods: introduce beneficial insects (ladybugs, parasitic wasps), use neem oil, insecticidal soaps, or simple hand-picking to manage pests. Encourage a healthy ecosystem to keep pests in check.
- Green Roof Patches: For a more permanent and integrated solution, consider installing a small section of “green roof” with sedums or other low-maintenance groundcovers. These provide excellent insulation, stormwater retention, and habitat. This is a more complex undertaking, usually requiring professional installation and structural assessment.
- DIY Fertilizers: Instead of relying solely on store-bought fertilizers, explore making your own. Composting, as mentioned, is key. You can also create “compost tea” by steeping finished compost in water, providing a liquid nutrient boost.
- Passive Solar Design: If building a greenhouse or protective structure, consider passive solar principles. Orient it to maximize winter sun exposure and minimize summer heat gain. This can extend your growing season without active heating/cooling.
- Water-Wise Plant Selection: Choose drought-tolerant plant varieties once they are established. Succulents, some herbs, and certain native plants can thrive with less water, reducing your watering demands in the long run.
Seasonal Considerations for a Year-Round Rooftop Harvest
A rooftop garden, while exciting, is also subjected to the full force of the seasons. Understanding and planning for seasonal changes will help you maximize your yield and protect your plants throughout the year.
Spring: The Season of Renewal and Planting
- Clean-up and Preparation: As temperatures rise, clear out any winter debris. Inspect containers for damage and replenish potting mix.
- Starting Seeds: Many vegetables can be started indoors from seed weeks before the last frost, giving them a head start once moved to the rooftop.
- Cool-Season Planting: Plant cool-season crops like lettuce, spinach, kale, radishes, peas, and root vegetables as soon as frost danger has passed.
- Hardening Off: Gradually acclimate indoor-started seedlings to outdoor conditions by placing them outside for increasing periods before permanent planting.
- Fertilize: Lightly fertilize newly planted crops to encourage vigorous growth.
Summer: Abundance and Intense Heat
- Watering Frequency: This is when watering becomes critical. Check soil moisture daily, sometimes twice a day during heatwaves. Deep watering is better than frequent shallow watering.
- Shade Cloth: Install shade cloth over sensitive plants during peak afternoon sun to prevent scorching and reduce water stress.
- Succession Planting: For fast-growing crops like lettuce and radishes, plant small batches every 2-3 weeks to ensure a continuous harvest.
- Pest Monitoring: Pests are often most active in summer. Regularly inspect plants for signs of infestation and address them promptly.
- Harvesting: Harvest frequently to encourage more production, especially for fruiting vegetables like tomatoes and peppers.
Autumn: Transition and Final Harvests
- Extending the Season: Use row covers or mini hoop tunnels to protect plants from early frosts, extending the harvest of existing crops.
- Cool-Season Replenishment: Plant another round of cool-season crops like kale, mustard greens, and some root vegetables for a fall harvest.
- Garlic Planting: Fall is the ideal time to plant garlic for a summer harvest next year.
- Drying Herbs: Harvest herbs before the first hard frost and dry them for winter use.
- Prepare for Winter: Start thinking about winter protection and clean-up.
Winter: Dormancy and Protection
- Container Care: Empty delicate terracotta pots or move them indoors to prevent cracking from freezing and thawing cycles. Protect wooden raised beds.
- Perennial Protection: Mulch perennial herbs and small fruit bushes heavily to insulate their roots.
- Season Extension: If you have a mini-hoop house or cold frame, you might be able to grow some hardy greens even in winter.
- Planning for Next Season: Use the dormant period to review your garden’s performance, research new plants, and plan your layout for the upcoming spring. Order seeds in advance.
- Fallow Period: Allow certain containers to rest, enriching the soil with compost and leaving it exposed to winter elements for revitalization.
Expert Resources for Your Rooftop Gardening Journey
To further enhance your knowledge and troubleshoot challenges, here are some reputable external resources that offer invaluable information on gardening, urban permaculture, and sustainable practices. These sites provide scientifically backed advice and a wealth of practical tips.
- Gardening Know How: An extensive resource for all gardening questions, including specific articles on container gardening, pest control, and plant care. Their “ask a master gardener” section is particularly useful. Visit Gardening Know How
- Royal Horticultural Society (RHS): A world-renowned gardening charity with comprehensive guides on plant selection, cultivation, and sustainable practices. Their advice on gardening in small spaces and challenging environments is excellent. Explore RHS Gardening
- University Extension Offices: Many universities across North America offer free, research-based information through their extension services. These are excellent for localized advice on climate-appropriate plants, soil health, and pest management specific to your region. For example, the University of Minnesota Extension offers guides on urban gardening and small spaces. Find your local Extension Office
Conclusion: Cultivate Your Urban Eden
Building a rooftop garden for beginners is an incredibly rewarding endeavor, transforming an overlooked space into a vibrant, productive ecosystem. It requires careful planning, dedicated effort, and a touch of creativity, but the benefits far outweigh the challenges. From fresh, organic produce to a tranquil urban escape, your rooftop oasis contributes to a healthier you and a more sustainable city.
By following this comprehensive guide, from the crucial structural assessment to eco-friendly practices and year-round seasonal considerations, you are well-equipped to embark on your rooftop gardening journey. Embrace the principles of urban permaculture, connect with nature, and enjoy the delicious fruits (and vegetables!) of your labor. Happy growing!
FAQ: Your Rooftop Garden Questions Answered
Q1: Is my roof strong enough for a rooftop garden?
A1: Always get a structural engineer to assess your roof’s load-bearing capacity before starting any rooftop garden project. This is the most crucial step to ensure safety and prevent structural damage.
<h4>Q2: What are the best plants for a beginner's rooftop garden?</h4>
<p>A2: Start with robust, easy-to-grow plants suited for containers and varying conditions. Great choices include herbs (basil, mint, rosemary), leafy greens (lettuce, spinach, kale), bush beans, radishes, and determinate cherry tomatoes.</p>

<h4>Q3: How often do I need to water a rooftop garden?</h4>
<p>A3: Rooftop gardens typically dry out faster due to increased sun and wind exposure. You will likely need to water daily, possibly twice a day during hot, dry, or windy periods. Always check the soil moisture with your finger before watering.</p>

<h4>Q4: How can I protect my rooftop garden from strong winds?</h4>
<p>A4: Install permeable windbreaks like sturdy trellises, lattice, or mesh to filter the wind rather than block it completely (solid barriers can create turbulence). Strategically place larger, tough plants to shield more delicate ones, and ensure all containers are heavy or secured to prevent tipping.</p>


