Introduction
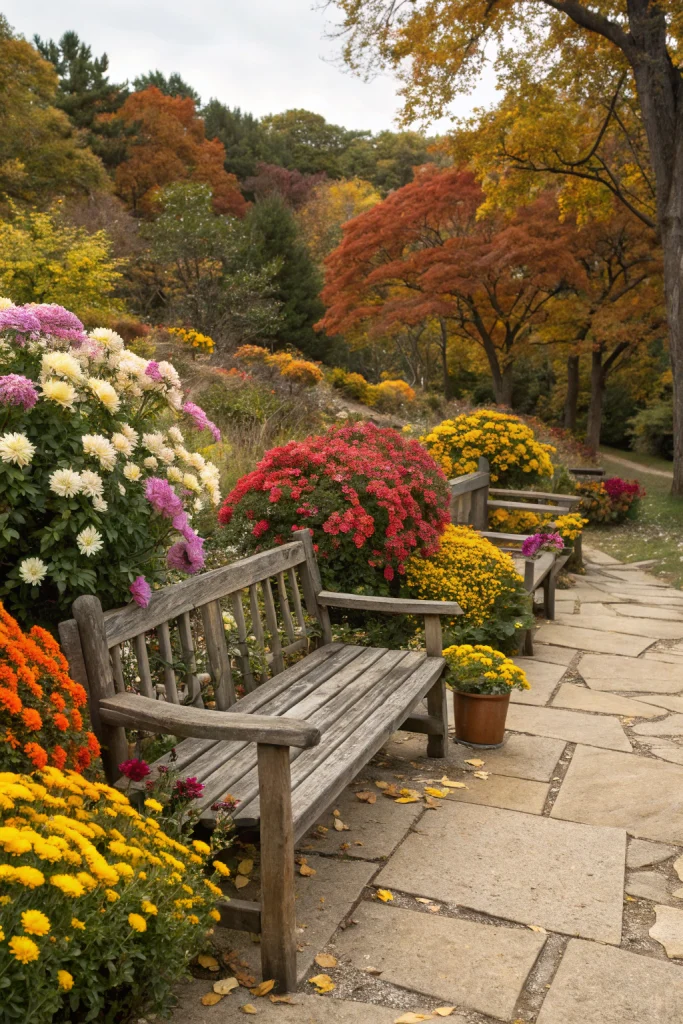
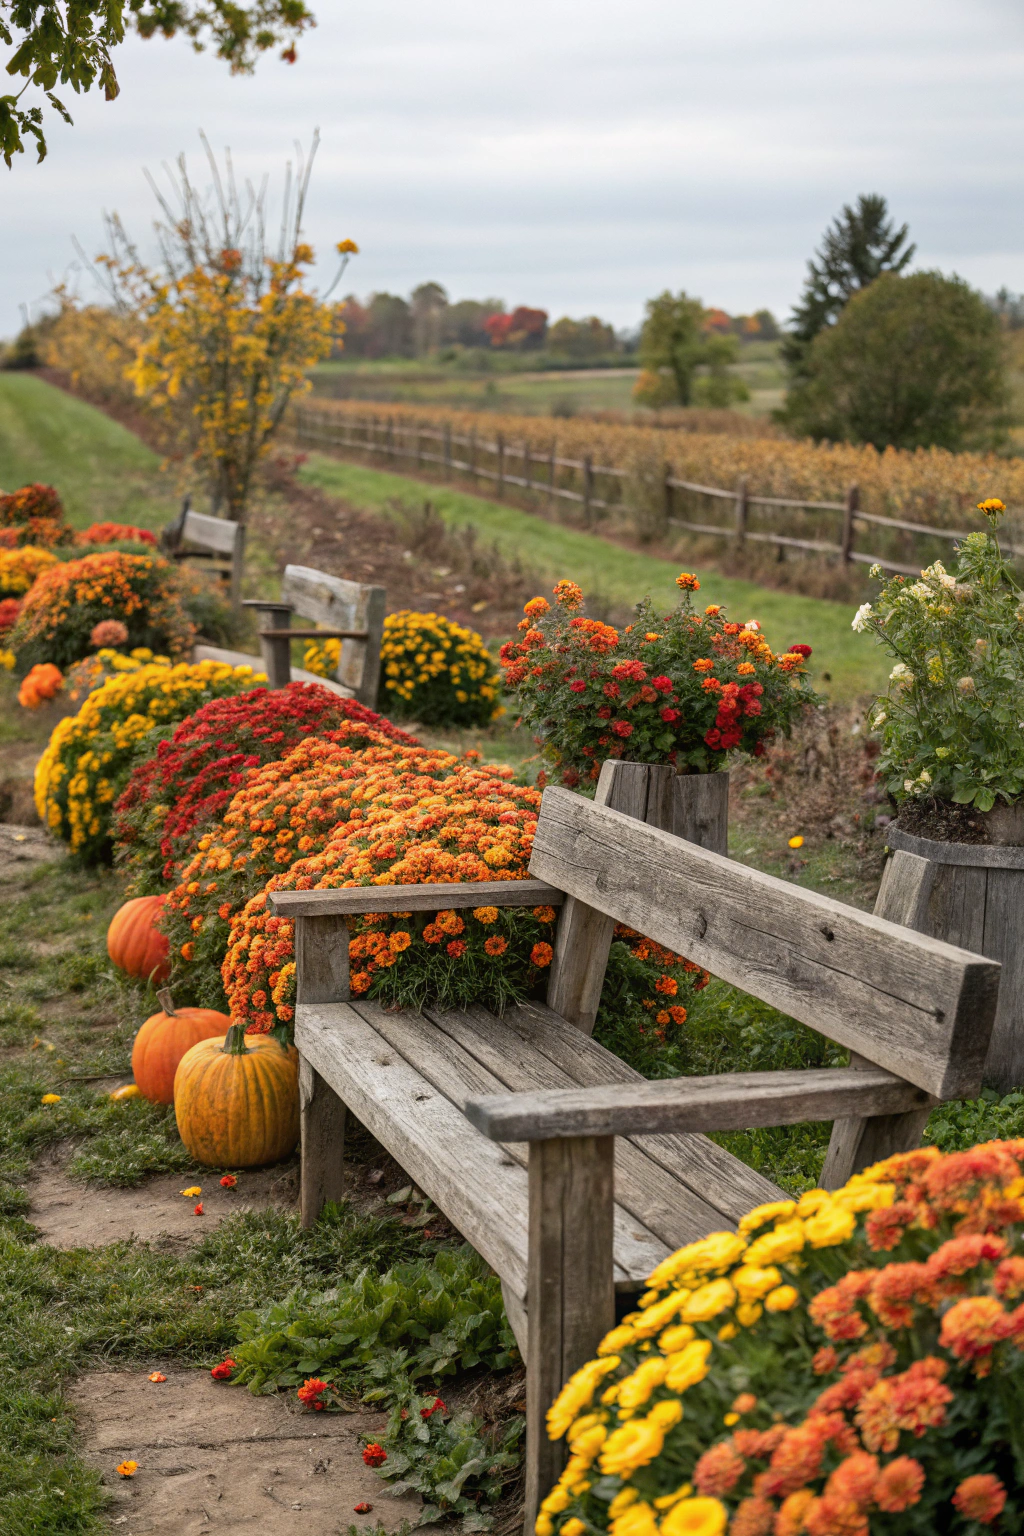
Creating charming rustic benches surrounded by October flowers can boost your property value by an average of 3-5% compared to similar homes without designated outdoor seating, a significant return for a relatively low investment.
[lwptoc]
This guide will walk you through the practical steps to construct and adorn your own rustic benches, transforming them into inviting focal points for your garden as autumn arrives. You’ll discover how to select the right materials, choose hardy October blooms, and maintain your creation for lasting appeal.
Our aim is to provide a comprehensive, eco-friendly approach that not only adds aesthetic beauty but also creates a functional, cost-effective outdoor living space. By following our detailed instructions, you’ll achieve measurable results in both garden appeal and personal satisfaction.
Quick Summary
- Achieve a beautiful, functional garden feature that enhances curb appeal and comfort.
- Complete this project in approximately 6-8 hours, spread over a weekend.
- Save an estimated 30-50% compared to purchasing pre-made alternatives.
Context & Ideal Conditions
October is the perfect time for planting many autumn flowers and establishing rustic garden features as the soil is still warm enough for root development, but temperatures are cooling. This project thrives in areas receiving full sun to partial shade (at least 4-6 hours of direct sunlight) for optimal flower growth. Ideal soil pH for most recommended autumn flowers ranges from 6.0 to 7.0, with well-draining loam being preferred. When building your rustic benches, select a stable, level area, ensuring it can support a live load of at least 250 lbs (113 kg) per person, assuming two occupants.
rustic, benches, surrounded, october, flowers: Tools & Materials
For building your rustic bench, you’ll need the following:
- Wood: Eight 2x4s (nominal 1.5 x 3.5 in / 3.8 x 8.9 cm) each 8 ft (2.4 m) long, preferably pressure-treated pine or cedar for outdoor durability. For the seat and backrest, four 2x6s (nominal 1.5 x 5.5 in / 3.8 x 14 cm) also 8 ft (2.4 m) long.
- Fasteners: One box of 2.5 in (6.4 cm) exterior-grade deck screws (approximately 100 count) and one box of 3.5 in (8.9 cm) exterior-grade deck screws (approximately 50 count). Stainless steel is recommended for longevity.
- Tools: Circular saw or miter saw, electric drill/driver with Phillips head bit, measuring tape (16 ft / 5 m), Carpenter’s square, pencil, sandpaper (80-grit and 120-grit), safety glasses (ANSI Z87.1 certified), work gloves, and optional wood stain/sealant.
- Plants & Soil: Approximately 6-8 large (1 gallon / 3.8 L) potted mums (Chrysanthemum morifolium), 4-6 large (1 gallon / 3.8 L) ornamental kale or cabbage (Brassica oleracea), and 4-6 small (4 inch / 10 cm) pansies or violas (Viola cornuta). Use 3 cu ft (85 L) of organic potting mix, supplemented with 1 cu ft (28 L) of compost.
- Mulch: One bag (2 cu ft / 57 L) of shredded bark or pine straw for moisture retention and weed suppression.
rustic, benches, surrounded, october, flowers: Time, Difficulty & Budget
| Prep | 60–90 min |
| Build/Plant | 300–420 min |
| Total | 360–510 min |
| Skill Level | Intermediate |
| Budget | ≈ $150–$300 (materials/tools, excluding perennial plants) |
Building your own rustic benches and planting surrounding flowers is approximately 30% cheaper than purchasing a high-quality, pre-assembled bench and pre-planted containers. This DIY approach also allows for greater customization and personal satisfaction.
Step-by-Step Tutorial
Step 1 — Layout & Prep
Begin by clearing your chosen area of any debris or existing vegetation. Use your measuring tape to mark out the footprint for your bench. A standard two-person bench is typically 4 ft (1.2 m) long and 18 in (46 cm) deep. Use stakes and string to define the perimeter.
Ensure the ground is level. You can use a 4 ft (1.2 m) level resting on a straight board to check for unevenness. If necessary, excavate high spots or fill low spots with compacted gravel or sand. Aim for a level difference of no more than ±1/2 in (±1.3 cm) across the entire footprint.
Step 2 — Cutting & Assembly
First, cut your 2x4s: four legs at 18 in (46 cm) each, four short stretchers at 15 in (38 cm) for the side frames, and two long stretchers at 45 in (114 cm) for connecting the frames. Cut your 2x6s: three pieces at 48 in (122 cm) for the seat, and two pieces at 48 in (122 cm) for the backrest.
Assemble the two side frames: attach two 18 in (46 cm) legs to two 15 in (38 cm) short stretchers using 2.5 in (6.4 cm) screws. The stretchers should be flush with the top and bottom of the legs, forming a rectangle. Pre-drill all holes with a 1/8 in (3 mm) bit to prevent splitting, aiming for 2 screws per joint.
Next, connect the two side frames with the long stretchers using 3.5 in (8.9 cm) screws. Position one long stretcher near the top and one near the bottom of the frame for stability. Attach the three 48 in (122 cm) 2x6s for the seat, evenly spaced, using 2.5 in (6.4 cm) screws, two screws per board per 2×4 support. Finally, attach the two 48 in (122 cm) 2x6s for the backrest, angling slightly for comfort if desired.
Step 3 — Installation/Planting
Position your assembled rustic bench in its desired location, ensuring stability. If the ground is not perfectly level, use wood or composite shims under the appropriate legs. Once the bench is stable, it’s time to prepare the planting beds around it. Dig beds to a depth of 6-8 in (15-20 cm) around the perimeter of the bench, extending out about 18-24 in (46-61 cm) from the bench’s edge.
Amend the soil within these beds by thoroughly mixing in your organic potting mix and compost. For a precise soil test, take a handful of soil and squeeze it. If it forms a ball but crumbles easily when poked, it's well-draining loam. If it remains a tight ball, add more sand; if it falls apart instantly, add more compost.
Carefully remove your chosen October flowers from their nursery pots. Gently loosen any circling roots. Plant the larger mums and ornamental kale/cabbage first, spacing them 12-18 in (30-46 cm) apart to allow for growth. Fill in gaps with the smaller pansies or violas, spacing them 6-8 in (15-20 cm) apart. Ensure the top of the root ball is level with the surrounding soil. After planting, water each plant thoroughly with approximately 0.5-1 gal (1.9-3.8 L) of water.
Step 4 — Finishing & QA
After the bench is assembled and secure, sand all rough edges and surfaces with 80-grit sandpaper, followed by 120-grit, to prevent splinters and create a smoother finish. This step is crucial for comfort and safety.
Apply at least two coats of an exterior-grade wood stain or sealant. A penetrating oil (like tung oil or linseed oil blend) will highlight the natural grain and offer good protection, while a wood stain with UV inhibitors will provide color and weather resistance. Follow the manufacturer's instructions for drying times between coats.
Once the sealant is dry, conduct a final quality assurance check. Inspect all joints for tightness and looseness. Ensure the bench is perfectly level and stable – it should not rock or wobble under a moderate load. Check for any protruding screws or sharp edges that might pose a safety hazard. If the bench is exceptionally large or placed in a windy area, consider anchoring it with galvanized L-brackets or ground stakes for added security.
Care & Schedule
Watering: During dry spells in October and early November, water your flowers every 2-3 days, providing 1-2 quarts (0.9-1.9 L) per plant. Reduce watering significantly as temperatures drop and rainfall increases. For established benches, ensure good drainage around the legs to prevent rot.
Fertilization: Most October flowers benefit from a balanced, slow-release granular fertilizer (e.g., 5-10-5 N-P-K) applied at half strength in early October to encourage continued blooming. Avoid fertilizing after late October to prevent new growth that would be vulnerable to frost.
Pruning/Cleaning: Deadhead spent flowers regularly to encourage new blooms and maintain a tidy appearance. Remove any yellowing or diseased leaves. Sweep or brush off any accumulated leaves or debris from the bench surface weekly.
Mulch Top-ups: In mid-autumn, apply an additional 2-3 inches (5-7.6 cm) of organic mulch around the base of your plants. This helps insulate roots, retain moisture, and suppress weeds. Replenish annually as needed.
Fastener Checks: Inspect all screws and joints on your bench biannually (spring and fall). Tighten any loose fasteners with a drill/driver. Consider applying a wood preservative or fresh coat of sealant every 1-2 years, depending on sun exposure and weather, to extend the bench’s life.
Variations & Adaptations
For small spaces or balconies, consider building a compact bench, perhaps 2.5 ft (0.76 m) long, and opt for container gardening with smaller autumn flowers such as hardy cyclamen (Cyclamen hederifolium) or sedum (Sedum spectabile ‘Autumn Joy’). Use lightweight planter boxes instead of digging beds.
In hot climates, choose more heat-tolerant October bloomers like Salvia greggii or certain varieties of perennial asters that can handle extended warmth. For cold climates (USDA Zones 5 or below), focus on extremely hardy plants like 'Autumn Joy' sedum, pansies that can overwinter, or focus on plants with striking foliage such as Heuchera.
Alternative materials for the bench could include reclaimed timber for a more weathered look, or sturdy composite decking for minimal maintenance. If heavy tools are a concern, a "knock-down" version can be designed using pre-cut lumber and pre-drilled holes, requiring only hand tools for final assembly. For aesthetic options, consider painting the bench with an outdoor-rated distressed paint to enhance the rustic charm, or choose wood species like black locust or white oak for natural resistance to rot.
Common Mistakes to Avoid
- Undersized Fasteners: Using screws that are too short or thin can compromise the structural integrity of your bench, leading to instability or collapse. Always use exterior-grade deck screws of appropriate length (2.5-3.5 in / 6.4-8.9 cm) to penetrate deeply into both pieces of wood.
- No Drainage: Planting flowers without adequate drainage in the beds can lead to root rot. Ensure your soil is well-amended with compost and possibly sand, and that there’s no standing water after heavy rain.
- Over-watering: While October plants need water, especially when newly planted, over-watering can be just as detrimental as under-watering. Allow the top 1-2 inches (2.5-5 cm) of soil to dry out between waterings.
- Wrong Wood Type: Using untreated lumber for outdoor furniture will lead to rapid decay and insect infestation. Always select pressure-treated wood, cedar, redwood, or other naturally rot-resistant species.
- Poor Orientation: Planting flowers that require full sun in a shaded area, or vice-versa, will result in stunted growth and poor blooming. Research your chosen plants’ light requirements and orient your bench accordingly.
- Skipping Sanding & Sealing: Neglecting these finishing steps can lead to splinters for users and premature weathering and rot for the bench. Sanding creates a smooth, safe surface, and proper sealing protects the wood from moisture and UV damage.
Sustainability, Safety & Regulations
Embrace sustainability by sourcing reclaimed or locally milled lumber for your bench. Collect rainwater for irrigation to reduce reliance on municipal water, potentially saving 10-20 gal (38-76 L) per week during drier periods. Ensure all wood scraps are properly disposed of or composted if untreated.
Safety is paramount during construction. Always wear appropriate Personal Protective Equipment (PPE), including ANSI Z87.1 certified safety glasses, hearing protection (earplugs or earmuffs), and sturdy work gloves (EN 388 compliant for cut resistance). Use tools according to manufacturer's instructions and ensure blades are sharp.
For child and pet safety, ensure there are no pinch points or sharp edges on the finished bench. Plant non-toxic flowers around the bench, avoiding species that could be harmful if ingested. Check local zoning regulations for any restrictions on garden structures, especially if your bench is unusually large or near property lines. Dispose of any green waste through municipal composting or your own compost pile.
Measure the Outcome
Tracking your project’s success can be very satisfying. For your plants, aim for a survival rate of over 90% by mid-November. Observe plant growth, noting any increases in height or spread (e.g., mums expanding by 2-3 inches / 5-7.6 cm in diameter per month). Track your water usage; a rain barrel could potentially save you 50-100 gal (189-379 L) of water monthly during dry periods compared to hose watering.
On the financial side, calculate your actual cost per bench, which should ideally be $150-$300, leading to a significant saving against a retail purchase. For the overall space, measure the number of hours you spend enjoying your new outdoor haven, a true indicator of satisfaction. If you notice any issues like drooping plants or unstable joints, address them promptly.
Conclusion
Creating rustic benches surrounded by October flowers is a rewarding project that combines practical woodworking with the joy of gardening. By following these steps, you’ll not only build a durable and charming seating area but also cultivate a vibrant autumn display. This DIY endeavor offers significant cost savings and allows for a personalized touch, enhancing your garden’s appeal and providing a cozy spot to enjoy the season.
We encourage you to embark on this fulfilling project. Share your progress and final results in the comments below, and feel free to ask any questions. We love seeing your garden transformations!
FAQ
Internal & External Links
For more autumn garden inspiration, check out our guide on Color Palettes for Autumn Gardens. If you’re looking to extend your growing season, learn about DIY Grow Lights and Season Extenders. You might also enjoy our tips for creating Rustic Apple Crate Planters to complement your new bench, or explore ideas for Wooden Crates for Fall Decor. For other garden seating options, see our article on Backyard Seating Glow-Up.
Find more garden and DIY inspiration on our Pinterest Boards — Garden & DIY inspiration.


