Introduction
Creating rustic pallet planters for seasonal autumn flowers can dramatically reduce your landscaping budget by up to 70%, challenging the common belief that beautiful seasonal displays require significant financial outlay. This DIY approach not only saves money but also offers a sustainable way to reuse discarded materials.
[lwptoc]
This guide will walk you through building your own charming and functional pallet planters, bringing a touch of country charm to your outdoor space. You’ll discover how easy it is to transform simple pallets into attractive containers for vibrant fall blooms and foliage.
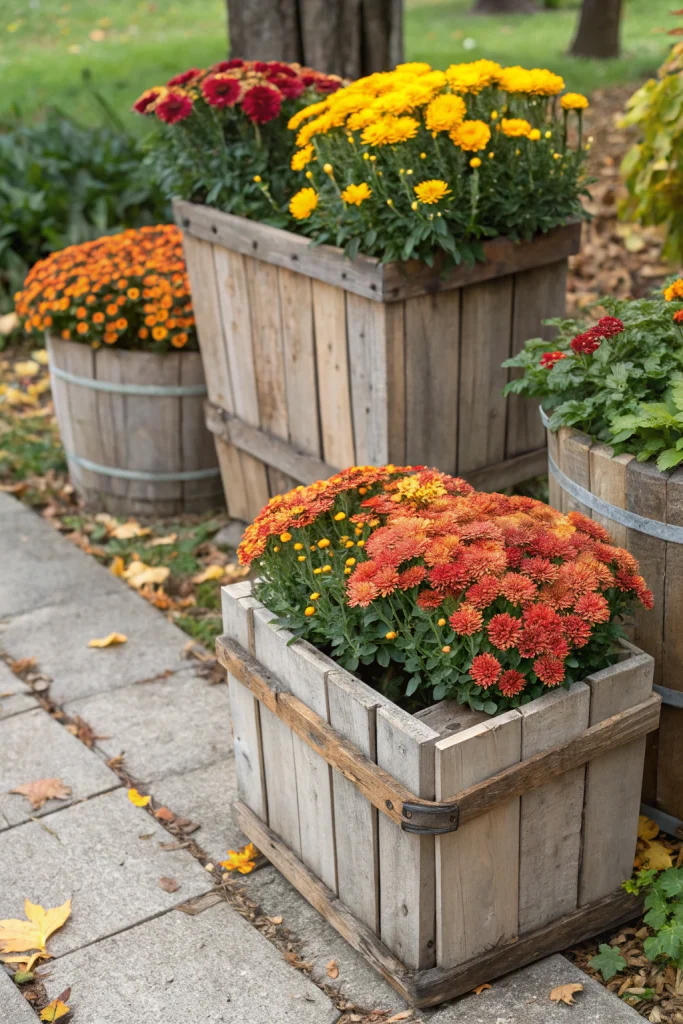
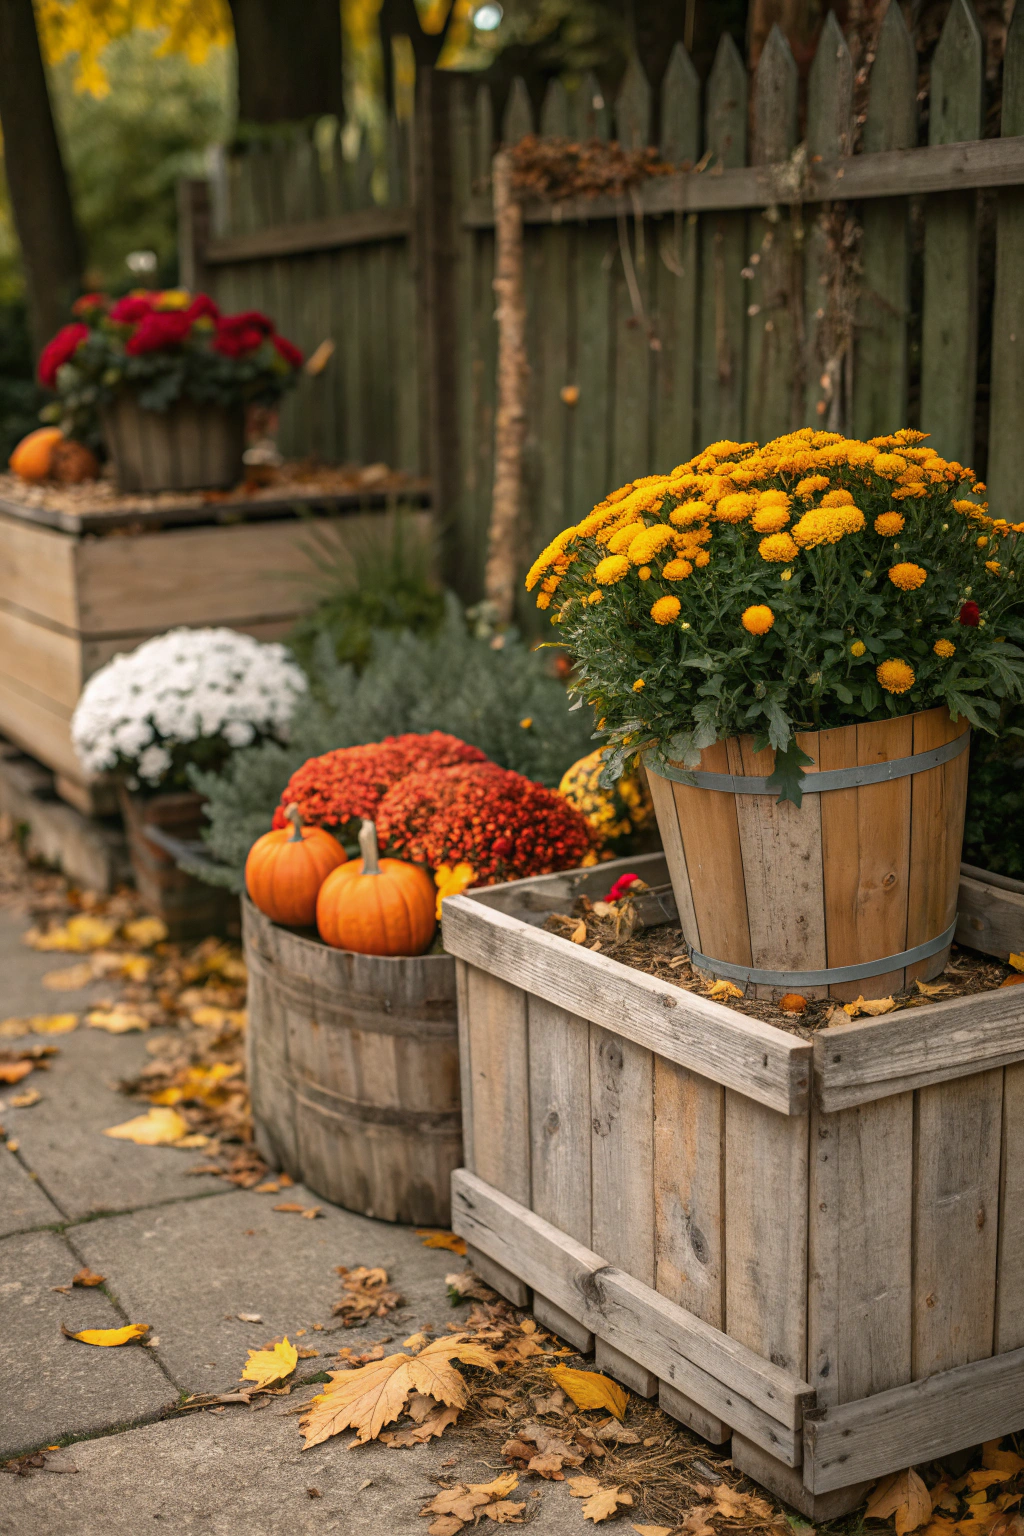
Embrace the satisfaction of a hands-on project that adds unique character to your home or garden. These planters are perfect for showcasing hardy chrysanthemums, ornamental kales, and pansies, extending your gardening enjoyment well into the cooler months.
Quick Summary
- Eco-Friendly & Budget-Conscious: Repurpose pallets to save money and reduce waste.
- Customizable Aesthetic: Create unique, rustic displays that perfectly fit your autumn decor.
- Engaging DIY Project: Enjoy a rewarding build process with clear, step-by-step instructions.
Context & Ideal Conditions
Autumn is the prime season for these planters, typically from late August through early November, depending on your climate zone (USDA Hardiness Zones 4-9 are ideal for most common fall annuals). Place your pallet planters in areas receiving at least 6 hours of direct sunlight (full sun) daily for optimal flowering. If planting ornamental foliage, partial shade (3-6 hours of sun) is often acceptable.
Maintain soil temperatures above 45°F (7°C) for best plant growth, although many autumn flowers can tolerate colder snaps. The ideal soil pH for most fall annuals is slightly acidic to neutral, between 6.0 and 7.0. Given the confined nature of planters, proper drainage is paramount; choose a well-draining potting mix containing sphagnum peat moss or coco coir. For load considerations, a typical 48 x 40-inch (122 x 102 cm) planter filled with moist soil can weigh 150-200 lbs (68-90 kg), so ensure a stable, level base.
rustic, pallet, planters, for, seasonal: Tools & Materials
Gathering the right tools and materials is crucial for a smooth build. For your rustic pallet planter, you’ll need at least one heat-treated (HT stamped) wooden pallet, preferably pine or oak, measuring approximately 48 x 40 inches (122 x 102 cm). Avoid chemically treated (MB stamped) pallets. Each pallet provides sufficient wood for one medium-sized planter or several smaller ones.
- Pallets: 1-2 heat-treated (HT stamp) wooden pallets, typically 48 x 40 inches (122 x 102 cm).
- Wood Screws: 1.5-inch (3.8 cm) exterior-grade deck screws, #8 gauge (min. 50 count).
- Wood Glue: Titebond III or similar exterior-grade wood glue (1 qt / 0.95 L).
- Staple Gun & Staples: Heavy-duty staple gun with 1/2-inch (1.3 cm) staples.
- Landscape Fabric: Non-woven landscape fabric, 3 ft x 5 ft (0.9 m x 1.5 m) section.
- Potting Mix: 1.5-2 cu ft (42-57 L) of high-quality, well-draining potting mix.
- Polyurethane Sealant: Clear, outdoor-grade polyurethane sealant (1 pint / 0.47 L).
- Safety Gear: ANSI Z87.1 certified safety glasses, ANSI S3.19 rated hearing protection, work gloves (e.g., leather or nitrile-coated).
- Measuring Tape: 25-foot (7.6 m) retractable tape measure.
- Pencil: Standard carpenter’s pencil.
- Circular Saw or Jigsaw: With a sharp wood blade.
- Drill/Driver: Cordless drill with appropriate drill bits (e.g., 1/8-inch / 3 mm for pilot holes) and screwdriver bits (Phillips #2 or Square #2).
- Orbital Sander & Sandpaper: Medium-grit (80-120) sandpaper.
- Pry Bar & Hammer: For disassembling pallets.
rustic, pallet, planters, for, seasonal: Time, Difficulty & Budget
| Prep | 30–60 min |
| Build/Plant | 90–180 min |
| Total | 120–240 min |
| Skill Level | Beginner / Intermediate |
| Budget | ≈ $20–$50 (materials/tools) |
This project is approximately 40% cheaper than purchasing comparable ready-made wooden planters from a garden center or online retailer. The main cost savings come from salvaging free pallets and the DIY labor. Your time investment will yield a custom, sturdy planter with unique character.
Step-by-Step Tutorial
Step 1 — Layout & Prep
The first step is crucial for ensuring a stable and aesthetically pleasing planter. Begin by carefully disassembling your pallet. Use a pry bar and hammer to gently separate the deck boards from the stringers, aiming to keep the boards intact. Discard any broken or severely damaged pieces.
Measure and mark the desired lengths for your planter's sides and base. A common size is 24 inches (61 cm) long by 10 inches (25 cm) wide by 12 inches (30 cm) high, which comfortably fits three standard 6-inch (15 cm) fall annuals. Ensure your cuts are square and true; use a speed square for accuracy.
Step 2 — Cutting & Assembly
Once your pallet boards are harvested and cut to size, begin the assembly. You’ll need four longer pieces for the sides (e.g., 24 inches / 61 cm), four shorter pieces for the ends (e.g., 10 inches / 25 cm), and several pieces for the bottom, cut to fit the inside dimensions. For a typical planter, this means 4 side pieces (24×4 inches / 61×10 cm), 2 end pieces (10×4 inches / 25×10 cm), and 3-4 base pieces (10×4 inches / 25×10 cm).
Apply a generous bead of exterior-grade wood glue along the edges of the boards before joining them. Pre-drill pilot holes using a 1/8-inch (3 mm) drill bit for each screw location to prevent wood splitting, especially with harder woods like oak. Use 1.5-inch (3.8 cm) exterior-grade deck screws, driving them with a cordless drill/driver set to a medium torque setting (around 10-15 ft-lbs or 13.5-20 Nm, depending on wood density).
Step 3 — Installation/Planting
After the main structure is assembled and any glue has cured (typically 24 hours), prepare the planter for planting. Line the inside with heavy-duty landscape fabric, extending it up the sides and stapling it securely to the top edge using 1/2-inch (1.3 cm) staples. Ensure there are drainage holes; the landscape fabric allows water to pass while preventing soil loss. You can also drill additional 1/2-inch (1.3 cm) drainage holes through the wooden base if needed, spaced every 6 inches (15 cm).
Fill the planter with a high-quality, well-draining potting mix, leaving approximately 1 inch (2.5 cm) of space from the top edge. Plant your chosen seasonal flowers, such as chrysanthemums (Chrysanthemum morifolium), pansies (Viola x wittrockiana), or ornamental cabbage/kale (Brassica oleracea), following their recommended spacing. For most fall annuals, maintain at least 6-8 inches (15-20 cm) of spacing between plants for adequate airflow and growth. Water thoroughly after planting, using about 0.5-1 gallon (1.9-3.8 L) of water per cubic foot of soil.
Step 4 — Finishing & QA
Once your planter is assembled and planted, the finishing touches can enhance its durability and appearance. Lightly sand all exterior surfaces using an orbital sander with 80-120 grit sandpaper to remove splinters and rough edges, especially if kids or pets will be near the planters. This also prepares the wood for a sealant.
Apply two coats of clear, outdoor-grade polyurethane sealant to all exterior wood surfaces to protect against moisture and UV damage. Allow adequate drying time between coats, typically 2-4 hours. If your planter is placed on a porch or deck, consider adding felt pads or small feet to the bottom to protect the surface and promote airflow. Periodically check all fasteners for tightness, especially after the wood has been exposed to changes in humidity, as wood can expand and contract, potentially loosening screws over time.
Care & Schedule
Maintaining your rustic pallet planters for seasonal autumn flowers involves consistent care to ensure vibrant displays. Water when the top inch (2.5 cm) of soil feels dry; this typically equates to 0.5-1 gallon (1.9-3.8 L) per week per square foot of planter surface, adjusting for rainfall and temperature. In warmer, drier autumns, you may need to water more frequently, perhaps every 2-3 days.
Fertilize lightly every 3-4 weeks with a balanced liquid fertilizer (e.g., 5-10-5 N-P-K) diluted to half strength. Deadhead spent blooms (remove faded flowers) to encourage new growth and prolong flowering. Remove any dead or diseased foliage promptly to maintain plant health. Top up mulch with 1-2 inches (2.5-5 cm) of shredded leaves or wood chips to retain moisture and regulate soil temperature. Before winter, consider bringing the planters indoors or protecting them if your plants are not cold-hardy. Annually, check all fasteners and re-tighten any loose screws.
Variations & Adaptations
These pallet planters are incredibly versatile. For small spaces or balconies, consider creating smaller, tiered versions, using a single pallet to build two or three compact vertical planters. In hot climates, select drought-tolerant fall plantings like Sedum or Dianthus, and consider painting the exterior of the planter with light-colored, reflective paint to reduce heat absorption. For cold climates, opt for hardy evergreens or winter-interest plants like Boxwood or Skimmia, and insulate the interior of the planter with styrofoam sheets before planting.
If you don't have access to power tools, a "knock-down" version can be achieved using heavy-duty exterior-grade corner brackets and pre-drilled holes, requiring only a screwdriver for assembly. Aesthetically, you can choose different sealant tones – from a clear natural finish to a dark walnut stain – to match your outdoor decor, or even distress the wood for a more aged, rustic look.
Common Mistakes to Avoid
- No Drainage Holes: This is a fatal error. Without adequate drainage, plant roots will sit in standing water, leading to root rot. Prevention: Always ensure sufficient drainage holes in the base and line with permeable landscape fabric.
- Using Chemically Treated Pallets: Pallets stamped with “MB” (Methyl Bromide) are treated with a toxic pesticide and should never be used for planting. Prevention: Only use pallets stamped “HT” (Heat Treated).
- Incorrectly Sized Planter for Plants: Overcrowding or using too small a planter restricts root growth. Prevention: Research plant mature sizes and ensure the container offers enough root space (minimum 6-inch / 15 cm depth for most annuals).
- Using Indoor Potting Soil: Indoor soils are often too dense for outdoor containers and lack proper drainage qualities. Prevention: Always use a high-quality, well-draining outdoor potting mix specifically formulated for containers.
- Weak Fasteners or Joints: This can lead to structural failure, especially when the planter is heavy with wet soil. Prevention: Use exterior-grade screws and wood glue, pre-drill pilot holes, and ensure secure joints during assembly.
- No Protective Finish: Leaving pallet wood untreated outdoors will result in rapid deterioration. Prevention: Apply at least two coats of an exterior-grade sealant or stain to protect the wood from moisture and UV.
- Poor Planter Orientation: Placing sun-loving plants in deep shade or vice versa will result in poor growth. Prevention: Understand your chosen plants’ sunlight requirements and position the planter accordingly.
Sustainability, Safety & Regulations
Embracing sustainability in this project means utilizing salvaged wooden pallets, which diverts waste from landfills. Further enhance eco-friendliness by collecting rainwater for irrigation and composting spent flowers. Always wear appropriate personal protective equipment (PPE): ANSI Z87.1 certified safety glasses to protect eyes from sawdust and splinters, and ANSI S3.19 rated hearing protection when using power tools. Wear sturdy work gloves to prevent splinters and scrapes.
Ensure any power tools meet relevant industry standards for safety. When working with children or pets, ensure they are kept away from the work area during construction. Once complete, position planters stably to prevent tipping, especially if heavy. Check local HOA rules or city ordinances for any height limitations or setback requirements if placing planters near property lines. Dispose of wood scraps and green waste responsibly, preferably through composting or local recycling programs.
Measure the Outcome
Tracking the success of your rustic pallet planters is a rewarding experience. A key performance indicator (KPI) is the survival rate of your seasonal flowers; aim for 90-100% plant survival over the autumn season. Observe weekly growth: healthy plants should show visible signs of new foliage or increased bloom count. For example, a chrysanthemum may increase its width by 1-2 inches (2.5-5 cm) per month.
You can quantify your water savings by noting how much less water you use compared to in-ground gardens, especially if you're utilizing rainwater, potentially saving 5-10 gallons (19-38 L) per month. Calculate your cost per square foot (or square meter) of planted area, noting how it compares to store-bought options (often $10-$20 per sq ft for pre-planted containers versus $1-$3 per sq ft for DIY). The time saved from not shopping for pre-made planters, combined with the satisfaction of a custom build, adds a significant, albeit qualitative, value to your project.
Conclusion
Building rustic pallet planters for seasonal autumn flowers is a rewarding and cost-effective DIY project that brings charm and sustainability to your home. You’ve learned how to source and prepare materials, construct sturdy planters, and care for your autumn blooms, sidestepping common pitfalls. We encourage you to try this accessible project yourself, transforming simple pallets into beautiful seasonal displays. Share your creations and inspire others in our gardening community!
FAQ
A: Only use pallets stamped with “HT” (Heat Treated). Avoid “MB” (Methyl Bromide) treated pallets as they contain toxic chemicals.
A: For seasonal autumn flowers, they are best suited until the first hard frost. For winter interest, select cold-hardy evergreen plants or protect tender plants.
A: Always opt for a high-quality, well-draining potting mix specifically designed for containers. Do not use dense garden soil.
A: While power tools make the job quicker, a hand saw, hammer, and manual screwdriver can be used. Consider pre-cut lumber if power tools are not an option.
A: Check soil moisture. Wilting can mean both over or under-watering. Ensure good drainage and water only when the top inch of soil is dry.
A: Use exterior-grade wood, apply a waterproof sealant or stain, and ensure continuous airflow around the planter and proper drainage inside.
A: Mums, pansies, ornamental kale, and asters are typically inexpensive and offer vibrant autumn color. Look for end-of-season sales at local nurseries.
A: With proper sealing and care, a well-built pallet planter can last 3-5 years or more, depending on the wood type and climate.
Internal & External Links
For more inspiration on transforming found items into garden decor, check out our guide on Rustic Apple Crate Planters for Autumn Gardens. If you’re looking to extend your gardening season, explore our tips on DIY Cold Frame Builds. Additionally, discover creative ways to display your autumnal bounty with Wooden Shelves Displaying Seasonal Gourds and Apples. For further DIY and gardening inspiration, visit our Pinterest Boards — Garden & DIY inspiration.


