12 Ultimate Steps to Implement Swales and Berms for Superior Water Capture in Your Garden
Are you tired of seeing precious rainwater run off your property, taking valuable topsoil with it? Do you dream of a lush, thriving garden that requires less irrigation and nurtures a vital ecosystem? The ancient, yet profoundly effective, techniques of swales and berms offer a powerful solution, transforming your urban garden into a resilient, water-harvesting oasis. This comprehensive guide will walk you through everything you need to know about implementing swales and berms for superior water capture in your garden, a cornerstone of urban permaculture.
[lwptoc]
Why Swales and Berms Matter for Your Garden
In the world of urban permaculture, efficient water management is paramount. Swales and berms are earth-shaping techniques designed to slow, spread, and sink water into the landscape, rather than allowing it to erode soil and disappear. This ancient practice, adapted for modern gardens, creates a dynamic living system that recharges groundwater, reduces runoff, and fosters incredible biodiversity.
Beyond simply redirecting water, these features create microclimates that benefit a wide range of plants. The enhanced moisture retention means your plants experience less stress during dry spells, leading to healthier growth and improved yields. Simultaneously, by holding water on contours, swales and berms prevent soil erosion, keeping your valuable topsoil in place and rich with nutrients. This makes them an invaluable tool for any gardener looking to embrace sustainable practices and build a more resilient garden.
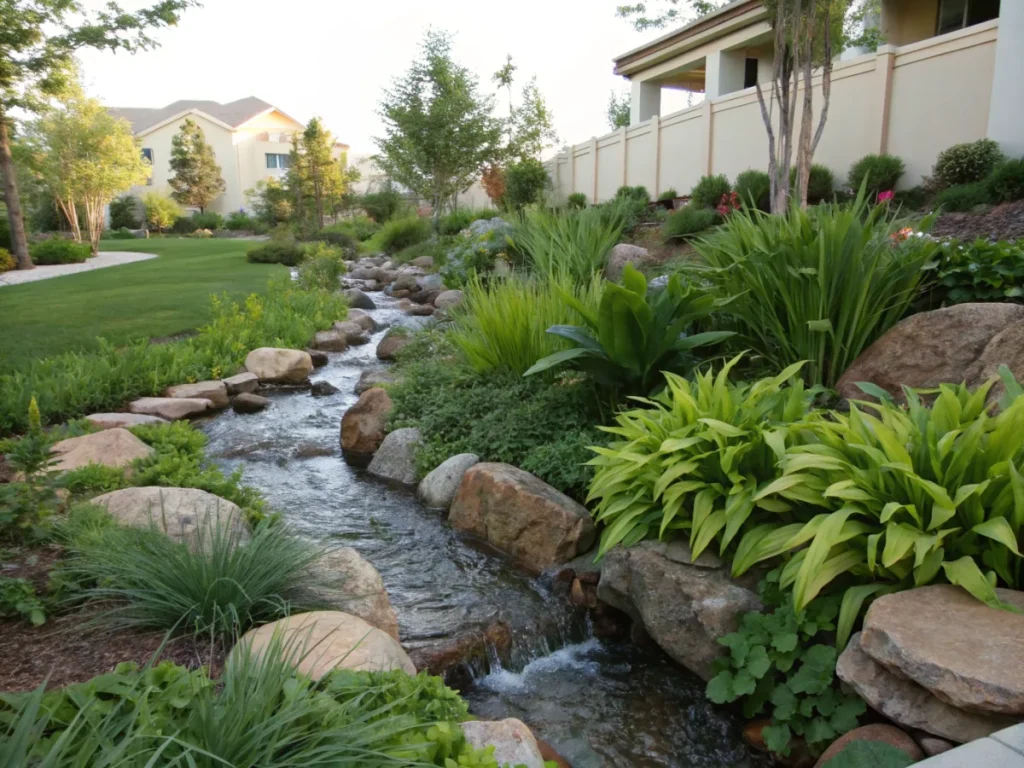
Imagine a garden where your plants thrive even during a hot summer, largely thanks to the rainwater you captured months ago. This isn’t a pipe dream; it’s the reality that swales and berms can create. They significantly reduce your reliance on municipal water, saving you money and conserving a precious resource. Moreover, the increased soil moisture boosts microbial activity, leading to richer, more fertile soil over time. This regenerative cycle is at the heart of permaculture and provides long-term benefits for your garden and the wider environment.
The construction of swales and berms also contributes to the a more aesthetically pleasing and diverse garden. The gentle undulations and terraced effects can add architectural interest, supporting diverse plantings and creating unique habitats for beneficial insects and wildlife. They are a true investment in the long-term health and productivity of your garden, embodying the principles of working with nature, not against it.
What You’ll Need: Tools, Materials, and Plants
Before you break ground, gather the necessary tools and materials to ensure a smooth and efficient build. Having everything on hand will prevent delays and make the process much more enjoyable. Planning your plant choices in advance is also crucial for the success of your swale and berm system.
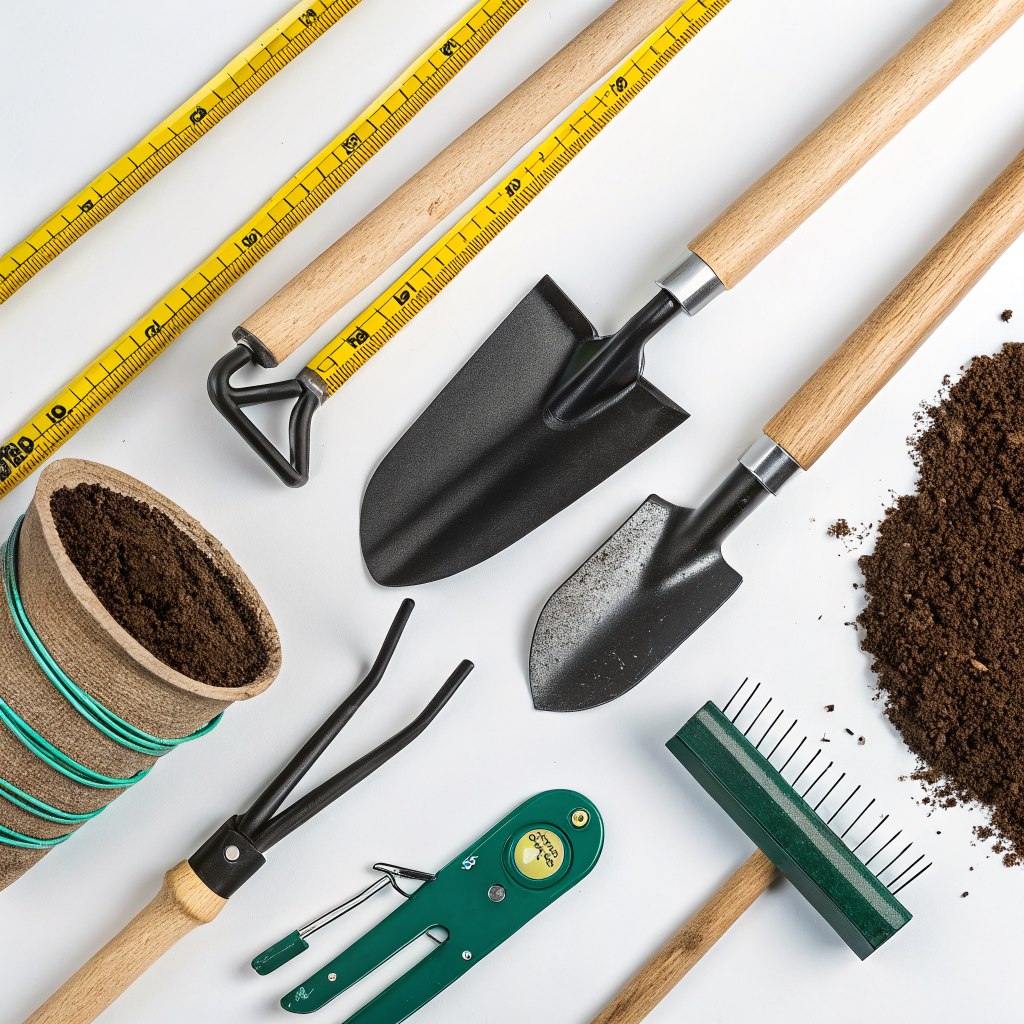
Essential Tools:
- Shovel and Pickaxe: For digging and breaking up tough soil.
- Rake: For leveling and shaping the berm.
- Wheelbarrow: To move soil and amendments.
- Leveling Tools: A long, straight board (e.g., a 2×4) and a string level or, ideally, an A-frame level for accurate contouring. A laser level can also be used for larger projects.
- Measuring Tape: For laying out dimensions.
- Gloves and Safety Glasses: For personal protection.
- Trowel and Hand Fork: For planting.
Materials:
- Organic Matter: Compost, wood chips, straw, or leaves to enrich the soil in the swale and cover the berm. This is crucial for soil health and water retention.
- Seeds or Plants: A diverse selection of water-tolerant and desired plants for the swale, and drought-tolerant or shallower-rooted plants for the berm.
- Mulch: Abundant wood chips, straw, or leaves for covering the berm and further enhancing water retention and weed suppression.
- Stakes and String: For marking out contours accurately.
- Optional: Rock or Gravel: For overflow spillways or to line the swale if soil is very porous, though generally avoided in purely organic systems.
Planting Considerations:
Plant selection is vital for the success of your swale and berm system. The swale itself, being a wetter environment, is ideal for water-loving plants, while the berm, which drains faster, suits more drought-tolerant species. Think about plants that offer multiple functions (food, medicine, nitrogen-fixing, dynamic accumulators).
- For the Swale (wettest zone): Consider plants like elderberry, willow (if space allows), comfrey, cattails (if very wet), mint, various wetland grasses, or moisture-loving fruiting shrubs.
- For the Berm (drier zone, but still gets moisture from the swale): Fruit trees (planted on the berm, not in the swale), nut trees, perennial vegetables, culinary herbs, and beneficial insect attractors. Nitrogen-fixing plants like clover or specific legumes are excellent for improving soil fertility.
- Succession Planting: As your system matures, you might introduce more shade-tolerant plants as trees grow.
Step-by-Step Guide to Building Swales and Berms
Building swales and berms requires careful planning and execution, but the process is highly rewarding. Follow these steps to create an effective water-harvesting system in your garden.
Step 1: Site Observation and Planning
Before any digging, observe your land’s topography and water flow patterns. Walk your garden during a rain event to see where water collects and where it runs off. Identify the natural contours and the highest point from which water originates. This initial observation is critical for determining the optimal placement of your swales and berms. Use a topographical map or sketch to visualize your design. Consider access points, existing features, and potential future expansions. This holistic approach ensures your new system integrates seamlessly with your existing garden.
Step 2: Determine Contour Lines
The essence of a swale is that it runs on contour, meaning it’s perfectly level across its length. This ensures water spreads evenly rather than flowing to one end. Use an A-frame level, a string level, or a laser level to mark your contour lines. Start at a high point in your garden and mark level points every few feet, then connect these marks with a string or spray paint. Accuracy here is paramount for water distribution. Take your time with this step; it’s the foundation of effective water capture. A slight deviation can cause water to pool excessively or flow off contour, reducing efficiency.
Step 3: Lay Out the Swale and Berm Dimensions
Once your contour line is marked, determine the width and depth of your swale and the width and height of your berm. A common starting point for home gardens is a swale about 1.5 to 2 feet deep and 2 to 4 feet wide. The berm will be directly downhill from the swale. Use stakes and string to clearly delineate the edges of both the swale and the berm. Ensure there’s enough space for both components and for planting. The size of your swale will depend on your rainfall, soil type, and desired water retention capacity.
Consider the desired slope for your berm; usually, a gentle slope is best for stability and planting. The overall design should also account for any necessary spillways or overflow management, especially in areas with heavy rainfall. Visualizing the final structure at this stage helps prevent issues later on.
Step 4: Dig the Swale
Begin digging the swale, placing all the excavated soil on the downhill side to form the berm. Dig down to your predetermined depth, ensuring the bottom of the swale is level along its entire length. This is where your leveling tools come in handy again. The goal is a U-shaped or V-shaped trench that can hold a significant amount of water. As you dig, break up any compacted soil at the bottom of the swale to improve infiltration. Take care to create smooth, sloping sides to prevent collapse. For smaller swales, a sturdy shovel might suffice, but for larger projects, a pickaxe can help with tougher soil.
Step 5: Form the Berm
As you dig the swale, consistently pile the excavated soil onto the downhill side to create the berm. Compact the soil lightly with your feet or a tamper to create a stable structure. The berm should be wide enough to support plantings and tall enough to contain the water in the swale. Aim for gentle slopes on both sides of the berm to ensure stability and ease of planting. The top of the berm should be somewhat flat or gently rounded. The soil for the berm should not be taken from the uphill side of the swale, as this can create preferential flow paths for water and undermine the purpose of the swale. Ensure there are no low spots on the berm where water could naturally flow over before the swale is full.
Step 6: Integrate Organic Matter
Once the swale and berm are shaped, it’s time to build soil health. Line the bottom of the swale with a thick layer of organic matter: wood chips, straw, leaves, or well-rotted compost. This acts as a sponge, slowly releasing moisture to the surrounding soil and feeding the soil food web. You can also mix organic matter into the top layers of the berm soil. This step is crucial for long-term fertility and water retention. The decomposition of organic matter also helps to create a living soil environment, encouraging beneficial fungi and bacteria. This layering process kickstarts the hydrological and biological functions of your new system.
Step 7: Plant the Berm and Swale
Now comes the fun part: planting! Plant trees, shrubs, and perennials along the crest and sides of the berm, ensuring their root systems will eventually tap into the moisture stored in the swale. Plant moisture-loving species directly in the swale itself. Consider nitrogen-fixing plants to enrich the soil and dynamic accumulators to draw up minerals. Create diverse polycultures for resilience and productivity. Remember to provide initial watering to help new plants establish. Proper plant placement is key for the long-term success of your swales and berms, creating a food forest or diverse ecosystem.
Step 8: Mulch, Mulch, Mulch!
Apply a thick layer of organic mulch (wood chips, straw, leaves) over both the berm and the exposed soil in the swale. Mulch suppresses weeds, conserves soil moisture, regulates soil temperature, and slowly adds organic matter as it breaks down. This reduces the need for weeding and watering, giving your plants the best chance to thrive. A good layer of mulch is like an insurance policy for your garden, protecting newly established plants and strengthening the entire system.
Step 9: Create Overflow Spillways (If Needed)
For areas with very heavy rainfall, or for larger swale systems, it’s wise to incorporate an overflow spillway. This is a gently sloped, vegetated channel at one end of the swale that allows excess water to safely exit without eroding the berm. It directs water to another swale, a rain garden, or a designated safe outflow area. The spillway should be wide and shallow, ideally vegetated with tough, erosion-resistant grasses or groundcovers. This prevents unintended damming and ensures system integrity during extreme weather events. Ensure the spillway is lower than the top of the berm to function correctly.
Step 10: Test and Observe
After construction, wait for the next rain event or simulate one with a hose. Observe how the water fills the swale, how long it takes to infiltrate, and if there are any areas of overflow or erosion. This observation phase is crucial for refining your system. Make adjustments as needed, such as re-leveling a section, adding more soil to the berm, or reinforcing a spillway. Continuous observation in the first few seasons will help you optimize your swales and berms for maximum efficiency.
Step 11: Ongoing Maintenance
Swales and berms are relatively low-maintenance once established, but regular attention will ensure their longevity. Replenish mulch as needed, especially around newly planted areas. Monitor the swale for sediment buildup and clear it out if it becomes significant. Keep an eye on plant health and prune as necessary. Regularly check the integrity of the berm and any spillways to prevent erosion. Over time, the living system will become increasingly self-sufficient, but initial care is vital. Think of it as nurturing a young ecosystem rather than simply maintaining a structure.
Step 12: Expand and Connect
Once you’ve successfully implemented your first swales and berms, consider expanding your system. You can create a series of interconnected swales on different contours, or integrate them with other water-harvesting features like rain gardens or rainwater tanks. Think about how successive swales can catch overflows from uphill ones, creating a cascading water management system across your entire property. This integrated approach builds true resilience and transforms your garden into a highly productive, water-wise ecosystem. Explore other ideas in urban permaculture on nouvelles-technologie.com/urban-permaculture-innovations/ for further inspiration.
Pro Tips and Common Mistakes
Implementing swales and berms can be incredibly rewarding, but a few expert tips can make the process smoother and your results more effective. Conversely, avoiding common pitfalls will save you time and effort in the long run.
Pro Tips:
- Start Small: Especially if you’re new to earthworks, begin with a smaller, manageable swale. This allows you to learn the techniques without getting overwhelmed and scale up once you’re confident.
- Work with Your Existing Landscape: Instead of fighting your site’s natural contours and water flow, enhance them. Swales are most effective when they follow the natural lay of the land.
- Incorporate Diversity: Plant a wide variety of species on your berm and in your swale. This builds resilience, attracts beneficial insects, and creates a more productive ecosystem. Consider companion planting strategies.
- Think Long-Term Soil Health: Continuously add organic matter. This isn’t just a one-time application. Decomposing mulch and plant residues are the engine of your soil’s fertility and water-holding capacity.
- Consider Access: Plan pathways and access points around your swales and berms for ease of maintenance and harvesting. You don’t want to inadvertently create obstacles in your own garden.
- Collaborate with Neighbors: If possible, coordinate with neighbors to manage water on a larger scale, creating interconnected systems that benefit the entire community.
Common Mistakes to Avoid:
- Not Leveling Correctly: This is the most crucial error. If your swale isn’t perfectly level, water will pool at the lowest point, potentially leading to erosion or waterlogging in one area, while other parts remain dry. Invest time in accurate leveling.
- Making the Berm Too Steep: A steep berm is prone to erosion and difficult to plant. Aim for gentle, stable slopes that allow for proper root establishment and prevent soil runoff.
- Compacting the Swale Bottom: While the berm needs light compaction, the bottom of the swale should be left loose or even scarified to encourage water infiltration.
- Ignoring Soil Type: Heavy clay soils will hold water for longer, while sandy soils will drain quickly. Adjust the depth and width of your swale accordingly. You might need to add more organic matter to sandy soils.
- Planting in the Immediate Swale Ditch: While some water-tolerant plants can go directly in the swale, the primary planting zone for most fruiting trees and shrubs is on the berm itself, where their roots can access the absorbed water without sitting in saturated conditions.
- Lack of Mulch: Skipping mulch is a missed opportunity. It’s vital for water retention, weed suppression, and soil building. Don’t skimp on this step.
- Not Planning for Overflow: Especially in areas with intense rainfall, neglecting to plan for excess water can lead to erosion and damage to your new system. Always have a safe overflow path.
Eco-Friendly Variations and Enhancements
Swales and berms are inherently eco-friendly, but you can enhance their permaculture principles further with thoughtful additions. These variations focus on maximizing biodiversity, improving water quality, and creating an even more resilient garden ecosystem.
- Integrate Hugelkultur Berms: Instead of simple earth berms, consider building Hugelkultur-style berms. This involves burying decaying wood and other organic matter within the berm. The wood acts like a sponge, slowly releasing water and nutrients over time, and creates an incredibly rich, self-fertilizing mound. It’s a fantastic way to utilize old logs or brush.
- Incorporate Rain Gardens: If your swale leads to an area where water naturally collects, consider expanding that area into a rain garden. These are depressions designed to capture and filter stormwater runoff, planted with native, water-loving vegetation. They beautify your landscape while performing a vital ecological service.
- Living Spillways: Instead of bare earth or rock for your overflow, plant robust, deep-rooted grasses, sedges, or other erosion-resistant groundcovers. These “living spillways” stabilize the soil, provide habitat, and filter water as it flows.
- Mycelial Inoculation: During construction, consider inoculating your wood chip mulch and buried organic matter with beneficial mushroom spores (e.g., Wine Cap mushrooms). These fungi break down organic matter, improve soil structure, and increase water infiltration, while also potentially providing an edible harvest. Learn more about this synergy at nouvelles-technologie.com/mycelial-networks-for-soil-health/.
- Create Wildlife Corridors: Design your swale and berm system to connect different parts of your garden, creating pathways for small wildlife, beneficial insects, and pollinators. The diverse plantings will naturally attract more biodiversity.
- Use Greywater Integration: For advanced systems, consider safely directing filtered greywater (from showers or washing machines) into your swale system. This expands your water capture significantly, turning a waste product into a valuable resource, though it requires careful planning to adhere to local regulations and safe practices.
Seasonal Considerations for Swales and Berms
While swales and berms are designed for year-round functionality, understanding how they interact with each season helps you maximize their benefits and ensure their longevity. Each season presents unique opportunities and challenges.
- Spring: This is an ideal time for initial construction or renovation, as the soil is typically workable and plants are ready to establish. Maximize water capture from spring rains by ensuring your swales are clear and ready to absorb moisture. This is also a perfect time for planting, taking advantage of the natural moisture.
- Summer: Swales truly shine in the summer, releasing stored moisture to your plants during dry periods, dramatically reducing your irrigation needs. Keep an eye on mulch levels and replenish as needed to conserve every drop. Check for any signs of plant stress and adjust watering only if necessary.
- Autumn: As leaves fall, gather them to replenish your mulch layers on the berms and in the swales. Autumn is also a good time for planting hardy perennials and dormant fruit trees, allowing their roots to establish before winter. Prepare for winter rains by ensuring spillways are clear.
- Winter: In colder climates, swales can capture snowmelt, slowly releasing it into the soil. Monitor for ice buildup that could impede water flow if temperatures fluctuate. In milder climates, winter rains continue to recharge the system. Avoid heavy foot traffic on wet, frozen ground which can compact soil.
Expert Resources for Further Learning
To deepen your understanding and explore more advanced techniques, consult these valuable external resources:
- Gardening Know How – Swale Garden Meaning: How To Make A Swale On A Slope: https://www.gardeningknowhow.com/special/containers/swale-garden-meaning.htm – Offers a good foundational overview of swale design and purpose.
- The Royal Horticultural Society (RHS) – Water Harvesting: https://www.rhs.org.uk/garden-design/water-harvesting – Provides broader context on water harvesting in gardens, with principles applicable to swales and berms.
- University of Minnesota Extension – Rain Gardens: https://extension.umn.edu/planting-and-growing-guides/rain-gardens – While focused on rain gardens, this resource offers excellent information on site assessment, plant selection for water management, and general principles of dealing with stormwater.
Conclusion
Embracing swales and berms in your urban garden is a transformative step towards resilient, sustainable living. It’s more than just digging ditches; it’s about re-patterning your land to work in harmony with nature’s cycles, particularly the precious cycle of water. By understanding and valuing water as it falls on your property, you can mitigate drought, prevent erosion, build fertile soil, and cultivate a thriving ecosystem that buzzes with life.
The journey of implementing these earthworks is one of observation, planning, and hands-on engagement. Each shovel of soil moved is an investment in a greener, more productive future. As your plants grow and your soil enriches, you’ll witness firsthand the power of permaculture principles at play. Your garden will become a living example of how thoughtful design can turn challenges into opportunities, creating abundance with less effort and more connection to the natural world. Start small, learn from your landscape, and watch your urban oasis flourish with captured rainwater.
FAQ: Swales and Berms for Water Capture
<p><strong>Q1: What is the main difference between a swale and a berm?</strong></p>
<p>A1: A swale is a level ditch or trench dug on contour, designed to capture and slowly infiltrate rainwater into the soil. A berm is the mound of soil created immediately downhill from the swale, used for planting drought-tolerant or shallower-rooted species whose roots can access the moisture in the swale.</p>

<p><strong>Q2: Can I build swales and berms in a small urban garden or even a sloped backyard?</strong></p>
<p>A2: Absolutely! Swales and berms are highly adaptable. For smaller urban spaces, you might create "mini-swales" or a series of shorter swales. They are especially beneficial on sloped backyards, as they prevent runoff and erosion, guiding water safely to where it can be used by plants.</p>

<p><strong>Q3: How deep and wide should my swale be for a typical home garden?</strong></p>
<p>A3: For home gardens, a common starting point for a swale is about 1.5 to 2 feet deep and 2 to 4 feet wide. However, the ideal size depends on your specific soil type, average rainfall, and the amount of water you aim to capture. Always consider the stability of the soil and ease of maintenance.</p>

<p><strong>Q4: What kind of plants should I put in and on my swales and berms?</strong></p>
<p>A4: For the swale itself (the wetter area), choose moisture-loving plants such as comfrey, mints, certain wetland grasses, or even small fruit bushes like elderberry. On the berm, which is slightly drier but benefits from the stored water, plant fruit trees, nut trees, perennial vegetables, herbs, and nitrogen-fixing plants. Select species appropriate for your local climate and hardiness zone.</p>


