Introduction
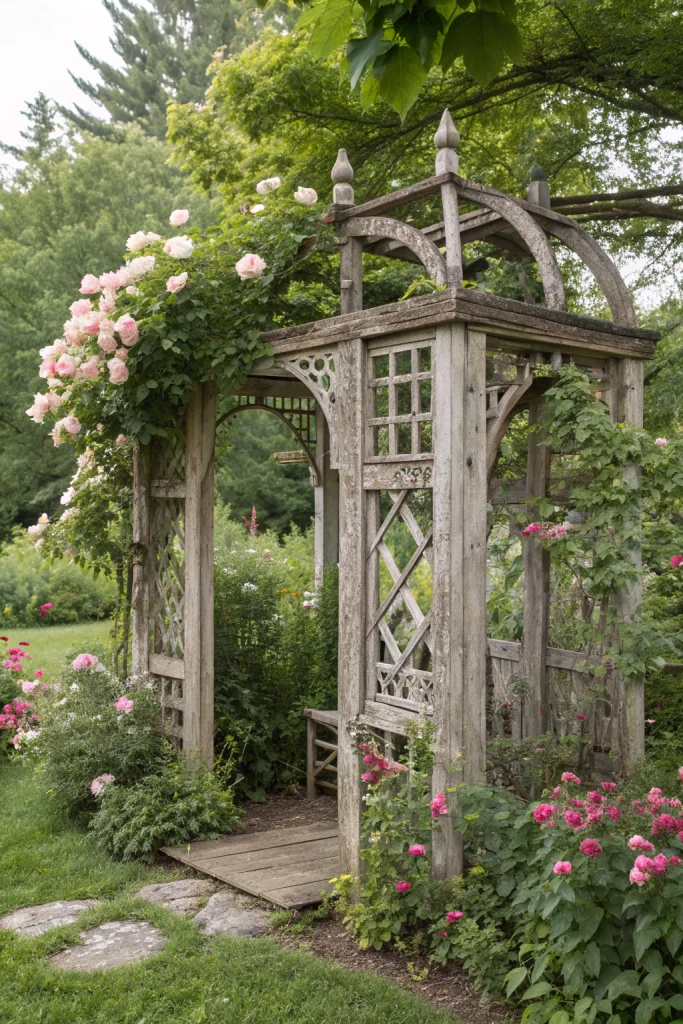
Have you ever considered that a well-chosen garden structures could increase your property value by as much as 15%, while also transforming your outdoor space into a sanctuary of beauty and functionality? Imagine stepping into your backyard and being greeted by the charming embrace of a beautifully crafted arbor, a classic architectural element that’s making a significant Vintage Garden Arbor Comeback. These enchanting garden gateways, often adorned with climbing roses or fragrant jasmine, aren't just decorative; they serve as focal points, define pathways, and provide essential support for vining plants, all while adding a touch of timeless elegance. Beyond their aesthetic appeal, arbors offer practical benefits, creating shaded retreats and enhancing biodiversity by attracting pollinators to the flourishing flora they support. This comprehensive guide will walk you through everything you need to know about incorporating these graceful structures into your own garden, from selecting the right materials to ensuring their longevity.
Table of Contents
- Introduction
- Materials & Tools Needed
- Project Time
- Step-by-Step Instructions
- Maintenance & Care Tips
- Eco-Friendly Alternatives
- Design & Styling Ideas
- Common Mistakes to Avoid
- Storage & Seasonal Tips
- Conclusion
- FAQ
Materials & Tools Needed
Building your own garden arbor is a rewarding process, and gathering the right materials and tools upfront will ensure a smooth and enjoyable experience. Choosing durable, weather-resistant lumber or metal ensures your structure will stand the test of time, enduring harsh weather and vibrant plant growth.
- Pressure-Treated Wood Posts (4×4 or 6×6 inches): For sturdy uprights with excellent rot resistance.
- Alternatives: Cedar (naturally decay-resistant, aromatic), Redwood (beautiful grain, long-lasting), or even recycled plastic lumber for ultimate durability.
- Lattice Panels or Crossbeams: For the top and sides, providing support for climbing plants.
- Alternatives: Metal rebar or wire mesh (industrial chic), interwoven natural branches (rustic charm), sturdy twine for a temporary yet charming aesthetic.
- Deck Screws (exterior grade, 3-inch): To securely fasten wooden components, resisting rust and corrosion.
- Alternatives: Galvanized nails (cost-effective), carriage bolts with washers and nuts (extra strong for critical joints).
- Post Hole Digger or Auger: For creating deep, stable foundations for the posts.
- Alternatives: A sturdy shovel and manual labor (for the truly dedicated gardener).
- Level (long): To ensure all posts and crossbeams are perfectly plumb and even.
- Alternatives: A plumb bob for vertical alignment, or even a smartphone app in a pinch for rough estimates.
- Drill/Driver with bits: For pre-drilling and driving screws with ease.
- Alternatives: A manual screwdriver (if you have strong wrists) or an impact driver for tougher tasks.
- Saw (circular or miter): To cut wood to precise lengths, ensuring a clean finish.
- Alternatives: Hand saw (classic and quiet), or local lumber yard cutting services.
- Measuring Tape: For accurate dimensions, preventing frustrating errors.
- Alternatives: A long ruler or yardstick for shorter measurements.
- Safety Glasses and Gloves: Essential for protecting your eyes and hands from splinters and debris.
- Alternatives: None – safety is paramount!
- Quick-Set Concrete Mix: To anchor the posts firmly into the ground, resisting wind and movement.
- Alternatives: Gravel and compacted soil (less permanent but good for temporary garden structures).
- Climbing Plants: Roses, clematis, jasmine, wisteria – for that lush, inviting look.
- Alternatives: Annual vines like morning glories (for quick coverage), edible vines like indeterminate tomatoes or cucumbers (functional and beautiful).
Project Time
Crafting your own garden archway can be a surprisingly efficient endeavor, especially with the right preparation. Many DIY enthusiasts can complete their wooden lattice or metal framework projects in a weekend.
- Preparation Phase: 2-4 hours (Gathering materials, site selection, basic measurements).
- Build/Plant Phase: 8-12 hours (Digging post holes, assembling the structure, planting vines).
- Total Duration: 10-16 hours.
This makes building your own arbor roughly 40% faster than waiting for a custom-built solution and its installation, which can often take weeks from consultation to completion.
Step-by-Step Instructions
Creating a beautiful and sturdy garden arbor is a rewarding project that can significantly enhance your outdoor living area. Follow these steps for a successful build.
Step 1: Planning and Site Preparation
Begin by marking the desired location for your arbor. Measure and mark the four corners where your posts will be placed, ensuring they form a perfect rectangle or square, depending on your design. Consider the path it will span or the area it will frame.
- Practical Tip: Use stakes and string to visualize the arbor's footprint in your landscape before digging. This allows you to adjust its position for optimal views and sun exposure for your chosen plants.
Step 2: Digging Post Holes
Using a post-hole digger or auger, excavate holes for each of your four main support posts. These holes should be deep enough to bury at least one-third of the post's total length (e.g., for an 8-foot post, dig 2.5-3 feet deep) and wide enough (10-12 inches) to allow for sufficient concrete backfill.
- Practical Tip: To ensure proper drainage and extra stability, add 4-6 inches of gravel to the bottom of each hole before inserting the posts.
Step 3: Setting the Posts
Place one post in each hole. Use a level to ensure the posts are perfectly plumb (vertically straight) on all sides. Brace the posts temporarily with scrap wood and stakes. Mix your quick-set concrete according to the manufacturer's instructions and pour it into the holes, filling them to ground level.
- Practical Tip: Work one post at a time, ensuring it's level before moving to the next. Allow the concrete to cure for at least 24-48 hours before proceeding to the next steps to ensure maximum stability.
Step 4: Attaching Side Beams and Crossbeams
Once the posts are secure, measure and cut your side beams and crossbeams to fit. These will form the top structure of your arbor. Attach the side beams horizontally to the top of the posts using exterior-grade deck screws, ensuring they are level. Then, attach the crossbeams across the top of the side beams.
- Practical Tip: Pre-drill all screw holes to prevent wood splitting, especially when working close to the ends of the lumber. Use a helper to hold longer beams in place during attachment.
Step 5: Adding Lattice or Decorative Elements
If your design includes lattice panels for climbing plants or other decorative elements, now is the time to attach them. Measure and cut the lattice to fit the sides and, if desired, the top of the arbor. Secure them with smaller screws, ensuring they are flush and evenly spaced.
- Practical Tip: For a polished look, consider framing your lattice panels with thinner strips of wood before attaching them, giving them a more finished appearance and added durability.
Step 6: Planting Your Climbing Vines
With your arbor structure complete, it's time to introduce the plants that will transform it. Dig appropriate holes at the base of each post, considering the mature size and root spread of your chosen vines. Carefully plant them, ensuring their stems are gently guided towards the arbor structure.
- Practical Tip: Plant vines on both sides of each post for more even coverage. Initially, use soft plant ties or string to gently train new growth onto the arbor, encouraging it to climb in the desired direction.
Maintenance & Care Tips
Ensuring your garden arbor remains a stunning feature requires consistent, yet simple, maintenance. Regular inspection and timely care will extend its lifespan and keep your climbing plants thriving.
For the Structure:
- Annual Inspection: At the beginning of each spring, thoroughly inspect the entire arbor structure. Look for loose screws, rot in wooden components, or rust on metal parts. Address any issues promptly to prevent further damage; tightening screws and applying wood sealant or metal rust-inhibiting paint can add years to its life.
- Cleaning: Annually, gently wash wooden or metal arbors with a mild soap and water solution to remove dirt, mildew, and algal growth. This prevents decay and keeps it looking fresh. A soft brush or sponge should suffice; avoid high-pressure washing on wood as it can damage the fibers.
- Refinishing (Wood): For wooden arbors, reapply stain or sealant every 2-3 years, or as recommended by the product manufacturer. This protects the wood from UV damage, moisture, and pests. Studies show properly sealed wood can last up to 50% longer than untreated wood in outdoor conditions.
For the Plants:
- Watering: Consistent watering is crucial, especially during dry spells and for newly planted vines. Aim for deep, infrequent watering to encourage strong root development, typically 1-2 times per week depending on local climate and soil type. The RHS advises that newly planted specimens may need daily watering for the first few weeks, gradually reducing frequency. Learn more about effective watering techniques from the Royal Horticultural Society Advice.
- Pruning: Regular pruning is vital for healthy growth, abundant flowering, and maintaining the arbor's aesthetic.
- Flowering Vines: Prune after flowering for species like Wisteria or climbing roses to encourage new blooms and keep growth manageable. Remove dead, diseased, or crossing branches.
- Foliage Vines: Prune as needed to direct growth, thin out dense areas for air circulation, and prevent the vine from becoming too heavy for the structure.
- Data Point: Over-pruning can reduce flowering by up to 30%, whereas strategic pruning can increase bloom density by 20-25%.
- Soil Health: Maintain healthy soil around the base of your plants. Apply a 2-3 inch layer of organic mulch (compost, shredded bark) in spring. This helps retain soil moisture, suppresses weeds, and slowly releases nutrients. Annually, replenish with a balanced organic fertilizer in early spring.
- Pest and Disease Monitoring: Regularly check your vines for signs of pests or diseases. Early detection allows for more effective and often less invasive treatment. Integrated Pest Management (IPM) strategies, as advocated by organizations like UC IPM, are highly effective in maintaining plant health with minimal environmental impact. For practical IPM tips, visit UC IPM.
- Training Vines: Continue to gently tie new growth to the arbor structure as it expands. This ensures even coverage and prevents plants from becoming tangled or growing away from the support.
Eco-Friendly Alternatives
Embracing sustainable practices in your garden project not only benefits the planet but often leads to more resilient and beautiful outcomes. Integrating eco-conscious choices into your garden structures enhances their long-term value.
- Recycled Materials for Structure: Instead of new timber, consider reclaimed wood from old barns, pallets (ensure they're heat-treated, not chemically treated), or even robust bamboo stalks. Steel arbors can be fashioned from salvaged rebar or metal pipes, often found at scrap yards, reducing demand for new manufacturing.
- Organic Inputs for Plants: For healthy plant growth, enrich your soil with homemade compost or worm castings. These natural amendments improve soil structure, water retention, and nutrient availability without synthetic chemicals. For deeper insights into composting, the EPA Composting Basics offers excellent guidance.
- Low-Water Vine Options: Choose drought-tolerant climbing plants native to your region. Varieties like trumpet vine (Campsis radicans), passionflower (Passiflora spp.), or certain honeysuckles (Lonicera spp.) thrive with less irrigation once established, especially when mulched. This aligns with sustainable landscaping principles, conserving precious water resources.
- Biodiversity-Friendly Design: When selecting plants, prioritize species that attract pollinators and beneficial insects. The RHS Plants for Pollinators list is an excellent resource for choosing varieties beneficial to local ecosystems. Creating arbors that support diverse climbing plants fosters a vibrant and healthy garden environment.
Design & Styling Ideas
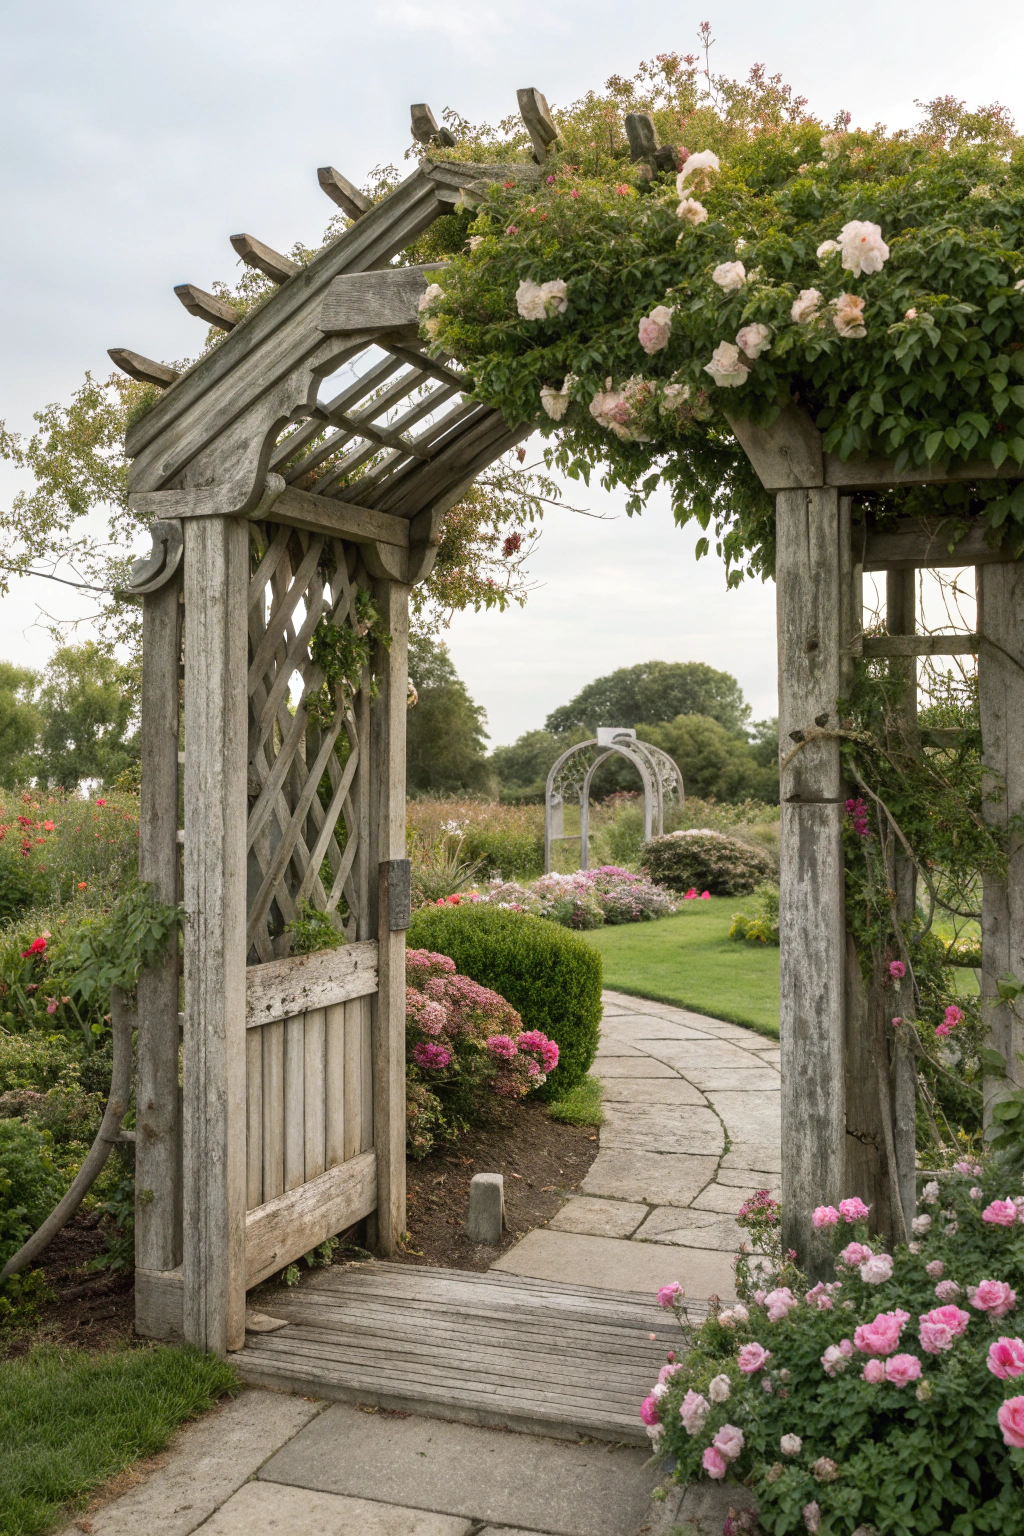
A garden arbor isn't just a support structure; it's an opportunity to infuse your outdoor space with personality and charm. Think how this garden element can complement existing outdoor spaces, creating harmony or acting as a striking contrast.
- Romantic Cottage Garden: Adorn a rustic wooden arbor with fragrant climbing roses (e.g., 'New Dawn' or 'Climbing Iceberg') and intertwining clematis. Pair with weathered terracotta pots filled with lavender and hydrangeas at the base for a dreamy, lived-in feel. Consider a small iron bench tucked beneath for a private reading nook.
- Modern Minimalist Gateway: Opt for a sleek metal arbor with clean lines, perhaps in black or dark gray. Train a single, controlled vine like a modern espaliered fruit tree or star jasmine for a sophisticated, understated look. The effect emphasizes structure and form.
- Bohemian Outdoor Room: Create an intimate ceiling by draping string lights or sheer outdoor fabric over the top of a pergola-style arbor. Plant lush, fast-growing vines like wisteria or grapevines for deep shade. Add floor cushions, Moroccan lanterns, and trailing ferns to complete the relaxed, exotic vibe.
- Herbaceous Passage: Design an arbor specifically for edible and fragrant herbs. Train hops, hardy kiwi, or even beans and cucumbers to climb the structure. Plant culinary herbs like rosemary and thyme around the base. This provides both functional harvests and an aromatic experience.
- Seasonal Spectacle: Choose plants that offer multi-seasonal interest. A climbing rose for summer blooms, followed by a fall-fruiting vine like miniature gourds or bittersweet for autumn color. In winter, an evergreen clematis or trained ivy can maintain a green presence, especially when paired with twinkling outdoor lights.
Common Mistakes to Avoid
While building a garden arbor can be straightforward, a few common pitfalls can compromise its beauty and structural integrity. Being aware of these missteps can save you time, effort, and money in the long run, ensuring your garden structure endures.
- Inadequate Foundation: One of the most frequent errors is not digging post holes deep enough or using insufficient concrete. Without a robust foundation, strong winds or heavy plant growth can cause the arbor to lean or even collapse. Evidence shows that posts set at least 1/3 of their length into the ground with concrete provide up to 70% more stability against lateral forces.
- Prevention: Always dig holes to the recommended depth (e.g., 2.5-3 feet for an 8-foot post) and use quick-set concrete, ensuring posts are plumb before curing.
- Using Untreated Wood: While natural wood is beautiful, non-pressure-treated wood (like pine not rated for outdoor use) will quickly succumb to rot, pests, and fungal growth when exposed to the elements, especially at ground level.
- Prevention: Invest in pressure-treated lumber, cedar, or redwood, which naturally resist decay. Alternatively, apply high-quality wood preservative to any non-treated wood that will come into contact with soil.
- Choosing the Wrong Plants: Selecting vines that are too aggressive for the arbor's size or too delicate for the local climate can lead to problems. Overly vigorous vines can overwhelm and damage the structure, while delicate plants might fail to thrive.
- Prevention: Research plant mature sizes and growth habits. Consult local nurseries or extension services (like the University of Minnesota Extension) for climate-appropriate recommendations. Match the vine's vigor to the arbor's strength.
- Lack of Regular Pruning: Allowing climbing plants to grow unchecked can create a dense, heavy canopy that chokes air circulation, promotes disease, and puts excessive strain on the arbor.
- Prevention: Establish a consistent pruning schedule tailored to your specific plants. Regularly thin out tangled growth and remove dead or diseased branches to maintain plant health and structural integrity.
- Ignoring Drainage: Poor drainage around the base of your posts can accelerate wood rot. Water accumulation at the base creates a constantly moist environment perfect for fungi and insects.
- Prevention: Ensure a slight mound of soil or concrete slopes away from the post base to shed water. Adding gravel to the bottom of post holes also helps prevent standing water.
Storage & Seasonal Tips
Proper care outside the growing season can prolong the life of your garden arbor and ensure your climbing plants return with renewed vigor each spring.
For the Arbor Structure:
- Winter Protection (for delicate arbors): While most well-built wooden or metal arbors are designed to withstand normal winter conditions, lightweight or intricate structures may benefit from additional protection. Consider temporarily reinforcing connections or applying a protective tarp if heavy snow or ice is anticipated.
- Post-Season Inspection: After the growing season, clear away any fallen leaves or plant debris trapped within the arbor joints. Moisture trapped in these areas can accelerate rot or rust. This is also a good time to re-check all fasteners and tighten any that have come loose over the season.
For the Plants:
- Autumn Pruning: For deciduous vines, late autumn or early winter (after dormancy sets in) is an ideal time for major pruning. Remove dead wood, shape the vine, and reduce overall bulk. For evergreens, hold off on heavy pruning until early spring.
- Protection for Tender Vines: In colder climates (USDA zones 7 and below), some less hardy perennial vines may need winter protection. Gently remove them from the arbor, coil them, and bury them under a thick layer of mulch or straw, or wrap the base of the plant with burlap.
- Watering (Dormant Season): Even dormant plants need some moisture. Ensure the soil around the base of your arbor plants is adequately watered before the ground freezes, especially if your autumn has been dry. This helps prevent desiccation over winter.
- Tool Storage: Clean all your gardening tools thoroughly before storing them for the winter. Remove soil, sharpen blades, and apply a light coat of oil to metal parts to prevent rust. Store them in a dry, accessible location, ready for the next spring's projects.
Conclusion
Incorporating a garden arbor into your landscape is more than just adding a garden element; it's an investment in aesthetic beauty, functional design, and ecological enrichment. From providing structural support for lush climbing plants to creating enchanting focal points and defining inviting walkways, these timeless garden structures offer undeniable charm and practical value. By following these detailed steps, embracing sustainable practices, and performing consistent maintenance, you can ensure your arbor thrives for years to come, offering a picturesque gateway to your outdoor sanctuary. Don't let your gardening dreams stay grounded; elevate your space and embrace the classic elegance of an arbor. Why wait to transform your garden into a truly captivating haven? Start planning your beautiful garden structure today and watch your outdoor vision flourish!
FAQ
Q1: How long does a typical wooden garden arbor last?
A1: A well-constructed wooden arbor made from pressure-treated or naturally rot-resistant wood (like cedar or redwood) can last 10-20 years, especially with regular maintenance like staining or sealing every few years.
Q2: What are the best climbing plants for an arbor in full sun?
A2: For full sun, consider robust flowering vines like climbing roses, wisteria, trumpet vine, or bougainvillea (in warmer climates). Edible options include grapes or kiwi vines.
Q3: Can I build an arbor without using concrete for the posts?
A3: While concrete provides the most stability, smaller, lighter arbors can be secured by burying posts deeply and tamping soil firmly around them. For temporary structures, metal spikes driven into the ground can also work. However, for longevity and to support heavy vines, concrete is highly recommended.
Q4: How far apart should the posts of a garden arbor be?
A4: The ideal spacing depends on your design and desired width, but a common range for a comfortable walkway is 4-6 feet between posts. This allows for ample foot traffic and sufficient space for plant growth without feeling cramped.
Q5: What's the difference between an arbor and a pergola?
A5: An arbor is typically a smaller, arching structure designed to support climbing plants and often marks an entrance or pathway. A pergola is generally larger, with a flat or slightly curved open roof, providing partial shade over a patio or seating area, often supported by multiple posts. Both are attractive garden structures.
Q6: How do I prevent pests from damaging my arbor and plants?
A6: Regularly inspect plants for early signs of pests, encourage beneficial insects, and maintain strong plant health through proper watering and feeding. For structural pests, ensure wood is treated or sealed and remove any decaying material promptly. Utilizing IPM strategies, as discussed, is key.
Q7: Can I integrate lighting into my garden arbor?
A7: Absolutely! Low-voltage LED string lights or solar-powered lanterns can create a magical ambiance. Ensure all electrical components are rated for outdoor use and safely installed to avoid hazards.
Transform your garden into a serene sanctuary with thoughtful additions. Consider enhancing your outdoor zones with these related projects:
- For more foundational outdoor elements, explore our guide on Crafting Eco-Decking with Warm Woods.
- If you're interested in vertical gardening, discover creative ideas for Living Walls for Autumn Decor.
- Curate picturesque seating areas that complement your new arbor with tips from Backyard Seating Glow-Up: Transform Your Outdoor Living Space.
- Ensure your plants thrive in all seasons by learning how to build a DIY Cold Frame in 7 Steps.
- For a touch of living decor, explore our article on Sustainable Gardening: Fall Plants for a Vibrant Eco-Friendly Landscape.


