
10 Ultimate Steps to Master the Winter Sowing Seeds Method
Are you dreaming of an abundant garden, brimming with sturdy plants long before traditional spring planting? Do you dread the indoor mess, the constant monitoring, and the cost of grow lights associated with conventional seed starting? If so, the winter sowing seeds method is about to become your new favorite gardening hack. This ingenious, eco-conscious technique allows you to start a wide variety of seeds outdoors during the coldest months, leveraging nature’s own rhythm to produce robust, resilient seedlings with minimal effort and no heat source whatsoever. It’s a game-changer for gardeners looking to expand their plant repertoire, save money, and get a significant head start on the growing season.
[lwptoc]
The beauty of winter sowing lies in its simplicity and effectiveness. You essentially create mini-greenhouses out of recycled containers, sow your seeds, and let Mother Nature do the rest. The fluctuating temperatures, natural light cycles, and gradual warming expose the seeds to conditions that mimic their natural germination process, resulting in hardier plants perfectly acclimated to your regional climate. Say goodbye to damping-off disease, leggy seedlings, and the constant stress of hardening off; winter-sown plants are born tough, ready to thrive from day one.
Why the Winter Sowing Seeds Method Matters for Your Garden
Embracing the winter sowing seeds method offers a multitude of benefits that can transform your gardening experience. First and foremost, it’s a significant time-saver. Once your seeds are sown in their makeshift greenhouses, they require very little attention until spring. You won’t be tied to grow lights, heating mats, or the daily ritual of watering delicate indoor seedlings.
Secondly, it produces superior plants. Seeds germinating outdoors in natural conditions develop stronger root systems and thicker stems, making them inherently more resistant to pests, diseases, and transplant shock. They are naturally “hardened off” by the elements, unlike their indoor counterparts that need a gradual adjustment period to the outdoor environment. This resilience means a higher success rate for your garden.
Thirdly, it’s incredibly cost-effective. Eliminating the need for expensive grow lights, heating mats, and specialized seed-starting mixes can save you a substantial amount of money. You’re primarily using recycled materials, making it an environmentally friendly option as well. This budget-friendly approach allows you to experiment with a wider variety of plants without breaking the bank, expanding your gardening horizons significantly.
Finally, winter sowing extends your planting season. By starting seeds months earlier than you typically would, you can enjoy blooms and harvests weeks ahead of schedule. This is particularly beneficial for plants that require a long growing season or those that benefit from early establishment before summer heat waves. It’s a wonderful way to beat the spring rush and enjoy the joy of gardening even when snow is on the ground.
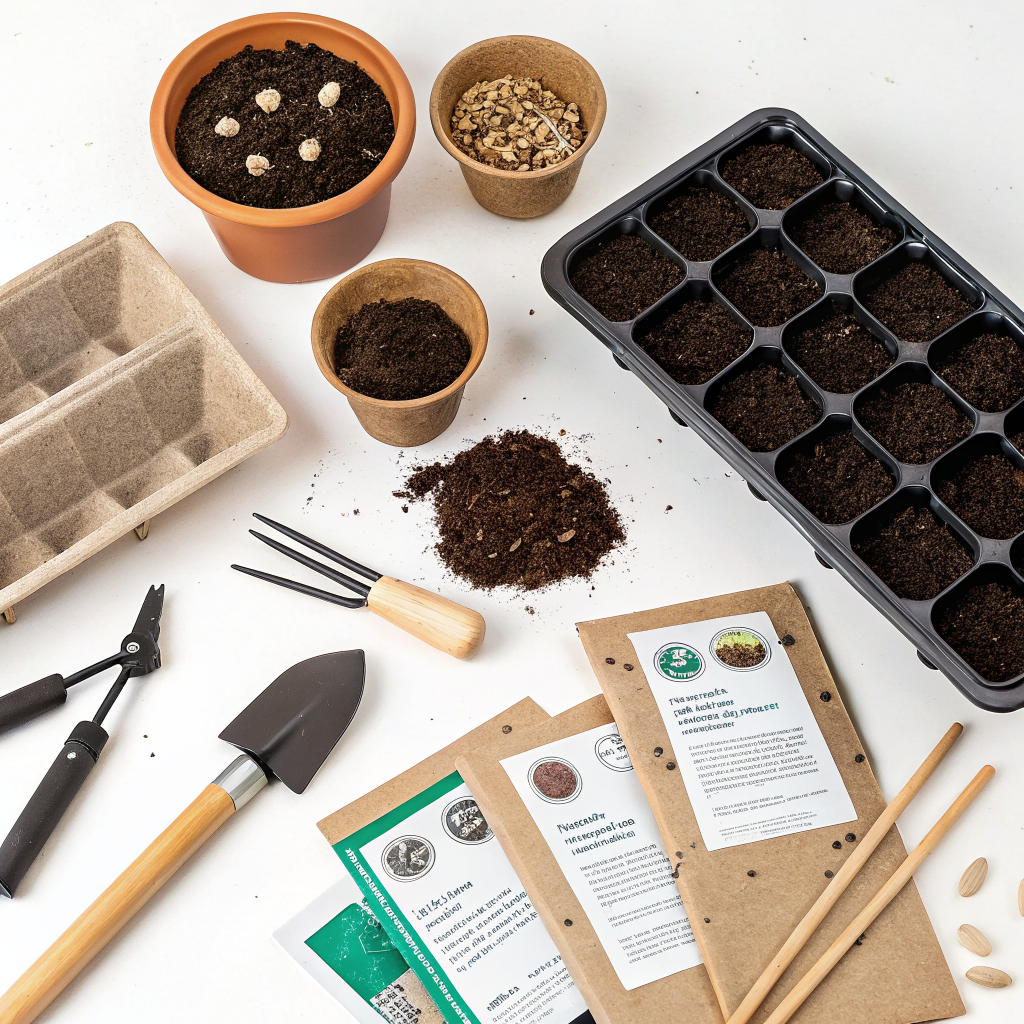
What You Need for Successful Winter Sowing
One of the appealing aspects of the winter sowing seeds method is its reliance on readily available and often recycled materials. You don’t need fancy equipment, just a few key items to get started.
Containers:
- Translucent Plastic Containers: The workhorses of winter sowing. Milk jugs (gallon or half-gallon), clear juice bottles, 2-liter soda bottles, clear clam-shell fruit/salad containers, and even large clear take-out containers work perfectly. The key is translucency to allow light in and a sufficient depth for root development.
- Drainage: Essential for preventing waterlogged soil and root rot. You’ll need a drill, soldering iron, or sharp knife to create ample drainage holes in the bottom of your containers.
Growing Medium:
- Good Quality Potting Mix: Choose a sterile, well-draining seed-starting mix or a general-purpose potting mix that doesn’t contain large chunks of bark or uncomposted material. Avoid garden soil, as it can be heavy, harbor pathogens, and drain poorly. A moisture-retentive yet aerated mix is ideal.
Seeds:
- Cold-Stratification Requiring Seeds: Many perennial, biennial, and some annual seeds benefit immensely from or even require a period of cold stratification to break dormancy. These seeds are perfect candidates for winter sowing. Examples include coneflowers, asters, milkweed, delphiniums, and many native plants.
- Hardy Annuals and Vegetables: Kale, lettuce, spinach, snapdragons, calendula, and many others can thrive with this method. Check individual seed packets for suitability and recommended planting times.
- Avoid Tropicals and Heat-Loving Plants: Tomatoes, peppers, and most tender herbs are not suitable for winter sowing as they are sensitive to cold and require warm temperatures to germinate.
Tools:
- Sharp Knife or Scissors: For cutting your containers.
- Duct Tape or Heavy-Duty Packaging Tape: To seal your container mini-greenhouses.
- Permanent Marker: For labeling your containers clearly. Labeling is crucial – you’ll be surprised how quickly you forget what’s in each jug!
- Drill or Soldering Iron: For creating drainage holes. A soldering iron makes quick, clean holes.
- Watering Can or Spray Bottle: For initially moistening the soil.
Step-by-Step Guide to the Winter Sowing Seeds Method
Ready to get started? Follow these steps to set up your winter sowing operation for success. Remember, patience is key, as germination will occur naturally when conditions are right.
Step 1: Prepare Your Containers
Clean your chosen translucent containers thoroughly. For milk jugs or similar, cut them horizontally around the middle, leaving about an inch or two intact near the handle to create a “hinge.” This hinge will keep the top and bottom halves connected, making it easier to tape them back together. For clam-shell containers, simply ensure they are clean.
Next, create generous drainage holes in the bottom of each container. Drill 4-6 holes (about 1/4 to 1/2 inch in diameter) with a drill, or use a heated soldering iron to melt holes. Good drainage is critical to prevent root rot and ensure proper moisture regulation inside your mini-greenhouse. Without adequate drainage, your seeds could drown.
Step 2: Add Potting Mix
Fill the bottom half of your prepared containers with about 3-4 inches of good quality, sterile potting mix. Avoid compacting the soil too much; you want it light and airy for root growth. Thoroughly moisten the soil until it’s evenly damp, like a wrung-out sponge. You can do this by watering slowly or by pre-moistening the entire bag of mix before filling your containers.
Step 3: Sow Your Seeds
Refer to your seed packets for specific planting depth. Generally, most seeds are sown at a depth of two to three times their diameter. Smaller seeds can be surface-sown and gently pressed into the soil, while larger seeds will need to be covered. You can sow quite densely; you’ll thin them out later. For milk jugs, you can often sow 20-30 small seeds or 5-10 larger seeds per jug. This method often has high germination rates, so don’t overdo it with very large seeds.
Spread the seeds evenly over the surface of the moistened soil. For very tiny seeds, mixing them with a pinch of sand can help with even distribution. Very lightly cover the seeds with a thin layer of potting mix if required by the seed packet. Do not water again heavily after sowing, as this can displace tiny seeds.
Step 4: Label Your Containers
This is a crucial step that many gardeners overlook, only to regret it later. Use a permanent, UV-resistant marker to clearly label each container with the plant name, variety, and the date of sowing. You might think you’ll remember, but after a few weeks, it’s easy to forget what’s in each jug. You can also write directly on the duct tape once applied.
Step 5: Seal Your Mini-Greenhouses
Close the top half of your container, aligning it with the bottom. Securely tape the seam all the way around with strong duct tape or heavy-duty packaging tape. Ensure there are no large gaps, but a tiny bit of airflow isn’t detrimental. The tape creates a sealed environment, trapping moisture and creating a humid mini-greenhouse effect. This protection shields your seeds from strong winds, excessive rain, and hungry critters.
For clam-shell containers, simply snap them shut securely. Make sure they are closing tightly enough to maintain the internal environment.
Step 6: Place Them Outdoors
Move your sealed containers to an appropriate outdoor location. This should be a spot that receives natural daylight, but is preferably out of direct, intense sun, especially in late winter/early spring to prevent overheating inside the jugs. A north-facing wall, under deciduous trees, or an open area where they get some weather exposure but aren’t entirely battered by wind is ideal.
Place them directly on the ground or on a sturdy surface where they won’t be easily blown over. A shed roof or a concrete patio can work well. The containers need to experience the full range of winter temperatures, including freezing and thawing cycles, which are essential for many seeds to break dormancy. Do not bring them indoors, even on the coldest nights; they are designed for the outdoors.
Step 7: Monitor and Maintain (Minimal)
Once set up, the beauty of the winter sowing seeds method is its low maintenance. The sealed containers will mostly manage their own moisture levels through condensation and rain. However, check them periodically. If you notice the soil looks dry (which is rare), you can add a small amount of water through the drainage holes or by gently opening the top slightly. Ensure they remain securely taped if you do open them.
As spring approaches and temperatures rise, you’ll start to see signs of germination. This is the exciting part! Do not rush to open your containers fully. The seedlings are still adapting.
Step 8: Acclimation and Thinning
Once seedlings emerge and temperatures consistently stay above freezing both day and night, usually in early to mid-spring, you can begin to open your containers for gradual acclimation. Start by propping open the lid during the day to allow for more airflow and direct exposure, closing it at night if temperatures are still dipping significantly. After a week or two of this gradual opening, you can remove the tape entirely, leaving the tops open.
At this stage, you’ll also want to thin your seedlings. Gently remove the weaker seedlings, leaving the strongest ones spaced appropriately for their mature size. This ensures the remaining plants have enough resources to develop strong root systems. If you’ve sown densely, you can often transplant entire clumps of seedlings rather than individual ones.
Step 9: Transplanting
When your seedlings have developed several sets of true leaves and the threat of severe frost has passed (check your local last frost date), they are ready for transplanting into your garden beds or larger pots. Because they have already been hardened off by the elements, they are much less likely to suffer from transplant shock than indoor-started plants. They will seamlessly integrate into their new environment.
Gently remove the entire block of soil and seedlings from the container. Tease apart individual seedlings or small clumps, being careful not to damage the roots. Plant them at the same depth they were growing in the jug, water them in well, and watch them flourish.
Step 10: Enjoy Your Resilient Garden
Sit back and enjoy the fruits of your early labor! Your winter-sown plants will be robust, healthy, and often ahead of conventionally started plants. This method truly taps into the natural resilience of seeds, giving your garden a strong foundation for the entire growing season. You’ll be amazed at the vigor and adaptability of these naturally-grown plants.
Pro Tips and Common Mistakes with the Winter Sowing Seeds Method
Even though the winter sowing seeds method is forgiving, a few expert tips can boost your success, and being aware of common pitfalls can save you trouble.
Pro Tips:
- Timing is key for seeds: Broadly speaking, sow perennials and shrubs roughly 4-6 weeks before your last expected hard freeze. Hardy annuals can go in 2-3 months before the last frost. Don’t worry too much about precise dates; the seeds will germinate when nature tells them it’s time.
- Don’t skimp on drainage holes: When in doubt, add more. Waterlogged soil is a death knell for young seedlings.
- Use fresh seeds: Seed viability decreases over time. Using fresh seeds (within 1-2 years of harvest) gives you the best germination rates. Many seed companies provide excellent resources; check out RHS.org.uk for seed-saving tips.
- Consider placement: While they need to be outdoors, consider protecting them from extreme winds or heavy snow drifts that could bury them completely for extended periods. A sheltered spot near a building is often ideal.
- “Bag method” for large trays: If you’re sowing many seeds in a larger tray, you can use clear plastic bags secured over the tray instead of individual jugs. This scales up the method for larger batches, assuming you still provide good drainage.
- Don’t peek too often: Resist the urge to constantly open your containers, especially during the coldest months. The sealed environment is crucial for maintaining moisture and temperature regulation.
Common Mistakes to Avoid:
- Bringing containers indoors: The whole point is to expose seeds to natural temperature fluctuations. Bringing them inside “to warm them up” defeats the purpose and can cause them to germinate too early, only to die when put back out.
- Using garden soil: Garden soil is too heavy, often contains weed seeds, and can harbor pathogens. Always use a sterile, well-draining potting or seed-starting mix.
- Not enough drainage: As mentioned, this is critical. Puddles in the bottom of your containers will drown your seeds.
- Improper labeling: Seriously, label everything. It seems trivial now, but come spring you’ll be scratching your head.
- Planting too deep or not deep enough: Always consult your seed packets. Tiny seeds need barely any cover, while larger ones need more.
- Opening containers too soon: Give seedlings time to develop before fully exposing them. Gradual acclimation is key to preventing shock.
- Ignoring moisture once opened: After you open the containers in spring, especially on sunny or windy days, you’ll need to start actively monitoring moisture levels, as they will dry out much faster than when sealed.
Eco-Friendly Variations for the Winter Sowing Seeds Method
The winter sowing seeds method is inherently eco-friendly due to its use of recycled materials and avoidance of energy-intensive grow lights. However, you can take its environmental credentials even further.
- Maximize Container Reuse: Beyond milk jugs, think about other plastic containers that often go to recycling. Clear large salad containers, rotisserie chicken containers, and even large clear soda bottles can be repurposed. The goal is to divert as much plastic from the waste stream as possible. Need more ideas? Check out our article on sustainable gardening tips.
- Source Sustainable Potting Mix: Look for potting mixes that are peat-free, or contain responsibly sourced peat. Components like coir (coconut fiber), composted bark, and perlite are often more sustainable alternatives. Some brands are also incorporating worm castings or other natural fertilizers, reducing the need for synthetic additives.
- Collect and Use Rainwater: Once your seedlings are up and the containers are open, use collected rainwater for irrigation. This conserves tap water and provides plants with a superior, chlorine-free water source. Building a simple rain barrel can be a great DIY project for water conservation.
- Practice Seed Saving: Once you successfully grow plants from winter-sown seeds, consider saving seeds from those plants for future seasons. This creates a self-sustaining cycle, reduces your reliance on purchased seeds (and their packaging), and develops plants naturally adapted to your specific garden environment. Learn more about it on Gardening Know How’s seed saving guide.
- Composting Leftover Materials: Once you’ve transplanted your seedlings, the potting mix that remains in the containers can be added to your compost pile, enriching it for future use. Ensure any non-soil materials (like tape pieces) are removed.
Seasonal Considerations for the Winter Sowing Seeds Method
While the general principle of the winter sowing seeds method remains consistent, adjusting your approach slightly based on the season you initiate it can optimize results.
Late Fall/Early Winter (November – December):
This is an excellent time for sowing seeds that require a very long period of cold stratification or those that are extremely slow to germinate. Think native plants, many perennials (e.g., milkweed, coneflowers, certain trees/shrubs), and some biennials. The longer exposure to the full depth of winter ensures dormancy is thoroughly broken. Ensure containers are well-sealed, as they’ll endure the harshest weather. Consider placing them where they’ll accumulate a bit of snow cover for insulation.
Mid-Winter (January – February):
This is arguably the peak time for general winter sowing. Most perennials, many hardy annuals (like snapdragons, calendula), and cool-season vegetables (spinach, lettuce, kale, collards) can be sown now. The seeds will still get sufficient cold exposure for stratification and will be ready to germinate as temperatures naturally begin to rise in late winter/early spring. This timing usually results in robust seedlings ready to transplant after your last average frost date.
Late Winter/Early Spring (March):
While still possible, this window is generally for faster-germinating hardy annuals or vegetables. You might still get some stratification for slower seeds, but it will be a shorter period. Ensure daily temperature fluctuations are still significant enough to encourage the freeze-thaw cycles that aid germination. By this time, you’ll need to monitor moisture more closely, as sunny days can lead to faster drying inside the jugs, even when sealed. Readiness for transplanting will be quicker.
Understanding your local climate and average frost dates is paramount to maximizing success. Resources from your local agricultural extension office, such as University of Minnesota Extension on winter sowing, can provide region-specific guidance.
Conclusion
The winter sowing seeds method is more than just a gardening technique; it’s a philosophy that embraces nature’s wisdom, promotes sustainability, and empowers you to grow a thriving, resilient garden with minimal fuss. By leveraging recycled materials and the natural elements, you can bypass the common challenges of indoor seed starting and cultivate a greater variety of plants, often weeks or even months earlier than traditional methods allow. Imagine the satisfaction of watching sturdy seedlings emerge from under a blanket of snow, perfectly adapted and ready to conquer your garden beds.
Whether you’re a seasoned gardener looking for a new challenge or a beginner intimidated by the complexities of seed starting, winter sowing offers an incredibly accessible and rewarding path. It fosters a deeper connection with the natural world, teaching patience and observation as you witness life slowly awaken against the odds. So gather your milk jugs, select your seeds, and embrace the magic of growing green in the depths of winter. Your garden (and your wallet!) will thank you.
Frequently Asked Questions About Winter Sowing Seeds
Q1: Can I use any type of seed for winter sowing?
A1: Not all seeds are suitable. The winter sowing seeds method works best for seeds that benefit from or require a period of cold stratification (e.g., many perennials, biennials, native plants, and even some hardy annuals and cool-season vegetables). Seeds for tropical plants or heat-loving annuals (like tomatoes, peppers, basil) are not suitable as they need warm temperatures to germinate and cannot survive cold conditions.
<h4>Q2: What is the ideal temperature range for winter sowing?</h4>
<p>A2: There isn't an "ideal" temperature range in the conventional sense. The beauty of winter sowing is that the seeds experience natural outdoor temperature fluctuations, including freezing and thawing cycles. These cycles are crucial for breaking dormancy in many seeds. As long as temperatures drop below freezing for a period and then gradually warm up, the method will work.</p>

<h4>Q3: How often do I need to water the containers after sowing?</h4>
<p>A3: After the initial thorough moistening of the potting mix and sealing the containers, watering is usually minimal, if not entirely unnecessary, during the coldest months. The sealed containers act as mini-greenhouses, trapping moisture through condensation and allowing trapped rainwater to contribute. Only if the soil appears truly dry (which is rare before spring) should you add a small amount of water. Once seedlings emerge and containers are opened, regular watering suitable for seedlings will be required.</p>

<h4>Q4: How do I know when the seedlings are ready to transplant into the garden?</h4>
<p>A4: Your winter-sown seedlings are ready for transplanting when they have developed several sets of true leaves, look robust, and the risk of a hard frost has completely passed for your region. Because these plants have already been naturally hardened off outdoors, they generally experience very little transplant shock when moved to their final garden locations. Always check your local last average frost date before permanent planting.</p>


