Introduction
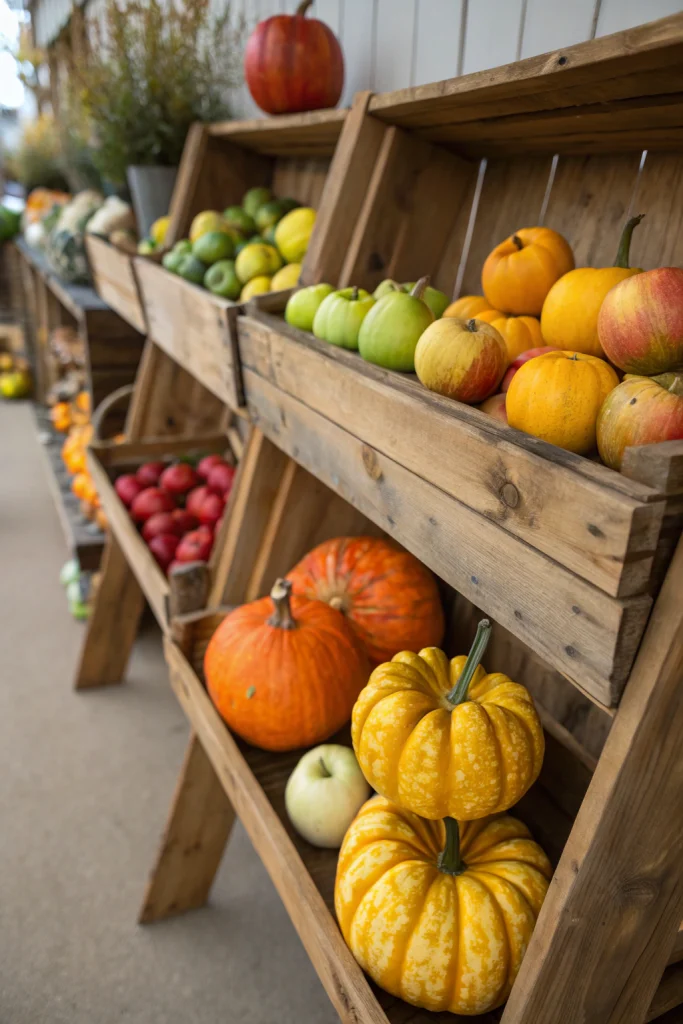
Creating charming wooden shelves displaying seasonal gourds and apples isn’t just about aesthetics; did you know that organized, elevated produce can reduce spoilage by up to 25% compared to floor storage, saving you money and valuable harvest? This simple DIY project offers a functional and beautiful way to celebrate autumn’s bounty inside or outside your home.
[lwptoc]
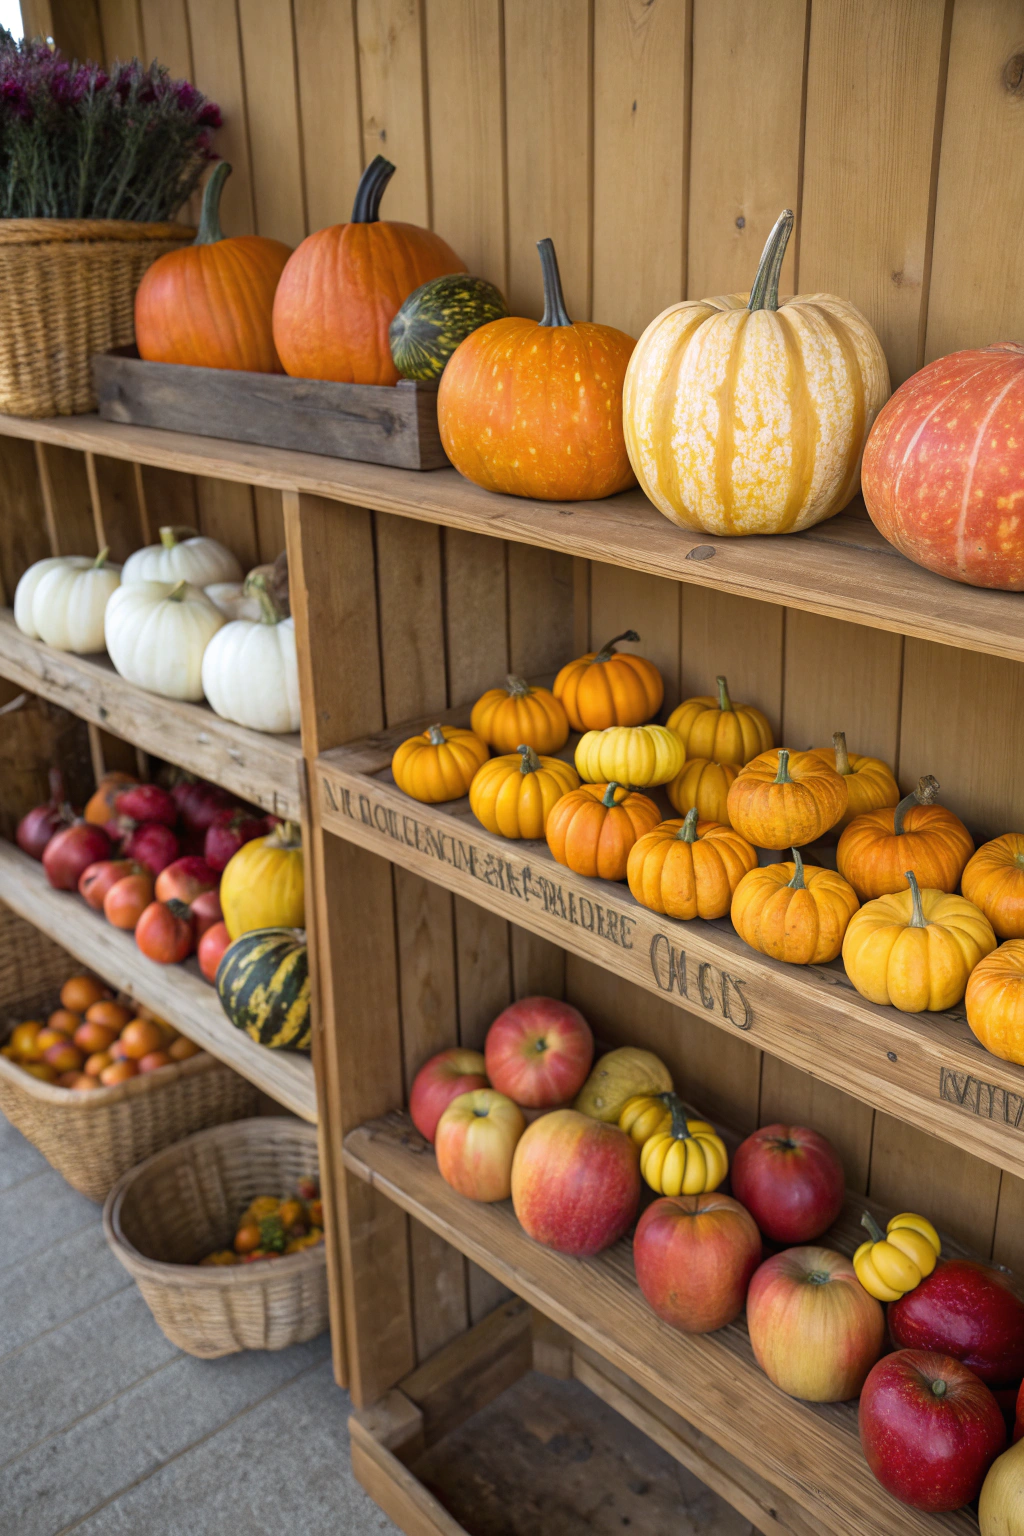
Beyond the practical benefits of better preservation, these customizable shelves add a rustic, inviting touch to any space. Imagine transforming your porch, kitchen, or garden shed into a vibrant display of nature's artistry.
Our guide will walk you through building your unique shelving unit, detailing every step from material selection to final arrangement. You'll gain a beautiful, durable piece of decor that enhances your home and garden, all while providing tangible benefits through improved organization and reduced waste.
Quick Summary
- Benefits: Extends produce freshness, enhances seasonal decor, customizable display.
- Time: Approximately 2-4 hours for construction, plus drying/finishing time.
- Cost: Budget-friendly, typically ranging from $40-$100 depending on materials.
Context & Ideal Conditions
This project is best undertaken during drier seasons, such as late summer or early autumn, to ensure proper wood curing if you’re working with fresh lumber or applying finishes outdoors. The finished wooden shelves displaying seasonal gourds and apples thrive in a location with partial shade to full sun, which helps prevent wood warping and preserves the vibrant colors of your produce.
Temperatures between 50-80°F (10-27°C) are ideal for building and finishing. If your shelves are intended for outdoor display, ensure the wood is treated or sealed to withstand local weather conditions, particularly if you experience high humidity or heavy rainfall. Consider your available area; a 3 ft (0.9 m) wide by 4 ft (1.2 m) tall unit is a versatile starting point, capable of holding up to 50 lbs (22.7 kg) per shelf.
wooden, shelves, displaying, seasonal, gourds: Tools & Materials
To construct your sturdy and attractive wooden shelves displaying seasonal gourds, you’ll need a selection of basic tools and materials. Choosing the right components will ensure longevity and aesthetic appeal for your seasonal display.
- Lumber:
- Four 6 ft (1.8 m) long 2x4s (Southern Yellow Pine or Cedar) for uprights.
- Six 3 ft (0.9 m) long 1x6s (Pine or Poplar, untreated if indoors) for shelves.
- Two 3 ft (0.9 m) long 1x4s (Pine or Poplar) for top and bottom cross braces.
- Fasteners:
- 100 count, 2.5 in (6.4 cm) exterior-grade wood screws (e.g., #8 square drive).
- 50 count, 1.25 in (3.2 cm) exterior-grade wood screws (e.g., #6 square drive).
- Adhesive:
- 1 bottle (10 fl oz / 295 mL) exterior-grade wood glue (e.g., Titebond III).
- Finishing (Optional, but recommended for outdoors):
- 1 quart (0.95 L) exterior wood stain/sealant (e.g., semi-transparent cedar tone).
- 2 in (5 cm) natural bristle paint brush.
- Safety Gear:
- ANSI Z87.1 rated safety glasses.
- EN 388 rated work gloves.
- N95 particulate respirator mask (for sanding/staining).
- Tools:
- Tape measure (25 ft / 7.6 m).
- Pencil.
- Speed square or combination square.
- Power drill/driver (cordless with 18V battery recommended).
- Circular saw or miter saw.
- Orbital sander with 120-grit sandpaper (optional, but recommended for smooth finish).
- Level (2 ft / 0.6 m).
wooden, shelves, displaying, seasonal, gourds: Time, Difficulty & Budget
Achieving a beautiful display of wooden shelves displaying seasonal gourds and apples is a rewarding endeavor. Understanding the time, difficulty, and budget upfront helps in planning. This project is notably more affordable than purchasing pre-made seasonal display units.
| Prep | 30–60 min |
| Build/Plant | 90–150 min |
| Total | 2–3.5 hours |
| Skill Level | Beginner / Intermediate |
| Budget | ≈ $40–$100 (materials/tools) |
This DIY approach is approximately 40-60% cheaper than a comparable store-bought seasonal display shelf. This significant saving allows you to invest more in quality materials or expand your gourd collection!
Step-by-Step Tutorial
Follow these steps to construct your durable and attractive display shelves. Precision at each stage ensures stability and aesthetic appeal.
Step 1 — Layout & Prep
Begin by preparing your workspace and materials. Lay out the four 2×4 uprights on a flat, stable surface. Using your tape measure and pencil, mark the positions for your shelves. We recommend spacing the shelves vertically at 12 inch (30 cm) intervals, which is ideal for various gourd and apple sizes. For a total height of 6 ft (1.8 m), mark shelf positions at 12 in (30 cm), 24 in (60 cm), 36 in (90 cm), and 48 in (120 cm) from the bottom of each upright. Use a speed square to ensure your marks are straight and uniform across all four uprights.
Step 2 — Cutting & Assembly
Using your miter saw or circular saw, cut the 1×6 boards to 3 ft (0.9 m) lengths for your shelves. Cut the 1×4 boards also to 3 ft (0.9 m) lengths for the top and bottom cross braces. Once cut, consider sanding all wood pieces with 120-grit sandpaper and an orbital sander to remove splinters and rough edges. This improves aesthetics and safety. For assembly, apply a bead of exterior-grade wood glue along the marked lines on the uprights where shelves will attach.
Secure each 1×6 shelf board to the 2×4 uprights using 2.5 in (6.4 cm) wood screws, driving two screws through the 2×4 into the end grain of each 1×6 shelf board. Pre-drilling with a 7/64 inch (2.8 mm) drill bit is highly recommended to prevent splitting, especially near board ends. For the 1×4 cross braces, attach them flush with the top and bottom of the uprights using the 1.25 in (3.2 cm) screws, two per joint.
Step 3 — Installation/Planting
Once fully assembled, position your wooden shelves in your desired location. For placement against a wall, ensure the surface is flat and level. Use your 2 ft (0.6 m) level to check the shelves for plumb and level. If the ground or floor is uneven, you may need to use shims made from scrap wood under the uprights to stabilize the unit. Fill the shelves with your seasonal gourds, apples, and other decorative items. Distribute weight evenly to maintain balance and prevent tipping.
Consider placing heavier items on lower shelves. For outdoor settings or high traffic areas, it's wise to anchor the shelves to a wall stud or solid fence post using L-brackets and appropriate fasteners to prevent accidental tipping. Each shelf is designed to comfortably hold up to 50 lbs (22.7 kg) of distributed weight without significant deflection for a total of 200 lbs (90.7 kg) for the entire unit.
Step 4 — Finishing & QA
After assembly, give the entire unit a final inspection. Check for any protruding screw heads or sharp wood edges. Address these by countersinking screws further or using sandpaper (150-grit then 220-grit) for a smoother finish. Apply your chosen wood stain or sealant according to the manufacturer’s instructions. A single coat often suffices for indoor use, while outdoor shelves benefit from 2-3 coats for maximum weather protection, allowing 24 hours of drying time between coats.
Ensure that all surfaces, especially end grains, are thoroughly coated to prevent moisture absorption. Regularly check the stability of the unit, particularly if it will hold significant weight. Press gently on each shelf and rock the unit slightly to confirm it feels secure.
Care & Schedule
Maintaining your wooden shelves is straightforward, ensuring they last for many seasons. For indoor units, a simple dusting or wipe-down with a damp cloth every 2-4 weeks is usually sufficient. Outdoor shelves, however, require a bit more attention due to exposure to elements.
Annually, typically in late spring or early autumn, inspect all fasteners for tightness and potential loosening due to wood expansion/contraction. Re-tighten any loose screws. If applicable, reapply a protective wood sealant or stain every 1-2 years, depending on sun and moisture exposure. This preventive maintenance will significantly extend the life and appearance of your shelves, protecting them from rot, UV damage, and insect infestation. If displaying fresh produce, wash gourds and apples before placement to remove any lurking pests or dirt.
Variations & Adaptations
These versatile wooden shelves can be adapted to almost any space and style. For small spaces or balconies, consider building a narrower unit, perhaps 1.5 ft (0.45 m) wide, with fewer shelves, or a corner unit design. In hot, arid climates, select woods like cedar or redwood which naturally resist rot and insects, and choose lighter stains to reflect heat. For cold, damp climates, pressure-treated lumber (e.g., KDAT certified) is ideal, combined with robust exterior sealants.
You can create a "knock-down" version using barrel nuts and bolts for easy disassembly and storage, perfect for seasonal use. Aesthetic adjustments include painting the wood in harvest colors, applying a distressed finish, or using different wood species like reclaimed barn wood for a truly rustic look. Consider adding small hooks to the sides for hanging decorations or even dried herbs.
Common Mistakes to Avoid
- Undersized Fasteners: Using screws that are too short or thin can compromise structural integrity. Always use recommended lengths (2.5 in / 6.4 cm for main joints) and gauges (#8 minimum).
- No Pre-drilling: Skipping pre-drilling, especially in hardwoods or near board ends, significantly increases the risk of wood splitting, weakening the joint.
- Incorrect Wood Choice: Using untreated interior-grade wood (like standard pine) outdoors leads to rapid deterioration from moisture, UV, and pests. Opt for cedar, redwood, or pressure-treated lumber for external projects.
- Lack of Drainage (for plants): If displaying potted plants with soil, inadequate drainage on solid shelves can lead to root rot and wood damage. Use waterproof liners with drainage holes.
- Overloading Shelves: Exceeding the recommended weight capacity (approx. 50 lbs / 22.7 kg per shelf for this design) can cause sagging, joint failure, or collapse. Distribute weight evenly.
- Poor Orientation: Placing outdoor shelves where they receive constant, direct rain without proper finishing will lead to premature wear. Consider a covered area or adequate sealing.
- Neglecting Finishing: Not staining or sealing outdoor wooden shelves exposes them to moisture, UV radiation, and mildew, drastically shortening their lifespan and aesthetic appeal.
Sustainability, Safety & Regulations
Embracing sustainability in your DIY projects not only benefits the environment but often saves money. Consider using salvaged wood from old fences, pallets, or demolition sites; always ensure it’s free of hazardous chemicals. For outdoor units, collecting rainwater for any potted plants on your shelves is an excellent eco-friendly practice. When applying stains or sealants, opt for low-VOC (Volatile Organic Compound) products to minimize air pollution.
Safety is paramount. Always wear your ANSI Z87.1 rated safety glasses when cutting or drilling, and EN 388 rated work gloves to protect your hands from splinters and abrasions. Keep a stable footing and ensure your workspace is well-lit and clear of obstructions. If children or pets are present, secure the shelves to a wall to prevent tipping. Check local homeowner association (HOA) rules or city ordinances for any height restrictions or setback requirements for outdoor structures, especially if your shelves are large or close to property lines. Dispose of wood scraps and sawdust responsibly, ideally through composting untreated wood or recognized green-waste facilities.
Measure the Outcome
To truly appreciate the success of your DIY shelving unit, consider tracking a few key performance indicators. For example, monitor the survival rate of gourds and apples on the shelves versus those stored elsewhere; you might find a 15-20% reduction in spoilage.
If using for plants, measure growth in inches (cm) per month. Quantify your cost savings by comparing the total cost of your DIY project to similar store-bought units, estimating a saving of $60-$100 (or more if you used reclaimed materials). Finally, consider the time saved by having organized produce at your fingertips, and the satisfaction of a handmade, beautiful seasonal display.
Conclusion
Building your own wooden shelves for displaying seasonal gourds and apples is a rewarding project that combines practicality with aesthetic appeal. You’ve learned how to select materials, construct a sturdy unit, and ensure its longevity with proper care. This DIY endeavor not only enhances your home’s seasonal decor but also offers significant savings and better preservation of your harvest.
We encourage you to embark on this project and experience the satisfaction of creating something beautiful and functional with your own hands. Share your creations, comment with your tips, and inspire others to embrace the warmth of autumn in their homes and gardens.
FAQ
Q: What’s the best type of wood for outdoor shelves?
A: For outdoor use, cedar, redwood, or pressure-treated pine are excellent choices due to their natural resistance to rot and insects. Cedar offers a beautiful aroma and aesthetic, while pressure-treated pine is more economical.
Q: Can I build this without power tools?
A: Yes, you can! A hand saw, manual drill (brace and bit), and a good set of screwdrivers can substitute for power tools. It will take longer and require more effort, but it’s entirely feasible for those preferring a no heavy-tool approach.
Q: How long will these shelves last outdoors?
A: With proper material selection (e.g., cedar or treated pine) and annual re-sealing, your outdoor shelves can easily last 5-10 years, and potentially longer depending on your climate and maintenance routine.
Q: What if my gourds start to rot on the shelves?
A: Ensure good air circulation around each gourd. Avoid overcrowding. Inspect items before placing them and remove any that show signs of spoilage immediately to prevent it from spreading. You can also place a thin layer of straw or newspaper between items to absorb moisture.
Q: How can I prevent the shelves from tipping over?
A: For stability, especially if placed outdoors or on uneven surfaces, anchor the top of the unit to a wall stud or sturdy fence post using L-brackets and appropriate heavy-duty screws. Distributing weight evenly with heavier items on lower shelves also improves stability.
Q: Are there low-cost material options?
A: Absolutely. Reclaimed pallet wood is a fantastic, low-cost option, often available for free. Just ensure it’s heat-treated (marked HT) rather than chemically treated (MB) and be prepared for extra sanding and de-nailing.
Q: How do I choose the right size of shelves for my space?
A: Measure your available space thoroughly first. Consider the largest items you plan to display and ensure adequate shelf depth and height. You can easily scale down the dimensions provided in this guide to fit smaller areas, such as a compact patio or kitchen corner.
Internal & External Links
Discover more about enhancing your autumn garden with our guide to Rustic Garden Tables with Autumn Flower Displays. Explore creative ways to store your harvest with Wooden Crates for Fall Decor. For additional garden tools and tips, check out our insights on Garden Tool Maintenance. Also, find inspiration on Recycled Garden Decor Ideas for sustainable outdoor living. Don’t forget to visit our Pinterest Boards — Garden & DIY inspiration for a visual feast of garden and home projects.


