Ultimate Guide: Build a Self-Watering Raised Bed for Under $50
Tired of daily watering, especially during scorching summers? Imagine a garden bed that practically waters itself, ensuring your plants thrive even when you’re busy or away. This comprehensive guide will walk you through building an inexpensive, efficient, and incredibly effective self-watering raised bed, also known as a wicking bed, for under $50. Get ready to transform your gardening experience with this game-changing self watering raised bed DIY project.
[lwptoc]
Why This Matters for Your Garden (and Your Wallet!)
The concept of a self-watering raised bed is revolutionary for both novice and experienced gardeners. It’s an ingenious system that uses capillary action to draw water from a reservoir up into the soil, providing consistent moisture directly to plant roots. This eliminates much of the guesswork and labor associated with traditional watering methods.
One of the most significant benefits is water conservation. Traditional watering often leads to significant evaporation and runoff, wasting precious water. A wicking bed drastically reduces water loss by supplying moisture from below, directly where it’s needed most, leading to healthier plants and a lower water bill.
Beyond water efficiency, these beds promote superior plant growth. Consistent moisture levels prevent the stress caused by fluctuating wet and dry soil conditions, which can lead to stunted growth or disease. Your plants will develop deeper root systems as they seek out the water source, making them more resilient to drought once established.
Furthermore, this system reduces weed growth. Because the soil surface remains relatively dry, weed seeds are less likely to germinate and thrive, meaning less time spent kneeling and pulling out unwanted invaders. It’s also a fantastic solution for gardeners with limited mobility, as the raised height reduces bending and kneeling.
The “under $50” budget makes this project accessible to almost everyone, proving that sustainable and effective gardening doesn’t have to break the bank. You’ll be utilizing readily available and often recycled materials, further enhancing the eco-friendly aspect of this build. Prepare to say goodbye to daily watering chores and hello to a flourishing garden with minimal effort!
What You Need: Tools, Materials, and Ideal Plants
Before diving into the construction, gathering all your components is crucial. This budget-friendly project relies on smart material choices and a few basic tools. Remember, flexibility is key; you can often substitute materials with what you have on hand or can source cheaply.
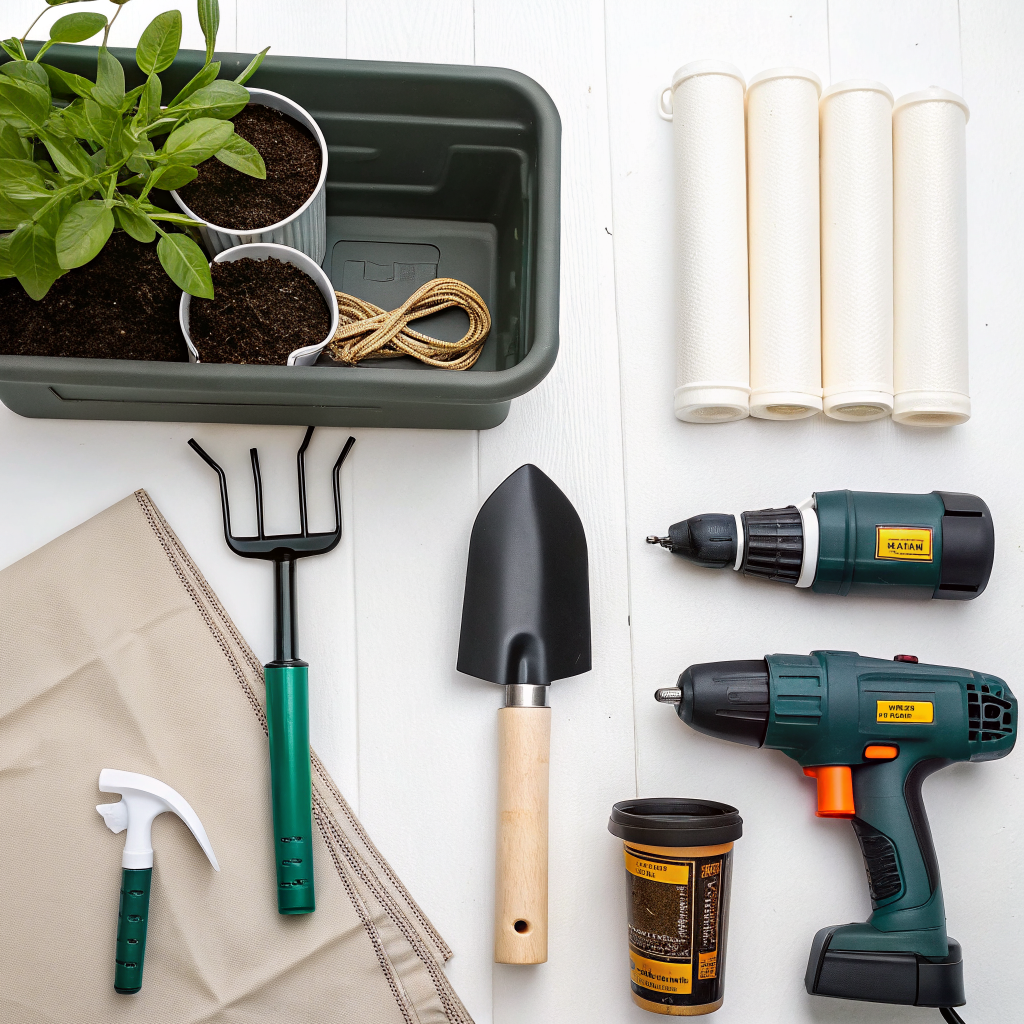
Tools:
- Drill with various drill bits (including a spade bit or hole saw for larger holes)
- Measuring tape
- Utility knife or strong scissors
- Saw (hand saw, circular saw, or jigsaw, depending on your material)
- Staple gun (optional, for securing liner)
- Shovel
Materials (approximate costs for under $50 budget):
- Container/Frame (Free-$15): This is where you can save a lot! Look for old wooden pallets (check for heat-treated “HT” stamp, avoid “MB” – methyl bromide treated), repurposed plastic barrels (food-grade if possible, cut in half), large sturdy plastic totes (30-50 gallon size recommended), or even concrete blocks. For wood, make sure it’s untreated or use a food-safe sealant for the interior. Tip: Community groups or local businesses often give away pallets or large containers.
- Pond Liner/Heavy-Duty Tarp (Free-$15): Essential for creating a waterproof reservoir. Look for old shower curtains, heavy-duty tarpaulins, or thick plastic sheeting. Ensure it’s durable enough to hold water without tearing.
- Drainage Pipe/Perforated Pipe (Free-$5): A 2-4 inch diameter PVC pipe, roughly the length of your bed, with holes drilled into it. Old corrugated drain pipe works perfectly. This ensures water distributes evenly in the reservoir.
- Water Inlet Pipe (Free-$3): A narrower PVC pipe (1-1.5 inches diameter) about 1-2 feet long, for refilling the reservoir. An old downspout extension or even a sturdy plastic bottle with the bottom cut off can work.
- Overflow Pipe (Free-$2): A small piece of PVC or similar pipe, about 1-2 inches diameter, that will determine the maximum water level in your reservoir.
- Wicking Material (Free-$10): ½ to 1 cubic foot of coarse gravel, lava rock, perlite, or even scrunched-up plastic bottles (for a super cheap option). This creates the water reservoir layer. Large sponges or old cloth can also enhance wicking.
- Geotextile Fabric/Old Burlap/Cardboard (Free-$5): A layer to separate the wicking material from the soil. Prevents soil from washing into the reservoir but allows water to pass. Old t-shirts or landscape fabric scraps work too.
- Soil Mixture (Free-$10): The most important ingredient! A good quality raised bed mix is ideal, but you can create your own. Combine compost (often free from local municipalities or your own pile), topsoil, and vermiculite or perlite for aeration. Avoid heavy garden soil that compacts easily.
Ideal Plants for a Self-Watering Raised Bed:
Self-watering beds are fantastic for plants that appreciate consistent moisture. They are less ideal for plants that prefer dry conditions or extremely well-drained soil (like many herbs from Mediterranean climates, or root vegetables prone to rot). Focus on plants that thrive in regular moisture.
- Leafy Greens: Lettuce, spinach, kale, Swiss chard, arugula – these all love consistent moisture and will bolt less quickly.
- Fruiting Vegetables: Tomatoes, peppers, eggplants, cucumbers, zucchini, squash, strawberries – these heavy feeders produce abundant crops with steady water supply.
- Herbs: Basil, mint (especially good in a contained environment), parsley, cilantro.
- Flowers: Many annuals and some perennials that enjoy moist soil, like impatiens, petunias, coleus, and cosmos.
Avoid things like rosemary, lavender, and carrots, which can suffer from too much moisture. Root vegetables like potatoes may also struggle if the soil is too wet for prolonged periods.
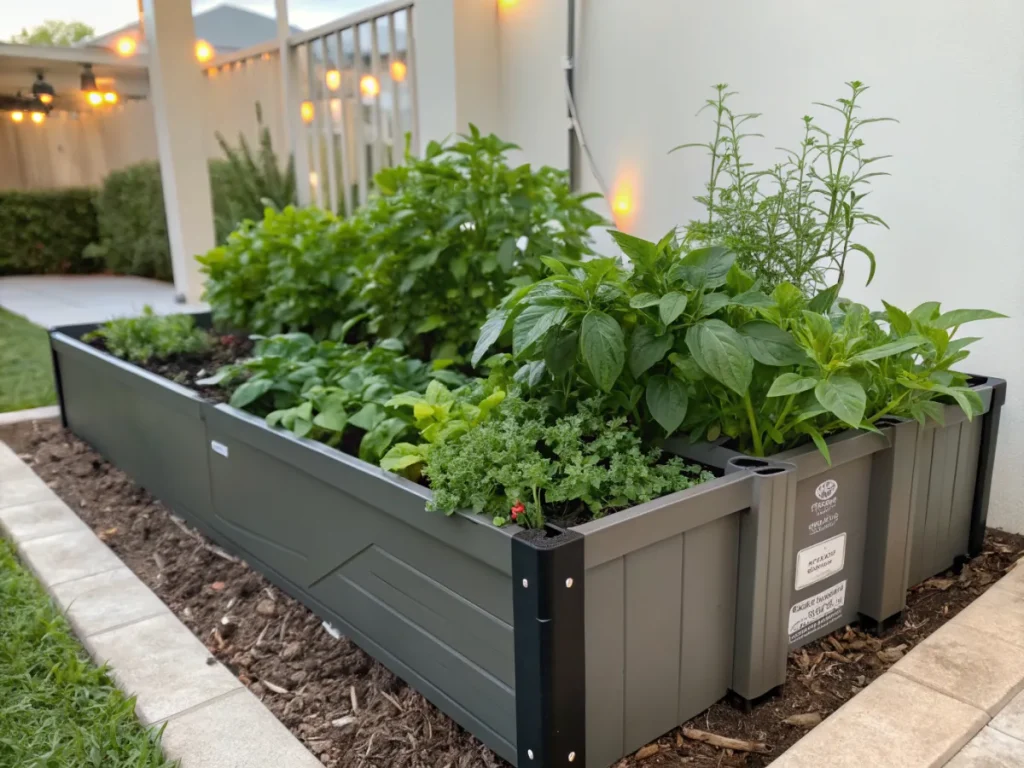
Step-by-Step Guide: Building Your Wicking Wonderland
This is where your vision comes to life! Follow these steps carefully for a functional and durable self-watering raised bed. The exact dimensions will depend on your chosen container, but the principles remain the same.
Step 1: Prepare Your Container
First, if you’re using a large plastic barrel, carefully cut it in half horizontally. For wooden pallets, disassemble them and cut the planks to size to build a rectangular or square frame. If using sturdy plastic totes, ensure they are clean. No matter your container, make sure its base is sturdy and level where it will reside in your garden.
If your container already has drainage holes from previous use, you may need to patch them temporarily for lining, or simply ensure your liner covers them effectively. The goal is to create a watertight box.
Step 2: Install the Reservoir Liner
Lay your pond liner or heavy-duty tarp inside the container, draping it over the edges. Ensure there’s plenty of slack in the corners to prevent tearing when filling. Smooth out as many wrinkles as possible on the bottom.
Secure the liner initially with staples or clips to the top edge of your container, but don’t finalize the trim yet. We want to test its water retention ability later.
Step 3: Create the Water Reservoir System
Lay your perforated drainage pipe along the bottom of the lined bed. If your bed is long, multiple pipes can be used, connected by a T-joint if desired, to ensure even water distribution. Drill additional holes into the top surface of this pipe if needed to ensure water can easily exit into the wicking material.
Next, position your water inlet pipe. Stand it upright in one corner or along one side of the bed, ensuring it reaches just above the finished soil level. It should sit directly on the bottom of the container, extending into the wicking layer.
Now, place your overflow pipe. This is critical! Drill a hole through the side of your container liner, about 4-6 inches from the bottom, depending on your desired reservoir depth. Insert the overflow pipe through this hole. This pipe will prevent the soil from becoming waterlogged by letting excess water drain out. The height of this pipe determines the maximum water level in your reservoir.
Step 4: Add the Wicking Layer and Separation Fabric
Carefully pour your chosen wicking material (gravel, lava rock, scrunched-up plastic bottles, etc.) around the drainage pipe and over the entire bottom of the lined bed. This layer should be about 4-6 inches deep, matching the height of your overflow pipe. This forms the water reservoir that feeds your plants.
Once the wicking layer is spread evenly, place your geotextile fabric, old burlap, or cardboard directly on top of it. This fabric acts as a barrier, preventing soil from mixing with the wicking material while still allowing water to pass through freely. Cut it to fit the shape of your bed, ensuring it covers the entire wicking layer.
Step 5: Fill with Soil and Plant
Now for the main event! Fill the bed with your high-quality soil mixture, leaving about an inch or two from the top edge of your container. Gently firm the soil, but avoid compacting it too much, as good aeration is still important for roots.
After filling with soil, it’s time to water the bed thoroughly from the top for the very first time. This initial watering helps settle the soil and fully saturate it. Continue watering until you see water flowing out of the overflow pipe. This indicates your reservoir is full.
Finally, plant your chosen vegetables, herbs, or flowers. Place your plants at their recommended spacing, making sure to disturb their roots as little as possible. Give them a final light watering from the top to help them settle into their new home. Your self watering raised bed DIY is complete!
Pro Tips and Common Mistakes to Avoid
Building a self-watering raised bed is straightforward, but a few insider tips can elevate your success, and being aware of common pitfalls will save you headaches.
Pro Tips:
- Initial Top Watering is Key: While the system is “self-watering” most of the time, the very first watering from the top is crucial. This helps establish capillary action and ensures the entire soil column is initially moist, encouraging roots to grow downwards. For newly transplanted seedlings or seeds, continue top-watering lightly for the first week or two until they establish.
- Monitor the Water Level: Periodically check the water level in your reservoir through the inlet pipe. A simple dipstick can be a useful tool. Refill when it’s low, especially during hot, dry periods or when plants are actively fruiting.
- Choose the Right Plants: As mentioned, not all plants are created equal for wicking beds. Stick to moisture-loving plants to maximize your yield and avoid issues like root rot.
- Consider the Sun: Even with a self-watering system, plants still need adequate sunlight. Position your bed in a spot that receives appropriate sun exposure for your chosen crops (typically 6-8 hours for most vegetables).
- Nutrient Management: While wicking beds are great for water, nutrients can sometimes be leached over time, especially with continuous watering. Consider a slow-release granular organic fertilizer mixed into the top 6 inches of soil at the beginning of the season, or plan for occasional liquid feed applications through the inlet pipe. For more on organic gardening, visit nouvelles-technologie.com/category/sustainable-living-tips/.
- Winterizing: If you live in an area with freezing winters, drain the reservoir completely to prevent expansion and potential damage to your container or liner when water freezes.
Common Mistakes to Avoid:
- No Overflow Hole: This is perhaps the most critical error. Without an overflow, heavy rains or overfilling the reservoir will lead to waterlogged soil, suffocating plant roots and causing rot. Always include an overflow pipe at the correct height.
- Wrong Soil Type: Using heavy clay soil or poorly draining garden soil will negate the benefits of a wicking bed. It will compact, prevent good aeration, and make it difficult for water to wick up effectively. Use a light, airy raised bed mix rich in compost.
- Liner Punctures: Be extremely careful when filling with wicking material or soil to not puncture the liner. A small hole can quickly lead to a leaky reservoir and a non-functional bed. Smooth rocks or sharp edges in your container can be culprits.
- Too Much Wicking Material/Too Little Soil: If your wicking layer is too deep relative to your soil depth, or if you don’t have enough soil, the capillary action might not be strong enough to reach the plant roots effectively. Aim for at least 8-10 inches of soil above the wicking layer.
- Forgetting the Separation Layer: Without the geotextile fabric or similar barrier, your soil will gradually wash down into the wicking material, clogging the reservoir and making the system ineffective.
- Not Considering Container Durability: If using wood, ensure it’s untreated or properly sealed for longevity. Repurposed plastic needs to be sturdy enough to hold the weight of water and soil without bowing or cracking. For more DIY home projects, check out nouvelles-technologie.com/category/home-improvement/.
Eco-Friendly Variations & Material Sourcing
One of the beautiful aspects of a self watering raised bed DIY is its inherent eco-friendliness. You’re conserving water and reducing effort. But you can take it a step further by consciously sourcing your materials. Sustainability isn’t just about the end product; it’s about the entire lifecycle.
- Reclaimed Wood: Instead of new lumber, hunt for reclaimed wood. Old fence posts, deck boards, or even fallen trees (if you have the tools to mill them) can make beautiful and rustic raised bed frames. Always ensure the wood is untreated or sealed with a food-safe product for internal contact with soil.
- Scrap Plastic: For the reservoir, consider using old food-grade plastic barrels from local businesses (bakeries, car washes, food processing plants sometimes give these away). Even sturdy plastic storage bins from thrift stores can be repurposed. Cut up old plastic bottles or containers for your wicking material instead of buying gravel – this is a fantastic way to recycle “beyond the bin.”
- Natural Liners: While pond liner is effective, for smaller beds, you could experiment with multiple layers of thick, natural rubber sheeting (though this can be more expensive) or even very heavy-duty, biodegradable cardboard layers (though these won’t last as long).
- Homemade Compost: This is arguably the most eco-friendly soil component. Start your own compost pile! It diverts organic waste from landfills, enriches your soil, and saves you money. Many municipalities also offer free or low-cost compost to residents.
- Rainwater Harvesting: Elevate your eco-game by connecting a rain barrel to collect water for filling your self-watering bed. This creates a truly closed-loop, sustainable watering system. For tips on maximizing your home’s efficiency, visit nouvelles-technologie.com/category/home-efficiency-tips/.
- Native Plants for Companion Planting: While growing edibles, consider integrating native flowering plants or herbs that attract beneficial insects and pollinators. This reduces the need for pesticides and supports local ecosystems.
By opting for salvaged, recycled, and locally sourced materials, you not only reduce your project’s cost but also its environmental footprint. Think creatively about what resources are available in your community and how they can be given a new life in your garden.
Seasonal Considerations for Your Self-Watering Bed
A self-watering raised bed simplifies gardening, but understanding how seasons impact its performance and your plants is crucial for sustained success.
Spring:
- Startup & Planting: This is the ideal time to build and install your bed. Once built, fill the reservoir and top-water thoroughly.
- Initial Feeding: Mix in slow-release organic fertilizers or compost into the topsoil layer before planting your spring crops (leafy greens, peas, early carrots, radishes).
- Monitor Moisture: Spring weather can be unpredictable. Check the reservoir weekly, but also keep an eye on soil moisture by touch, especially during unusual dry spells or heavy rains.
Summer:
- Peak Performance: Your self-watering bed really shines in summer! It provides consistent moisture to thirsty plants like tomatoes, cucumbers, and peppers, preventing them from wilting in the heat.
- Frequent Refills: Expect to refill the reservoir more often, possibly every few days or even daily for very large, productive plants during heatwaves.
- Nutrient Boost: Heavy-feeding plants will benefit from a liquid organic fertilizer applied through the water inlet pipe every few weeks.
- Mulching: Apply a layer of organic mulch (straw, shredded leaves, wood chips) on the soil surface to further reduce evaporation and keep soil temperatures stable. This is especially beneficial in self-watering beds as the surface can still dry out.
Autumn:
- Transition Crops: As summer crops fade, plant fall-harvesting vegetables like kale, collards, broccoli, or more lettuce.
- Reduced Watering: As temperatures drop and daylight shortens, plants require less water. Reduce the frequency of reservoir refills.
- Harvest & Clean-up: Harvest remaining crops. Remove dead plant material and replenish the soil with fresh compost if you plan to plant a winter crop or prepare it for next spring.
Winter:
- Draining the Reservoir (Crucial): In regions with freezing temperatures, it is absolutely vital to completely drain the water reservoir. Freezing water expands and can crack plastic containers or damage liners, ruining your bed.
- Protecting the Soil: If leaving the bed open, consider covering the soil with a layer of mulch or a tarp to protect it from harsh winter elements and prevent nutrient leaching.
- Winter Crops (Optional): In milder climates, you might continue growing cold-hardy greens with the help of a cold frame or hoop house built over your self-watering bed. Remember that even cold-hardy plants need some moisture, so monitor sparingly.
By adapting your gardening practices to the seasonal rhythms, your self-watering raised bed will remain a productive and low-maintenance asset to your garden year-round.
Expert Resources for Advanced Gardening
To further enhance your gardening knowledge and build upon the foundation of your new self-watering raised bed, here are some invaluable external resources from trusted horticultural experts:
- Gardening Know How: Understanding Soil for Healthier Plants
A good understanding of soil science is fundamental to successful gardening, especially in raised beds. Gardening Know How offers a wealth of articles on soil types, nutrients, and amendments. Delve deeper into creating the perfect soil blend to complement your wicking bed system.
- Royal Horticultural Society (RHS): Raised Beds & Keyhole Gardens
The RHS is a globally respected authority in horticulture. Their resources on raised beds provide comprehensive insights into design, construction, and planting strategies beyond just the self-watering aspect. You can learn about companion planting, crop rotation, and optimal plant choices for various raised bed setups.
- University of Minnesota Extension: Sustainable Home & Garden Practices
University extension programs are fantastic sources of research-based, practical advice. The University of Minnesota Extension provides excellent guides on sustainable gardening, water conservation, and specific plant care tailored to various climates. Their resources can help you refine your watering schedule, pest management, and overall garden ecology.
These resources offer a deeper dive into the science and art of gardening, ensuring your self-watering raised bed project is just the beginning of a truly flourishing and sustainable garden.
Conclusion: Your Self-Watering Oasis Awaits
Congratulations! You’ve just equipped yourself with the knowledge and steps to build a game-changing self-watering raised bed for less than $50. This isn’t just about saving money; it’s about saving time, conserving water, and fostering a healthier, more productive garden with minimal effort.
Embrace the satisfaction of nurturing flourishing plants with consistent moisture, even during the busiest of weeks. This self watering raised bed DIY project is a testament to how creative repurposing and clever design can yield incredible results. Get ready to enjoy bigger harvests, healthier plants, and more time to simply admire your sustainable, self-sufficient gardening oasis.
Happy gardening!
Frequently Asked Questions (FAQ)
Q1: What kind of plants are NOT suitable for a self-watering raised bed?
A1: Plants that prefer very dry conditions or extremely well-drained soil are generally not suitable. This includes many Mediterranean herbs like rosemary, lavender, and thyme, as well as some root vegetables like carrots or potatoes, which can be prone to rot if the soil is consistently too wet. Cacti and succulents are also a definite no.
Q2: How often do I need to refill the reservoir?
A2: The frequency depends on several factors: the size of your bed, the type and size of plants, the external temperature, and humidity. During hot summer months with large, thirsty plants (like tomatoes), you might need to refill every 2-3 days. In cooler weather or with smaller plants, it could be once a week or every two weeks. Regularly check the water level via the inlet pipe.
Q3: Can I use this system indoors or on a patio?
A3: Absolutely! Small-scale versions of this self-watering system (often called “sub-irrigated planters”) are perfect for indoor use or patios. Just ensure you have a tray underneath to catch any overflow from the drain hole, especially after heavy rains or overfilling. The principles remain the same.
Q4: Will the self-watering bed attract mosquitoes?
A4: With a properly designed overflow system, standing water is mostly contained within the reservoir, beneath the soil. However, if your overflow pipe is just an open hole, or if water is sitting stagnant on the surface, it could attract mosquitoes. To mitigate this, ensure your overflow pipe has some form of screening or is designed to fully drain excess water. Some people add mosquito dunks (Bacillus thuringiensis israelensis) to the reservoir, which kill mosquito larvae but are harmless to plants, pets, and humans.