The Ultimate Guide to Making 100% Free Fertilizer from Kitchen Scraps: Boost Your Garden Naturally
Are you looking to cultivate a thriving garden without breaking the bank on expensive fertilizers? Do you want to reduce your household waste and embrace a more sustainable lifestyle? If so, you’ve landed in the perfect place! This comprehensive guide will transform your perception of kitchen scraps, turning what you once considered trash into gardening gold. Discover how easy it is to create nutrient-rich, free fertilizer from kitchen scraps, nourishing your plants naturally and helping the environment along the way.
[lwptoc]
Why This Matters: The Unseen Power of Your Kitchen Waste
Every time you peel a banana, brew a cup of coffee, or crack an egg, you’re inadvertently discarding a wealth of valuable nutrients that your garden craves. Think of it as a hidden treasure chest of essential minerals, organic matter, and beneficial microorganisms just waiting to be unlocked. Instead of sending these precious resources to a landfill where they contribute to methane gas production, you can redirect them to your garden, creating a powerful, free fertilizer from kitchen scraps.
The benefits extend far beyond just cost savings. Commercial fertilizers, while effective, often come with environmental drawbacks. They can contribute to water pollution through runoff and are energy-intensive to produce. By utilizing your own kitchen waste, you’re choosing an organic, sustainable, and entirely natural approach to plant nutrition. This method improves soil structure, enhances microbial activity, and provides a slow-release of nutrients, promoting stronger, healthier plants from the roots up. It’s a truly circular economy in your backyard!
Imagine healthier vegetable yields, vibrant flower blooms, and robust, disease-resistant plants, all fueled by materials you would have otherwise thrown away. This approach not only saves you money but also reduces your environmental footprint. It’s a win-win for your wallet, your garden, and the planet. Let’s delve into the exciting world of transforming your daily kitchen discards into a gardener’s secret weapon.
What You Need: Tools and Materials for Your Fertilizer Factory
One of the beauties of making free fertilizer from kitchen scraps is how little specialized equipment you actually need. Most of what you require is likely already in your kitchen or shed. The key is simply to gather the right scraps and have a few basic containers on hand.
Essential Kitchen Scraps:
- Banana Peels: Rich in potassium, essential for fruit development, flowering, and overall plant health.
- Eggshells: An excellent source of calcium, which strengthens plant cell walls, prevents blossom end rot, and balances soil pH.
- Coffee Grounds: Add nitrogen, beneficial for leafy growth, and slightly acidify the soil, which many plants appreciate.
- Vegetable Scraps: (Non-oily, non-meat) Think potato peels, carrot tops, outer layers of onions, leafy greens. These provide a diverse array of micronutrients and organic matter.
- Tea Bags/Loose Tea Leaves: Similar to coffee grounds, they add nitrogen and organic material.
- Fruit Scraps: (Non-citrus, non-mouldy) Apple cores, pear peels, etc., contribute various vitamins and minerals.
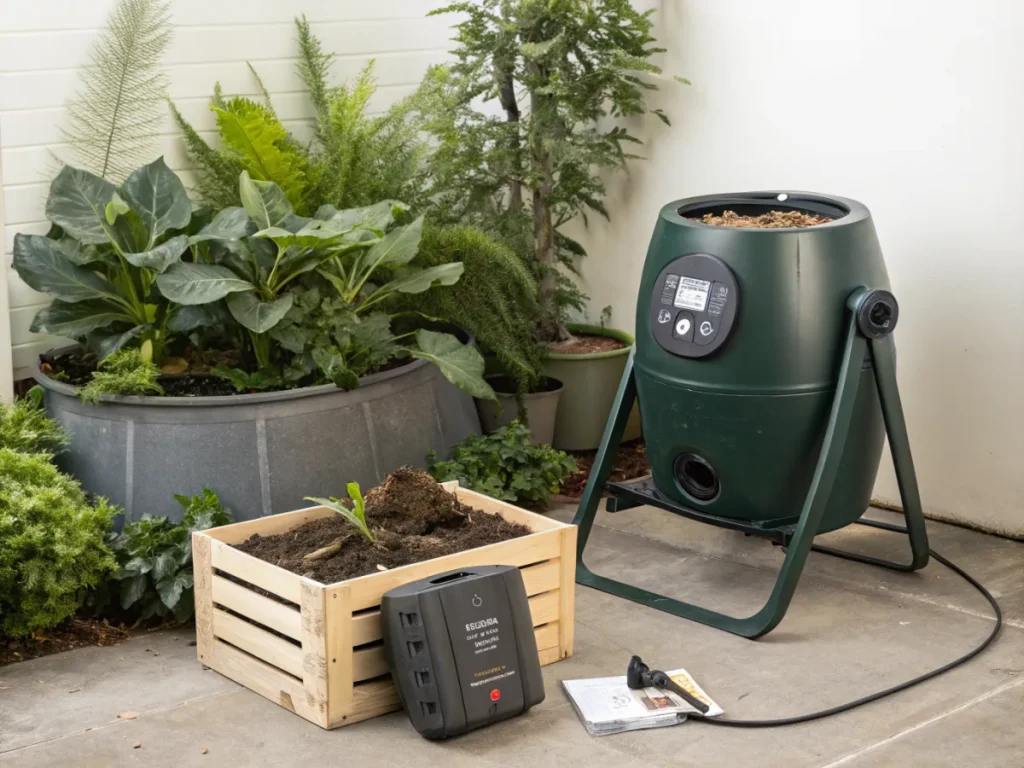
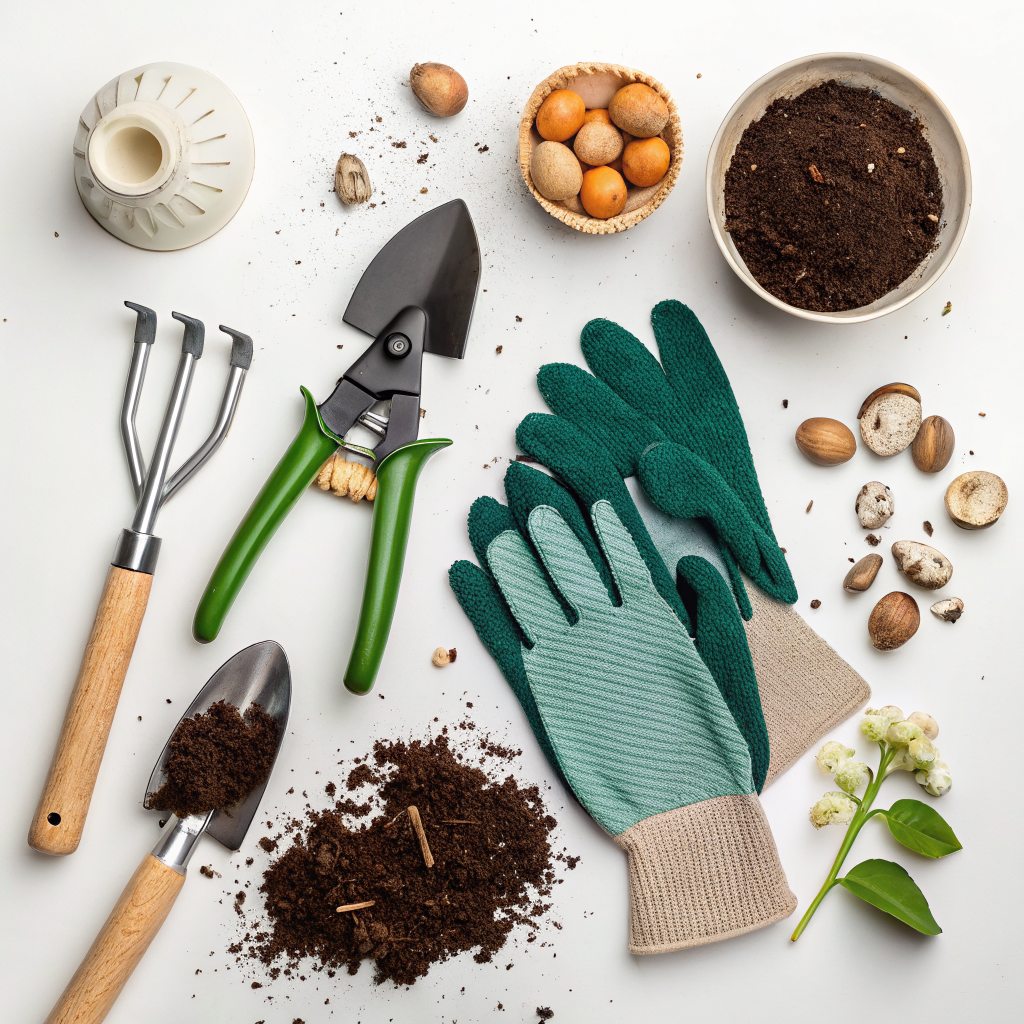
Tools and Other Materials:
- Compost Bin/Pile: The most common method. This can be a store-bought tumbler, a simple three-sided pallet structure, or even just a designated spot in your yard.
- Airtight Container with Lid: For collecting daily scraps before adding them to your main composting system or preparing liquid fertilizers.
- Watering Can/Spray Bottle: For applying liquid fertilizers.
- Blender/Food Processor: Optional, but highly recommended for creating quick, potent liquid fertilizers or finely ground amendments.
- Shovel/Trowel: For turning compost.
- Gloves: To keep your hands clean.
- Straw, Dried Leaves, Wood Chips: “Brown” materials are crucial for balancing “green” kitchen scraps in a compost heap.
Step-by-Step Guide: Transforming Scraps into Garden Gold
There are several fantastic ways to make free fertilizer from kitchen scraps, each with its own advantages. We’ll cover the most effective and popular methods so you can choose what works best for your garden and lifestyle.
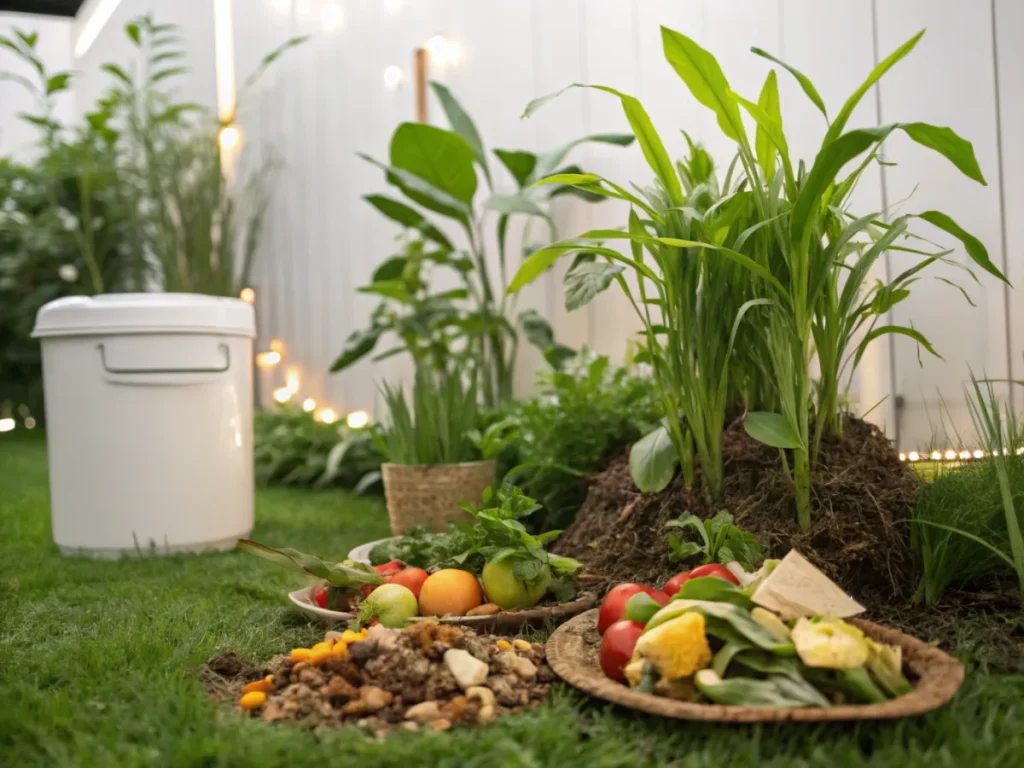
Method 1: Direct Burying/Trench Composting (The Simplest Approach)
- Collect Scraps: Gather your suitable kitchen scraps in an airtight container for a few days.
- Choose Your Spot: Select an area in your garden near plants that could use a boost, or where you plan to plant in the future. Avoid burying directly at the base of very young seedlings, as decomposition can generate heat.
- Dig a Trench or Hole: Dig a hole or trench about 6-12 inches deep. The depth is important to prevent pests and ensure proper decomposition.
- Bury the Scraps: Place a layer of kitchen scraps into the hole or trench.
- Cover Completely: Cover the scraps thoroughly with at least 6 inches of soil. This helps decomposition, prevents odors, and keeps critters away. Over time, the scraps will break down, releasing nutrients directly into the soil where plant roots can access them. Repeat this process regularly in different areas of your garden.
Method 2: Compost Pile/Bin (The Classic Method for Bulk Fertilizer)
- Begin with a Base Layer: Start your compost pile or bin with a good layer of “brown” materials like dried leaves, straw, or small twigs. This ensures good airflow.
- Add Green and Brown Layers: Continuously add layers of your “green” kitchen scraps (rich in nitrogen) and “brown” materials (rich in carbon). Aim for a ratio of roughly 1 part green to 2-3 parts brown. This balance is critical for efficient decomposition.
- Keep it Moist: Your compost pile should feel like a wrung-out sponge – damp, but not soaking wet. Water it if it’s too dry, especially during hot weather.
- Turn Regularly: Use a pitchfork or shovel to turn the compost pile every 1-2 weeks. This aerates the pile, speeds up decomposition, and ensures an even mix. Regular turning is key to a hot, active compost.
- Harvest Your Compost: Once the material at the bottom of your pile is dark, crumbly, and smells like fresh earth, it’s ready. This nutrient-rich compost can be dug into garden beds, used as a top dressing, or mixed into potting soil. This process of creating free fertilizer from kitchen scraps can take anywhere from 2 months to a year, depending on conditions and turning frequency.
Method 3: Liquid Fertilizer (Compost Tea or Scraps Soak)
Liquid fertilizers provide an immediate nutrient boost to plants and are great for foliar feeding or watering. You can create a potent free fertilizer from kitchen scraps quickly using this method.
- Choose Your Scraps: Banana peels and coffee grounds are excellent for liquid fertilizers. You can also include general vegetable scraps.
- Chop and Combine: Roughly chop your chosen scraps. For quicker results, you can blend them with some water to create a sludge.
- Soak in Water: Place the chopped or blended scraps (or just whole banana peels) into a bucket and cover them with water. For coffee grounds, you can simply steep them in warm water.
- Steep: Allow the mixture to steep for 3-7 days. Stir it daily. The longer it steeps, the stronger the “tea.”
- Strain and Dilute: Strain out the solids. The remaining liquid is your concentrated fertilizer. Dilute it with water until it resembles weak tea. A typical dilution is 1:10 (1 part concentrate to 10 parts water) for general use.
- Apply: Use the diluted liquid to water your plants or spray on their leaves (foliar feeding) for a quick nutrient uptake. The strained solids can be added to your compost pile or buried directly in the garden.
- Banana Peel Tea: Chop 2-3 banana peels, steep in a gallon of water for a week. Strain and use. Excellent for flowering and fruiting plants due to high potassium.
- Coffee Ground/Tea Leaf Solution: Steep used coffee grounds or tea leaves in water overnight. Dilute and use to give a nitrogen boost to leafy greens.
- Eggshell Water: Crush eggshells finely, steep in water for a few days. The water will absorb some calcium, though less effectively than direct application of crushed shells. Best to just add crushed shells directly to soil or compost.
Method 4: Direct Application of Specific Scraps
Some scraps can be applied directly to the soil around your plants for targeted benefits.
- Eggshells: Wash and dry eggshells thoroughly. Crush them into a fine powder (a coffee grinder works wonders). Sprinkle the powdered eggshells around the base of plants, especially tomatoes, peppers, and brassicas, to provide calcium and deter slugs. You can also mix them into the soil when planting.
- Coffee Grounds: Sprinkle used coffee grounds directly around acid-loving plants like blueberries, rhododendrons, and azaleas. Mix them lightly into the topsoil. They provide a gentle nitrogen boost and can help deter some pests. Avoid applying thick layers, as they can sometimes compact and repel water. You can find more detail about using coffee grounds in your garden at nouvelles-technologie.com.
- Banana Peels: Chop banana peels into small pieces and bury them a few inches deep near the base of flowering or fruiting plants. They will slowly release potassium and other nutrients. Alternatively, you can dry and powder them for easier incorporation.
Method 5: Vermicomposting (Worm Composting)
While requiring a dedicated worm bin (easily DIYed or purchased), vermicomposting is an incredibly efficient way to turn specific kitchen scraps into powerhouse free fertilizer. Red wiggler worms consume your scraps and excrete nutrient-rich “worm castings.”
- Set Up Your Worm Bin: Ensure it has drainage, ventilation, and bedding (shredded newspaper, cardboard, or coconut coir).
- Add Worms: Introduce red wigglers to their new home.
- Feed Scraps: Add small amounts of kitchen scraps (vegetable and fruit scraps, coffee grounds, tea bags, crushed eggshells) to one area of the bin. Bury them slightly under the bedding. Avoid meat, dairy, oily foods, and citrus, as these can harm the worms.
- Maintain Conditions: Keep the bedding moist (like a damp sponge) and the bin in a temperature-controlled environment (55-77°F or 13-25°C).
- Harvest Castings: After a few months, you’ll see rich, dark, earthy-smelling worm castings. You can harvest these castings and use them as a top dressing, mix them into potting soil, or make a “worm tea” liquid fertilizer by steeping them in water. Learn more about effective composting strategies at nouvelles-technologie.com.
Pro Tips and Common Mistakes When Making Free Fertilizer from Kitchen Scraps
While transforming kitchen scraps into free fertilizer is relatively straightforward, a few expert tips can enhance your success, and avoiding common pitfalls will save you headaches.
Pro Tips for Maximizing Efficiency:
- Chop it Up: Smaller pieces decompose much faster. Whether for composting or liquid fertilizers, chop your scraps finely. This significantly increases the surface area for microbes to work on.
- Balance is Key: For composting, maintaining the right “green” (nitrogen-rich, like kitchen scraps) to “brown” (carbon-rich, like dry leaves, straw) ratio is crucial. Aim for roughly 1 part green to 2-3 parts brown. An imbalanced pile can become slimy and smelly (too much green) or dry and slow (too much brown).
- Keep it Aerated: Regular turning of your compost pile introduces oxygen, which is vital for the beneficial aerobic bacteria that break down organic matter efficiently. Lack of air leads to anaerobic decomposition, which produces foul odors.
- Moisture Control: A compost pile should be consistently moist, like a damp sponge. Too dry, and decomposition slows to a crawl; too wet, and it can become waterlogged and anaerobic.
- Know Your Plants: Different plants have different nutrient needs. Acid-loving plants appreciate coffee grounds, while fruiting plants adore potassium from banana peels. Tailor your free fertilizer from kitchen scraps to your garden’s specific demands. Check out this guide on growing organic tomatoes for a perfect example of tailored fertilization.
- Patience is a Virtue: Decomposition takes time. While liquid fertilizers offer quick results, rich compost requires patience. Don’t rush the process; good things come to those who wait!
Common Mistakes to Avoid:
- Adding the Wrong Scraps: Never add meat, dairy products, bones, or oily foods to your compost or direct burial sites. These attract pests (rats, raccoons, flies), create foul odors, and can become breeding grounds for harmful bacteria. Also, avoid diseased plant material.
- Ignoring the Greens-to-Browns Ratio: This is arguably the biggest composting mistake. Too many greens lead to a slimy, stinky mess. Too many browns lead to a pile that never seems to break down. Strive for balance.
- Insufficient Aeration: Piles that aren’t turned often enough become dense and anaerobic, leading to unpleasant smells and slow decomposition.
- Letting the Pile Dry Out: Without adequate moisture, microbial activity ceases, and decomposition stops.
- Applying Raw Scraps Too Close to Plants: While direct burying is effective, avoid placing large, undecomposed scraps right at the base of young or sensitive plants. Decomposition can generate localized heat, potentially damaging roots. Always bury at least 6-12 inches away or deeper.
- Using Undiluted Liquid Fertilizers: Concentrated “compost tea” or “scrap soak” can be too strong and “burn” plants, especially when applied directly to leaves or sensitive roots. Always dilute significantly before use.
- Not Washing Eggshells: Unwashed eggshells can attract pests due to residual egg protein. Rinse them thoroughly before crushing.
Eco-Friendly Variations for Every Gardener
The beauty of making free fertilizer from kitchen scraps is its adaptability. Here are some eco-friendly variations to suit different needs and space constraints:
Small Space/Apartment Gardening:
- Bokashi Composting: This anaerobic fermentation process uses beneficial microbes to pickle your food scraps (including some that regular composting can’t handle, like cooked foods and small amounts of meat/dairy). The result is “fermented” scraps and a nutrient-rich liquid (“Bokashi tea”). The fermented scraps still need to be buried or added to a conventional compost pile to fully break down, but the process is odorless indoors.
- Worm Farm (Vermicomposting): As mentioned, a worm bin is perfect for small spaces. It’s clean, odorless (when managed correctly), and creates incredibly potent fertilizer. Kits are readily available, or you can build your own.
- “Blender Brew” Liquid Fertilizer: For a quick and easy solution, blend your fruit and veggie scraps (no meat/dairy) with water. Let it sit for a day or two, then strain and dilute. This is a fast way to get a liquid feed without needing a large compost pile.
Water Conservation Methods:
- Rainwater Collection for Liquid Fertilizers: Instead of using tap water, collect rainwater to steep your scraps for liquid fertilizers. Rainwater is naturally softer and free of chlorine, which is beneficial for plant health and microbial activity in your brews.
- Greywater Systems (Advanced): For those with more complex DIY skills, a greywater system can direct water from your sinks or showers (using eco-friendly soaps) to irrigate plants. While not directly making fertilizer, it ensures the water you *do* use more effectively carries the nutrients from your organic amendments.
- Cover Cropping with Kitchen Scraps: After harvesting a section of your garden, instead of leaving the soil bare, plant a cover crop. Directly bury your kitchen scraps beneath the cover crop. As the cover crop grows and is eventually tilled in, it works with the decomposing scraps to enrich the soil, prevent erosion, and suppress weeds.
Biodiversity Enhancement:
- Comfrey and Nettle Teas: While not strictly kitchen scraps, if you grow these plants, they make incredible liquid fertilizers. Comfrey is a dynamic accumulator of potassium, and nettles are rich in nitrogen. Chop leaves, steep in water for 2-3 weeks (it will be stinky!), dilute, and use.
- Wood Ash (from untreated wood): If you have a fireplace or wood stove, cooled wood ash from untreated wood (not charcoal or briquettes) can be a source of potassium and trace minerals. Use sparingly as it is alkaline and can raise soil pH. Never add excessive amounts, and test your soil pH first.
Seasonal Considerations for Your Scrap-Based Fertilizers
The best way to utilize your free fertilizer from kitchen scraps can vary with the seasons, aligning with your plants’ natural growth cycles and the decomposition rates of your compost.
- Spring (Awakening and Growth):
- Compost: Early spring is ideal for turning in finished compost into garden beds before planting. It enriches the soil for the season ahead, providing a slow-release of nutrients as plants establish.
- Nitrogen Boosts: As leafy greens, young vegetables, and annuals begin their vigorous growth, they benefit greatly from nitrogen. Use diluted coffee ground tea or slightly higher ratios of “green” scraps in established compost piles.
- Banana Peels: If you’re starting early flowering plants, burying banana peels can provide that potassium boost for strong bloom development.
- Summer (Fruiting and Flowering):
- Potassium Focus: This is prime time for fruiting vegetables (tomatoes, peppers, squash) and prolific flowering. Liquid fertilizers made from banana peels are particularly beneficial, applied every 2-4 weeks.
- Regular Compost Tea: Keep your plants hydrated and nourished with regular applications of general compost tea, providing a balanced feed.
- Calcium for Bloom End Rot: Ensure plants like tomatoes and peppers have adequate calcium by incorporating finely crushed eggshells around their base or into the soil during planting.
- Autumn (Harvest and Preparation):
- Compost Building: As garden clean-up begins, autumn is a fantastic time to build up your compost pile. Fallen leaves provide an abundant source of “brown” material, perfectly balancing the kitchen scraps you’ll continue to generate.
- Direct Burying: Prepare beds for next year by trench composting with your kitchen scraps after harvesting. This allows the nutrients to slowly integrate into the soil over winter.
- Soil Amendment: Work finished compost into perennial beds and around trees and shrubs to provide a slow-release feed and improve soil structure before winter sets in.
- Winter (Rest and Planning):
- Indoor Composting: If you live in a cold climate, outdoor compost piles may slow down significantly or even freeze. This is an excellent time for indoor vermicomposting or Bokashi composting to keep your free fertilizer from kitchen scraps production going.
- Collecting and Storing: Continue collecting and storing appropriate scraps. You can freeze some scraps like banana peels and vegetable ends to add to your compost pile or make liquid feeds once spring arrives.
- Planning: Use this time to research the specific nutrient needs of the plants you plan to grow next season, so you can tailor your scrap collection accordingly.
Expert Resources for Advanced Learning
To deepen your knowledge and refine your methods for making free fertilizer from kitchen scraps, consider exploring these reputable external resources:
- Gardening Know How: This site offers a vast library of gardening articles, including many on composting and organic fertilization. Their detailed guides can help you troubleshoot issues and expand your understanding of nutrient cycles in the garden. Visit Gardening Know How
- Royal Horticultural Society (RHS): As one of the world’s leading horticultural organizations, the RHS provides scientifically backed advice on all aspects of gardening. Their sections on soil health and composting are invaluable for understanding the principles behind successful organic fertilization. Explore the RHS Website
- University of Minnesota Extension: University extension offices often provide research-based, regionally specific gardening information, including excellent resources on composting, soil science, and sustainable gardening practices. Their guides are practical and reliable. Check out UMN Extension Gardening
Conclusion: Cultivate a Healthier Garden and Planet
You now possess the knowledge and tools to transform your everyday kitchen waste into a powerful, free fertilizer from kitchen scraps. By embracing these simple yet profound methods, you’re not just feeding your plants; you’re nurturing your soil, reducing landfill waste, and contributing to a more sustainable planet.
Imagine the satisfaction of watching your garden flourish, knowing that its vitality comes from the very food you’ve consumed. It’s a closed-loop system, a testament to nature’s incredible efficiency, and a truly empowering DIY project for any eco-conscious gardener. Start small, experiment, and enjoy the journey of cultivating a healthier, happier garden, one banana peel and coffee ground at a time. Your garden – and the planet – will thank you for it!
FAQ: Your Questions Answered
A1: Avoid meat, bones, dairy products, oily foods, and pet waste. These can attract pests, create unpleasant odors, and introduce harmful pathogens. Also, avoid diseased plant material to prevent spreading issues in your garden.
A2: Liquid fertilizers (like banana peel tea or coffee ground solution) can provide a noticeable boost within days or a week, especially when applied as a foliar spray. Direct burying of scraps or applying finished compost offers slower, more sustained benefits, typically taking weeks to months for the full impact to be seen as the nutrients are gradually released into the soil.
A3: If scraps are properly buried (at least 6-12 inches deep) or incorporated into a well-maintained, active compost pile, pest issues are significantly reduced. The key is to avoid leaving scraps exposed on the surface and to exclude the “avoid” list items (meat, dairy, oily foods). A well-balanced and regularly turned compost pile heats up, which helps deter pests.
A4: Citrus peels can be added to a compost pile, but in moderation. They decompose slowly due to their tough skins and high acidity, and their oils can sometimes deter beneficial organisms if used in large quantities. For direct application or liquid fertilizers, it’s generally best to avoid them or use them very sparingly, as their acidity can alter soil pH more quickly.