The Ultimate Guide: 7 Steps to Make a Wildlife Pond in a Weekend
Dreaming of a vibrant, living ecosystem in your backyard? Imagine the tranquil sounds of trickling water, the flash of a dragonfly’s wings, or the cheerful croak of a frog. Creating a wildlife pond is one of the most rewarding DIY projects you can undertake, and believe it or not, it’s entirely achievable in a single weekend. This comprehensive guide will walk you through everything you need to know to transform a patch of your garden into a biodiverse haven, attracting an array of fascinating creatures right to your doorstep. Get ready to ditch the screens, embrace the soil, and make wildlife pond weekend your new favorite pastime!
[lwptoc]
Why This Matters for Your Garden and the Planet
In an increasingly urbanized world, natural habitats are shrinking rapidly. Our gardens, no matter how small, can play a crucial role in providing vital stepping stones for wildlife. A pond, even a small one, acts as an essential water source and breeding ground for a myriad of species, from beneficial insects to amphibians and birds.
Think of it as a miniature nature reserve right outside your window. It supports pollinators like bees and butterflies, offers a crucial water source for birds and mammals, and provides a haven for dragonflies and damselflies, which are excellent natural pest controllers. Furthermore, a pond significantly boosts your garden’s biodiversity, making it more resilient and less reliant on artificial interventions.
Beyond the ecological benefits, a wildlife pond offers immense personal rewards. It’s a living, breathing natural sculpture that changes with the seasons, providing endless opportunities for observation and learning. The calming presence of water can reduce stress, enhance your garden’s aesthetic appeal, and connect you more deeply with the natural world. It’s a fantastic educational tool for children, fostering a love for nature and an understanding of ecological processes.
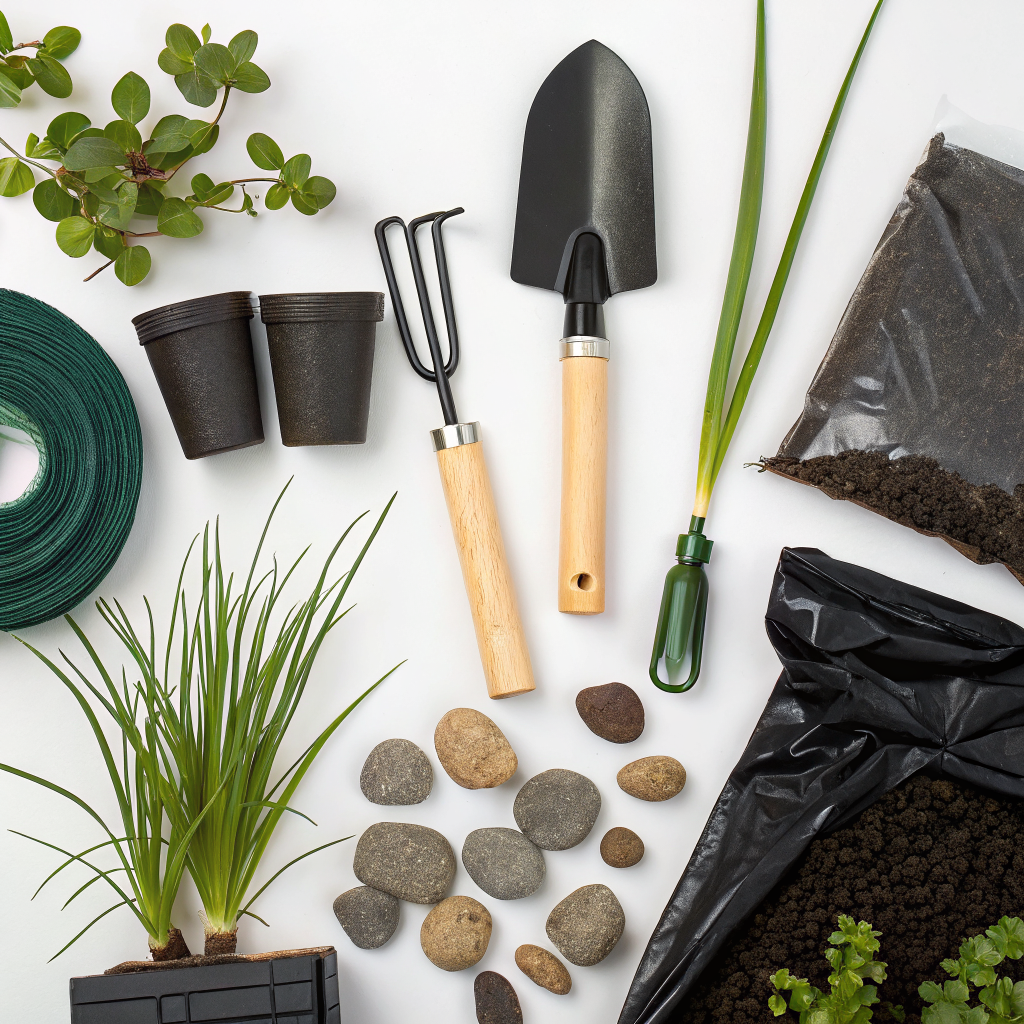
What You Need: Tools, Materials, and Essential Plants
Before you dig in, gathering all your supplies will ensure a smooth and efficient weekend project. Preparation is key to avoiding last-minute dashes to the hardware store and truly making wildlife pond weekend a success.
Tools:
- Shovel and Spade: For digging the pond shape.
- Wheelbarrow: For moving excavated soil.
- Spirit Level and Long Plank: To ensure the pond edges are level.
- Strong Scissors or Utility Knife: For cutting pond liner.
- Bucket or Watering Can: For initial filling and plant care.
- Measuring Tape: For planning and sizing.
- Garden Gloves: To protect your hands.
- Optional: Trowel, Rake.
Materials:
- Flexible Pond Liner (EPDM or PVC): This is the most crucial item. Choose a good quality, UV-resistant liner. Calculate its size: (Pond Length + 2 x Max Depth + 2 feet overlap) x (Pond Width + 2 x Max Depth + 2 feet overlap).
- Underlay Felt or Old Carpet/Newspaper: To protect the liner from punctures from stones or roots.
- Sand: A layer of sand beneath the underlay provides extra cushioning and helps level the base.
- Rounded Pebbles and Stones: For edging, creating shallow areas, and providing escape routes for wildlife.
- Dechlorinator (Optional but Recommended): If using tap water, this neutralizes chlorine which is harmful to aquatic life.
- Compost/Leaf Mould: For planting aquatic plants. Avoid rich garden soil as it can cause algae blooms.
Essential Plants:
A diverse selection of native plants is vital for a healthy, balanced pond ecosystem. Aim for a mix of types for different ecological roles.
- Oxygenators (Submerged Plants): These grow entirely underwater and are crucial for oxygenating the water and absorbing excess nutrients, preventing algae. Examples: Myriophyllum aquaticum (Water Milfoil), Ceratophyllum demersum (Hornwort).
- Marginal Plants (Bog Plants): These grow in shallow water at the pond edges, with their roots submerged and foliage above water. They provide cover, food, and create a gentle transition from land to water. Examples: Caltha palustris (Marsh Marigold), Mentha aquatica (Water Mint), Iris pseudacorus (Yellow Flag Iris).
- Floating Plants: These float on the surface, providing shade, reducing algae, and offering hiding spots. Examples: Stratiotes aloides (Water Soldier), Lemna minor (Duckweed – use sparingly as it can be invasive), Nymphoides peltata (Fringed Water Lily). Avoid invasive non-native species like water hyacinth.
- Deep Water Plants (Water Lilies): Offer shade, cover, and beautiful blooms. Require deeper water. Examples: Hardy water lilies Nymphaea spp. (ensure they are native or non-invasive cultivars).
Always source plants from reputable nurseries to avoid introducing diseases or invasive species. Look for native varieties specific to your region to maximize their benefit to local wildlife.
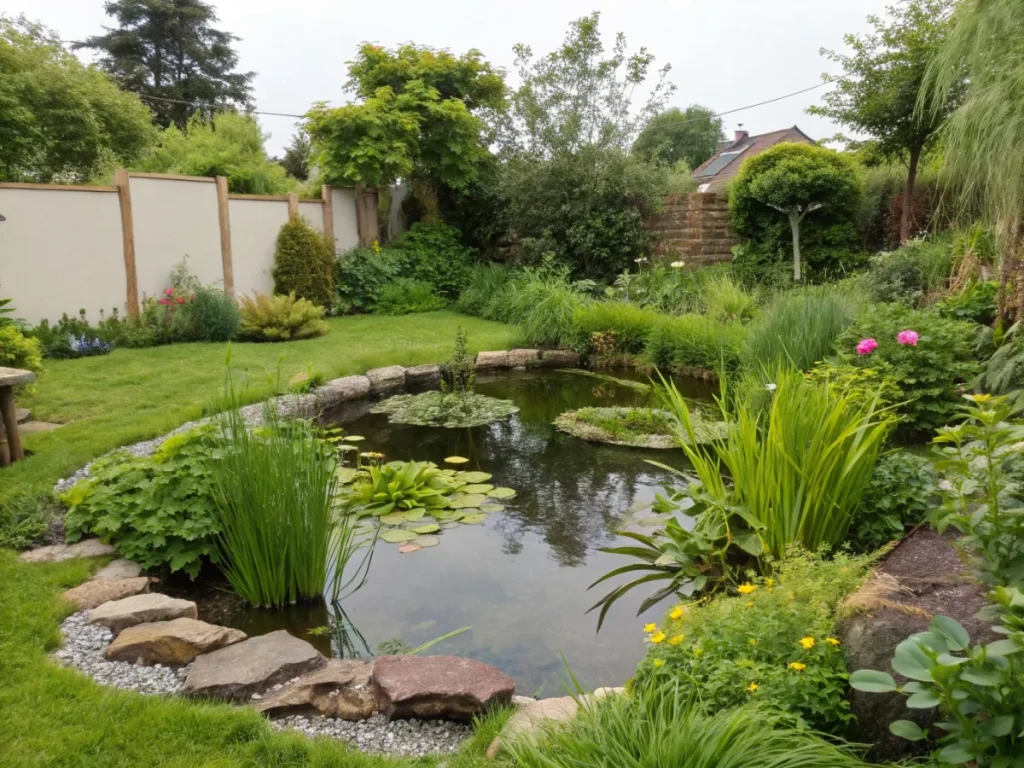
Step-by-Step Guide: Making Your Wildlife Pond in a Weekend
This timeline assumes a moderately sized pond (e.g., 6×4 feet, 2 feet deep) and good weather. Don’t rush; enjoy the process!
Day 1: Planning, Digging, and Liner Installation
- Choose the Perfect Location (Morning)
- Sunlight: Select a spot that receives partial shade for at least half the day (4-6 hours). Too much sun can lead to excessive algae growth; too much shade can hinder plant growth.
- Safety: Avoid areas directly under deciduous trees, as falling leaves can decompose, creating sludge and harming water quality. Also, consider proximity to utilities and children’s play areas. For more on choosing the right spot, visit our guide on garden zones.
- Visibility: Place it where you can easily observe the wildlife it attracts.
- Size and Shape: Mark out your desired pond shape with a rope or hose. Irregular, naturalistic shapes often look best. Consider your available space and how much time you have.
- Start Digging! (Late Morning/Afternoon)
- Begin excavating, creating different depth zones. A shallow ‘beach’ area (1-6 inches deep) with a gentle slope is crucial for wildlife to enter and exit safely.
- Create shelves at various depths (e.g., 6-12 inches for marginals, 18-24 inches for deep water plants and oxygenators). The deepest point should be at least 18-24 inches to prevent freezing solid in winter for temperate climates and provide stable temperatures in summer.
- As you dig, remove any sharp stones, roots, or debris that could puncture the liner.
- Use a spirit level on a long plank across the dug hole to ensure the edges are level. This is vital for maintaining an even water level later.
- Prepare the Liner and Install (Late Afternoon/Evening)
- Once dug and leveled, line the excavation with a 1-2 inch layer of sand to provide a smooth base.
- Lay down the underlay felt (or old carpet/newspaper) over the sand. This forms a protective barrier for your liner.
- Carefully unfold the pond liner and drape it over the hole, ensuring there’s plenty of overlap on all sides. Gently press it into the contours of the pond, allowing it to settle naturally without stretching. Try to minimize large folds or creases.
- Start filling the pond with water slowly. As it fills, the weight of the water will push the liner into place. Keep adjusting the folds as it fills, making them as neat as possible. You can use tap water initially, but if you have a dechlorinator, add it as the pond fills.
- Once full, let the liner settle for a few hours. Then, trim the excess liner, leaving a generous overlap (at least 12 inches) around the edges. This overlap will be covered later.
Day 2: Edging, Planting, and Finishing Touches
- Edge the Pond (Morning)
- This step integrates your pond seamlessly into the garden and provides essential access for wildlife.
- Lay flat, natural stones or paving slabs around the perimeter, slightly overhanging the water’s edge. This hides the liner and creates a neat finish. Ensure some stones protrude into the water to create little islands or basking spots.
- Leave irregular gaps and introduce smaller pebbles and gravel along the shallowest edges. This ‘beach’ area is critical for hedgehogs, frogs, and other creatures to safely access and leave the water.
- You can also layer turf, soil, and plants over the excess liner beyond the stones to further blend it in.
- Introduce Substrate and Plants (Late Morning/Afternoon)
- Before planting, add a thin layer of washed gravel or pebbles to the bottom of the pond, especially in the shallow areas. This provides substrate for beneficial bacteria and a foothold for submerged plants.
- Planting Oxygenators: Anchor these plants directly into the gravel at the bottom of the pond or place them in submerged baskets filled with aquatic compost.
- Planting Marginals: Place these in baskets filled with aquatic compost on the pond shelves. Ensure the water level is appropriate for their specific needs.
- Planting Deep Water Plants (e.g., Water Lilies): Plant these in large, specialist aquatic baskets with aquatic compost and gradually lower them to their final depth. For more insights on aquatic plants, consider resources like the RHS guide to pond planting.
- Floating Plants: Simply release these onto the water’s surface.
- Important Note: Use specific aquatic compost, not regular garden soil, as garden soil is too rich in nutrients and will cause severe algae problems.
- Add Finishing Touches and Monitor (Late Afternoon)
- Add logs, branches, or large rocks at the pond edges and extending into the water. These provide basking spots, cover, and escape routes for wildlife.
- Introduce a small pump and filter system if desired, but for a true wildlife pond, it’s often best to let the ecosystem find its own balance. A well-designed and planted pond may not need one.
- Now, practice patience! It will take time for the water to clear and for wildlife to discover their new home. Avoid introducing fish initially, as they can eat tadpoles and compete with other wildlife for resources.
- Ongoing Care and Enjoyment (Ongoing)
- Keep the pond topped up, especially during dry spells, using rainwater if possible.
- Regularly remove excessive blanket weed or algae by hand (a stick is useful).
- Trim overgrown marginals and remove dead leaves to prevent excess organic matter from building up at the bottom.
- Observe and enjoy! You’ll be amazed at how quickly your pond becomes a bustling hub of activity.
Pro Tips and Common Mistakes to Avoid
Even with careful planning, there are always little tricks and pitfalls to be aware of when you make wildlife pond weekend your mission.
Pro Tips:
- Rainwater is Best: If possible, collect rainwater in a butt to top up your pond. Tap water contains chlorine and nitrates, which can encourage algae growth.
- Slow is Good: Don’t rush the process, especially when filling and settling the liner. Patience will pay off with a more stable and aesthetically pleasing pond.
- Vary Depths: The more diverse your pond’s depths and habitats, the wider the range of wildlife it will attract.
- Create a “Beach”: A gently sloping, pebble-covered area is absolutely crucial for wildlife to get in and out safely.
- Add Local Materials: Incorporate local stones, logs, and soil to help the pond blend naturally into your garden and introduce local microorganisms.
- Consider a Log Pile Nearby: A log pile or stone pile next to the pond offers additional shelter for amphibians and insects. For more garden enhancements, see our article on easy garden projects.
- Mind the Edges: Ensure the liner is completely concealed. Exposed liner degrades over time and looks artificial.
Common Mistakes:
- No Shallower Areas: A pond with only steep sides traps newts, frogs, and other creatures, preventing them from escaping. This is a fatal mistake for wildlife.
- Too Much Direct Sun: Leads to rampant algae growth and can overheat the water, stressing aquatic life.
- Using Garden Soil for Plants: High nutrient content will lead to algae blooms. Always use aquatic compost or washed gravel.
- Introducing Non-Native Plants: Can outcompete native species and harm the local ecosystem. Stick to indigenous aquatic plants.
- Adding Fish Too Soon (or at all): Fish, especially goldfish and koi, eat pond insects, tadpoles, and compete for resources, significantly reducing biodiversity. For a true wildlife pond, avoid them.
- Overplanting: While plants are essential, too many can stifle the pond. Aim for around two-thirds of the surface to remain open water.
- Forgetting About Safety: Especially if you have young children or pets, consider fencing or a sturdy grid over the pond until creatures can escape easily.
Eco-Friendly Variations
Enhance the ecological impact of your wildlife pond with these sustainable considerations:
- No-Dig Pond: For smaller ponds or those with drainage issues, consider a partially raised pond using sleepers or stone, or a pre-formed pond tub. This reduces excavation.
- Rainwater Harvesting: Integrate a rainwater collection system directly into your pond design. A downspout feeding into a hidden overflow can keep your pond topped up with natural, chlorine-free water.
- Natural Filtration: Instead of relying on power-hungry pumps and filters, design a bog filter area. This is a shallow, gravel-filled trench bordering the pond, planted with water-loving plants that naturally filter the water as it passes through.
- Upcycled Materials: Use old bathtubs, sinks, or even large tires (carefully cleaned) as pond bases for smaller features. Just ensure they are food-grade or non-toxic.
- Biodiversity Corridor: Link your pond with other wildlife-friendly features in your garden, such as a wildflower meadow, native hedgerows, or a log pile, to create a flowing ecological corridor.
Seasonal Considerations for Your Wildlife Pond
A wildlife pond is a dynamic ecosystem that changes throughout the year. Understanding these cycles will help you maintain its health.
- Spring: This is a time of awakening. Tadpoles will emerge, insects will become active, and plants will begin to grow vigorously. Monitor oxygenator plants and remove excessive surface algae. This is often the best time to do any major spring cleaning or add new plants.
- Summer: Keep an eye on water levels, topping up with rainwater as needed. Manage any aggressive plant growth to ensure open water for wildlife. Provide shade if the pond is getting too much sun to prevent overheating and excessive evaporation. Observe the fascinating array of insects, dragonflies, and birds visiting for a drink or a bath.
- Autumn: Fallen leaves can be detrimental to pond health as they decompose, releasing nutrients that fuel algae. Netting placed over the pond before the leaves fall can simplify cleanup. Remove dead aquatic plant material to prevent it from decaying in the water.
- Winter: In colder climates, ensure a small area of the pond remains unfrozen to allow gases to escape. Do not smash ice vigorously as this can shock or harm aquatic life. A small ball floating on the surface can sometimes prevent a complete freeze, or you can purchase a pond heater/de-icer if necessary, though for a natural wildlife pond, a small area of open water is often sufficient. Many amphibians will hibernate in the pond mud or nearby log piles.
Expert Resources for Further Learning
Deepen your knowledge and find more detailed information from these reputable sources:
- Gardening Know How: For a practical guide on pond care and plant selection: https://www.gardeningknowhow.com/garden-how-to/water-garden/pond-care-tips.htm
- The Royal Horticultural Society (RHS): Excellent resources for choosing native plants and ecological pond design: https://www.rhs.org.uk/ponds/creating-a-wildlife-pond
- University of Minnesota Extension: Detailed information on pond ecology and management: https://extension.umn.edu/yard-and-garden-news/creating-mini-pond-your-yard
For more innovative garden ideas and eco-friendly tips, remember to check out our other articles on ecological gardening.
Conclusion
Creating a wildlife pond is one of the most rewarding and impactful additions you can make to your garden. As you’ve seen, it’s a project that is entirely achievable in a single weekend, bringing immediate and long-lasting benefits to both your local ecosystem and your personal well-being. From the satisfying process of planning and digging to the joy of observing your pond come alive, every step is an investment in nature.
By following these steps to make wildlife pond weekend your success story, you’ll be creating a vital oasis for frogs, newts, dragonflies, birds, and countless other species. You’ll not only enhance the beauty and diversity of your garden but also actively contribute to local biodiversity conservation. So, roll up your sleeves, gather your tools, and prepare to embark on a truly transformative DIY adventure. Your garden, and its future inhabitants, will thank you for it!
Frequently Asked Questions About Making a Wildlife Pond
Q1: How long does it take for a wildlife pond to attract animals?
A: Wildlife can discover your pond surprisingly quickly! Some insects like dragonflies and water beetles may arrive within days or weeks. Frogs and newts typically take longer, sometimes several months to a year, especially if there aren’t established populations nearby. Patience is key; over time, your pond will become a thriving ecosystem.
Q2: Can I put fish in my wildlife pond?
A: For a true wildlife pond focused on biodiversity, it’s generally best to avoid introducing fish. Fish, especially common species like goldfish and koi, will eat tadpoles, insect larvae, and compete with other wildlife for resources, significantly reducing the pond’s ecological value. If you want fish, consider a separate ornamental pond.
Q3: What if I don’t have enough space for a large pond?
A: No problem! Even a small mini-pond or a container pond can make a significant difference for wildlife. A simple half-barrel or a large ceramic pot, properly planted with aquatic plants and a few stones for escape, can provide a vital water source and habitat for insects and small amphibians. The principles remain the same: provide shallow entry/exit points, diverse plants, and avoid fish.
Q4: How do I keep my wildlife pond from becoming a mosquito breeding ground?
A: A healthy wildlife pond with a balanced ecosystem will naturally control mosquito populations. Predators like dragonflies, damselflies, frogs, and newts will feed on mosquito larvae. Ensure you have oxygenating plants and moving water (if using a small pump) to discourage stagnant conditions. Avoid letting the water become completely still and overgrown. Introducing mosquito dunks (Bacillus thuringiensis israelensis) is an eco-friendly option if preventative measures aren’t enough, but usually, nature does the job.