The Ultimate 7-Step Guide to Building an Automatic Drip System with Arduino
Tired of remembering to water your plants? Dreaming of a greener garden with less manual effort? You’ve landed in the right place! This comprehensive guide will walk you through building your very own automatic drip system Arduino, transforming your plant care routine from a chore into an automated delight. Imagine your plants thriving, receiving just the right amount of water at the perfect time, all controlled by a smart, DIY system you built yourself. It’s not just convenient; it’s a game-changer for plant health, water conservation, and your peace of mind.
[lwptoc]
Whether you’re a seasoned gardener, a budding tech enthusiast, or simply someone looking to make their life a little easier, this project is incredibly rewarding. We’ll demystify the electronics, simplify the plumbing, and empower you to create a sustainable watering solution tailored to your specific needs. Get ready to embrace the future of gardening!
Why an Automatic Drip System with Arduino Matters for Your Garden
The benefits of an automatic drip system Arduino extends far beyond simply not having to carry a watering can. This technology offers a multitude of advantages that enhance plant health, conserve precious resources, and simplify your gardening life. Understanding these benefits will underscore why this DIY project is such a valuable investment of your time and effort.
Firstly, precision watering is paramount for healthy plants. Unlike overhead sprinklers that often waste water through evaporation or overspray, drip irrigation delivers water directly to the plant’s root zone. This targeted approach minimizes water loss and ensures that every drop counts. With an Arduino controlling the schedule, you can fine-tune watering times and durations to match the specific needs of different plant types, preventing both under-watering and over-watering – two common causes of plant stress and death.
Secondly, water conservation is a critical concern in today’s world. By delivering water precisely where it’s needed and on a programmed schedule, your Arduino-controlled drip system can significantly reduce overall water consumption. This not only saves you money on your water bill but also contributes to environmental sustainability. Many traditional watering methods are inefficient; an automatic system helps us be much more responsible stewards of our resources.
Thirdly, automating the watering process frees up your valuable time. Imagine going on vacation without worrying about your plants drying out, or simply enjoying your evenings without the daily watering chore. The Arduino acts as the brain, consistently executing the watering schedule you’ve programmed. This consistency is also beneficial for plants, as they thrive on a predictable environment. Irregular watering can lead to stunted growth, disease susceptibility, and reduced yields.
Finally, intelligent watering can lead to healthier, more robust plants. When plants receive consistent, optimal moisture, they develop stronger root systems and become more resilient to pests and diseases. The reduced moisture on leaves, common with drip irrigation, also helps prevent fungal issues. This not only results in more vibrant blooms and bountiful harvests but also creates a more enjoyable and less problematic gardening experience overall.
What You Need: Tools, Materials, and Plant Considerations
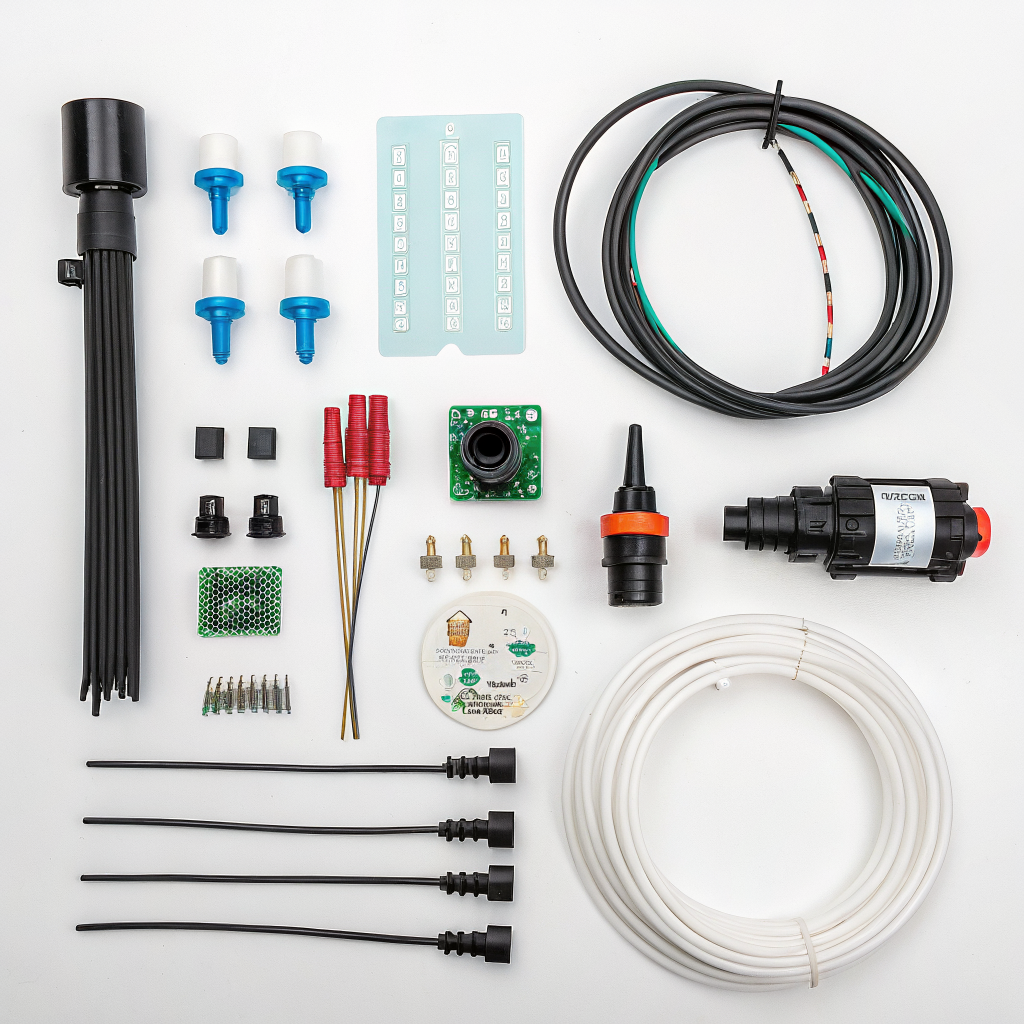
Before diving into the build, it’s essential to gather all the necessary components. This project combines basic plumbing with beginner-friendly electronics. Don’t be intimidated if you’re new to Arduino; we’ll guide you through each step. Selecting the right materials upfront will ensure a smooth and successful build of your automatic drip system Arduino.
Electronic Components:
- Arduino Board: An Arduino Uno or ESP32 is a great choice. The Uno is fantastic for beginners due to its simplicity and vast online resources, while the ESP32 offers built-in Wi-Fi, perfect for future remote monitoring or control.
- Soil Moisture Sensor: Crucial for smart watering. Capacitive sensors are generally preferred over resistive ones as they are less prone to corrosion and last longer. You’ll need one per watering zone or significant plant group.
- 12V DC Solenoid Valve: These are the “taps” your Arduino will control. You’ll need one for each independent watering zone you plan to create. Ensure it’s rated for your water pressure.
- Relay Module (1, 2, or 4-channel): An Arduino cannot directly power a 12V solenoid valve. A relay acts as an electronically controlled switch, allowing the Arduino to turn the higher-voltage solenoid on and off safely. A 2-channel relay is a good start if you plan for two zones.
- 12V Power Supply: To power the solenoid valves. A power supply with sufficient amperage for all connected valves is important (e.g., if each valve draws 0.5A and you have 2 valves, you’d need at least a 1A power supply).
- Breadboard and Jumper Wires: For prototyping and connecting components without soldering. Male-to-male, male-to-female, and female-to-female wires will all be useful.
- USB Cable: To connect your Arduino to your computer for programming.
- Optional: LCD Screen (16×2 or 20×4 with I2C module): For displaying sensor readings, current time, or watering status directly on your system.
- Optional: Real-Time Clock Module (RTC – DS3231 or DS1307): To keep accurate time for scheduling, even if the Arduino loses power. Essential for precise, unattended operation.
Plumbing Components:
- Drip Line Tubing (1/4 inch and/or 1/2 inch): The main arteries of your system. 1/2 inch is good for main lines, 1/4 inch for individual plant emitters.
- Drip Emitters: These deliver water directly to the plant. Choose between pressure-compensating emitters for even distribution over long runs, or adjustable emitters for varying plant needs.
- Connectors/Fittings: T-connectors, elbows, end caps, and reducers for connecting tubing.
- Pressure Regulator: Drip systems operate best at lower pressures (10-25 PSI). If your home water pressure is higher, a regulator is crucial.
- Filter: To prevent sediment from clogging your emitters.
- Backflow Preventer: Essential to prevent dirty irrigation water from flowing back into your potable water supply.
- Hose Adapter or Faucet Connector: To connect your system to a water source (e.g., outdoor spigot).
- Hose Clamp/Zip Ties: For securing tubing.
Tools:
- Wire strippers/cutters
- Small screwdrivers (for relay terminals)
- Multimeter (helpful for troubleshooting)
- Drill (if mounting components)
- Scissors or utility knife (for cutting tubing)
- Measuring tape
- Computer with Arduino IDE installed
Plant and Garden Considerations:
- Plant Types: Group plants with similar water needs in the same irrigation zone (e.g., succulents together, thirsty annuals together). This helps optimize water use.
- Soil Type: Sandy soils drain quickly and may need more frequent, shorter watering cycles. Clay soils retain water longer and require less frequent, longer watering.
- Sun Exposure: Plants in full sun will generally need more water than those in shade.
- Layout of your Garden: Sketch out your garden to plan tubing runs and emitter placement. This will help you determine the lengths of tubing and number of emitters needed.
- Water Source: Identify a convenient water spigot or other water source.
Step-by-Step Guide to Building Your Automatic Drip System with Arduino
This section breaks down the construction of your automatic drip system Arduino into manageable steps, covering both the electronic wiring and the plumbing installation. Follow these instructions carefully for a successful build.
Step 1: Assemble the Electronic Control Unit
This is the brain of your operation. We’ll start by connecting the Arduino to the relay, sensor, and power source.
- Connect the Soil Moisture Sensor:
- Connect the VCC pin of the capacitive soil moisture sensor to the 5V pin on your Arduino.
- Connect the GND pin of the sensor to a GND pin on your Arduino.
- Connect the A0 (analog output) pin of the sensor to an analog input pin on your Arduino (e.g., A0).
- If using multiple sensors, connect them to different analog pins (A1, A2, etc.).
- Connect the Relay Module:
- Connect the VCC (or JD VCC, depending on your relay) pin of the relay module to the 5V pin on your Arduino. Some relays have a separate VCC for coil power, which should go to Arduino 5V, and JD-VCC which might require an external 5V source if you want to isolate the Arduino. For simplicity, often VCC and JD-VCC are bridged and connected to Arduino 5V.
- Connect the GND pin of the relay module to a GND pin on your Arduino.
- Connect the IN1 pin (for the first channel) of the relay module to a digital output pin on your Arduino (e.g., D7). If using more channels, connect IN2 to D8, etc.
- Connect the 12V Power Supply and Solenoid Valves:
- Connect the positive (+) terminal of your 12V power supply to the common (COM) terminal of your relay channel.
- Connect one wire from your 12V solenoid valve to the normally open (NO) terminal of the same relay channel.
- Connect the other wire from your 12V solenoid valve to the negative (-) terminal of your 12V power supply.
- Repeat this for each solenoid valve and relay channel. Ensure the 12V power supply is only connected once, providing power to the entire circuit for the solenoids.
- (Optional) Connect RTC Module:
- Connect VCC of RTC to 5V on Arduino.
- Connect GND of RTC to GND on Arduino.
- Connect SDA of RTC to SDA (A4 on Uno) on Arduino.
- Connect SCL of RTC to SCL (A5 on Uno) on Arduino.
- (Optional) Connect LCD Screen:
- Connect VCC of LCD to 5V on Arduino.
- Connect GND of LCD to GND on Arduino.
- Connect SDA of LCD to SDA (A4 on Uno) on Arduino.
- Connect SCL of LCD to SCL (A5 on Uno) on Arduino. (Note: RTC and LCD can share SDA/SCL lines as they both use I2C communication).
- Double-check all connections. Ensure no bare wires are touching, which could cause a short circuit.
Step 2: Program the Arduino
This is where your automatic drip system Arduino comes to life. You’ll upload code that tells the Arduino how and when to water.
- Install Arduino IDE: If you haven’t already, download and install the Arduino IDE from the official Arduino website (www.arduino.cc/en/software).
- Install Libraries: You’ll likely need libraries for your specific soil moisture sensor, RTC module (e.g., DS1307, DS3231), and LCD display (e.g., LiquidCrystal_I2C). Go to “Sketch > Include Library > Manage Libraries…” in the IDE and search for/install the necessary ones.
- Write or Adapt the Code: Here’s a basic example. You will need to customize this significantly based on your specific components and watering logic.
// Include necessary libraries
#include <Wire.h> // Required for I2C communication (for RTC and some LCDs)
#include <RTClib.h> // For DS3231/DS1307 RTC
// #include <LiquidCrystal_I2C.h> // Uncomment if using I2C LCD

// Define pins
const int soilMoisturePin = A0; // Analog pin for soil moisture sensor 1
const int valvePin = 7;         // Digital pin for relay controlling solenoid valve 1

// Define thresholds and watering parameters
const int dryThreshold = 500;   // Adjust this value based on your sensor readings for "dry"
const int wetThreshold = 300;   // Adjust this value for "wet" (e.g., after watering)
const long wateringDuration = 10 * 1000; // 10 seconds of watering (in milliseconds)
const long wateringInterval = 2 * 60 * 60 * 1000; // Water every 2 hours (in milliseconds)

// RTC Object
RTC_DS3231 rtc; // Or RTC_DS1307 if you are using that module

// (Optional) LCD Object
// LiquidCrystal_I2C lcd(0x27, 16, 2); // Change 0x27 to your LCD's I2C address, 16,2 are columns/rows

unsigned long lastWateringTime = 0;
bool currentlyWatering = false;
int moistureValue;

void setup() {
  Serial.begin(9600);
  pinMode(valvePin, OUTPUT);
  digitalWrite(valvePin, HIGH); // Ensure valve is off initially (HIGH for active-LOW relays)

  // Initialize RTC
  if (!rtc.begin()) {
    Serial.println("Couldn't find RTC");
    while (1);
  }
  // rtc.adjust(DateTime(F(__DATE__), F(__TIME__))); // Uncomment to set RTC to current compile time
  // rtc.adjust(DateTime(2026, 1, 1, 12, 0, 0)); // Uncomment and set manually if RTC time is incorrect

  // (Optional) Initialize LCD
  // lcd.init();
  // lcd.backlight();
  // lcd.print("Drip System ON!");
  // delay(2000);
  // lcd.clear();
}

void loop() {
  moistureValue = analogRead(soilMoisturePin); // Read soil moisture
  Serial.print("Soil Moisture: ");
  Serial.println(moistureValue);

  // Get current time from RTC
  DateTime now = rtc.now();
  Serial.print("Time: ");
  Serial.print(now.hour(), DEC);
  Serial.print(':');
  Serial.print(now.minute(), DEC);
  Serial.print(':');
  Serial.print(now.second(), DEC);
  Serial.println();

  // (Optional) Display on LCD
  // lcd.setCursor(0,0);
  // lcd.print("Moisture: ");
  // lcd.print(moistureValue);
  // lcd.setCursor(0,1);
  // lcd.print("Time: ");
  // lcd.print(now.hour(), DEC);
  // lcd.print(":");
  // if (now.minute() < 10) lcd.print("0");
  // lcd.print(now.minute(), DEC);

  // Simple logic: If soil is dry AND it's been long enough since last watering
  if (moistureValue > dryThreshold && (millis() - lastWateringTime > wateringInterval)) {
    Serial.println("Soil is dry! Starting to water...");
    // lcd.clear();
    // lcd.print("Watering...");
    digitalWrite(valvePin, LOW); // Turn on valve (LOW for active-LOW relay)
    currentlyWatering = true;
    lastWateringTime = millis(); // Record start of watering
    delay(wateringDuration); // Water for the specified duration
    digitalWrite(valvePin, HIGH); // Turn off valve
    currentlyWatering = false;
    Serial.println("Watering complete.");
    // lcd.clear();
    // lcd.print("Watered!");
    // delay(2000);
  }

  // To prevent rapid cycling, you might want a minimum delay between checks or a more sophisticated state machine
  delay(5000); // Wait 5 seconds before next moisture check
}
dryThresholdandwetThreshold: These values are crucial! You MUST calibrate your soil moisture sensor. Place the sensor in dry soil and note the reading. Then, thoroughly water the soil and note the reading after it has absorbed. Your ‘dry’ reading will be higher than your ‘wet’ reading from an analog pin.wateringDuration: Experiment to find the optimal watering time for your specific plants and soil. Start conservative.wateringInterval: This acts as a minimum delay between watering cycles to prevent over-watering. You might want to make this more sophisticated by checking the time of day using the RTC.- Relay Logic: Some relays are “active-HIGH” (digitalWrite(valvePin, HIGH) turns them on), others are “active-LOW” (digitalWrite(valvePin, LOW) turns them on). Adjust
digitalWrite(valvePin, HIGH/LOW)accordingly. - RTC and Scheduling: For more advanced scheduling (e.g., watering only between 6 AM and 8 AM), incorporate the RTC’s time functions into your
ifconditions.
Step 3: Install the Main Plumbing Line
This forms the backbone of your physical drip system.
- Attach Backflow Preventer and Filter: Screw the backflow preventer onto your outdoor faucet. Then, attach the filter to the backflow preventer.
- Attach Pressure Regulator: Connect the pressure regulator to the filter. This reduces your water pressure to a range suitable for drip irrigation.
- Connect Main Drip Tubing: Attach your main 1/2 inch drip line tubing to the output of the pressure regulator using the appropriate connector.
- Lay Out Main Line: Run the main drip line throughout your garden, close to the areas you intend to water. Avoid sharp bends; use elbow fittings where necessary. Secure the tubing with stakes or clips.
- Mount Solenoid Valves: Install your solenoid valves in a protected, accessible location along the main line. You might need to cut the main line and use T-fittings or inline connectors to integrate the valves. Ensure they are oriented correctly (flow direction is usually marked). Each valve should control a distinct watering zone.
Step 4: Install Drip Emitters and Lateral Lines
This step gets water to your individual plants.
- Connect Lateral Lines: Where you want to water a specific group of plants, use a T-fitting to branch off from your 1/2 inch main line with a 1/4 inch lateral line.
- Place Emitters: For each plant, insert a drip emitter directly into the 1/4 inch tubing near its base. Use a punch tool to make clean holes in the 1/2 inch tubing if you’re inserting emitters directly into the main line without lateral tubing. Ensure the emitter type (e.g., 1 GPH) matches the plant’s needs.
- Secure Tubing: Use tubing stakes to hold the emitter lines in place and prevent them from being dislodged.
- Cap the Ends: Use end caps on all main and lateral drip lines to maintain pressure and prevent leaks.
Step 5: Test and Calibrate Your System
Crucial for optimal performance of your automatic drip system Arduino.
- Manual Valve Test: Manually open your water source faucet. Check all connections for leaks. Adjust fittings as needed.
- Electronic Test: Upload your Arduino code. Observe the serial monitor for sensor readings. Manually trigger the solenoid valves (e.g., by temporarily raising a soil moisture sensor out of the soil or by modifying the code to water for a few seconds). Verify that water flows through the emitters.
- Soil Moisture Calibration: This is arguably the most vital part of accurate watering. Calibrate your soil moisture sensor readings.
- Place the sensor in bone-dry soil and note the reading on the serial monitor (this will be your
dryThreshold). - Thoroughly water the soil around the sensor until it’s saturated, then wait for the water to drain and absorb (not sitting on the surface). Note this reading (this will be your effective ‘wet’ reading, usually your lower boundary for watering).
- Adjust your
dryThreshold,wetThreshold, andwateringDurationin your Arduino code based on these observations and your plant’s needs. Repeat this process until you are confident the system is watering appropriately.
- Place the sensor in bone-dry soil and note the reading on the serial monitor (this will be your
- Observe and Adjust: Over the next few days, closely monitor your plants. Are they thriving? Too wet? Too dry? Fine-tune your watering duration and frequency in the code. Adjust emitter types if certain plants are getting too much or too little water.
Pro Tips and Common Mistakes for Your Automatic Drip System Arduino
Building an automatic drip system Arduino is a rewarding project, but a few insights can make the process smoother and more effective. Avoiding common pitfalls will save you time and ensure your plants stay happy.
Pro Tips:
- Start Small, Expand Later: Don’t try to automate your entire yard at once. Begin with a single garden bed or a few potted plants. This allows you to learn the ropes, troubleshoot, and gain confidence before scaling up. You can easily add more zones and sensors once you’re comfortable.
- Encase Your Electronics: Water and electronics don’t mix! Use a weatherproof enclosure (like a plastic junction box or a dedicated outdoor electronics box) for your Arduino, relay, and wiring. Seal all cable entry points to protect against rain, dust, and insects.
- Use Separate Power for Solenoids: While some small relays might allow Arduino to power them, it’s generally best practice and safer to use a separate 12V power supply for the solenoid valves. This prevents drawing too much current from the Arduino’s 5V rail, which could lead to instability or damage.
- Implement a Manual Override Switch: Include a simple push-button or toggle switch wired to an Arduino digital pin. This allows you to manually trigger watering or stop it, which is invaluable for testing, system emergencies, or when you simply want to give your plants an extra drink.
- Consider Redundancy: For critical plants, consider adding a secondary, simpler watering mechanism as a backup, or at least a visual indicator to confirm the system is operational.
- Logging Data: Enhance your code to record watering events, soil moisture levels, and even time stamps to an SD card module (if using an ESP32 or adding an SD card shield for Arduino Uno). This data is incredibly useful for optimizing your watering schedule over the long term. This is a great way to learn more about your garden’s needs.
- Remote Monitoring/Control (ESP32): If you chose an ESP32, explore using its Wi-Fi capabilities to send data to a cloud platform (like Blynk or ThingSpeak) or to control your system via a web interface or app. This elevates your system truly to a “smart” garden. You can find more about ESP32 projects at nouvelles-technologie.com/esp32-temperature-sensor-project-for-beginners/.
Common Mistakes to Avoid:
- Improper Sensor Calibration: The most frequent cause of over or under-watering. Always calibrate your soil moisture sensors in both dry and thoroughly watered soil *in situ*. Soil composition dramatically affects readings.
- Ignoring Water Pressure: Drip systems require specific, lower water pressure. Running a drip system directly off high household pressure without a regulator will likely cause leaks, blown tubing, and damage to emitters.
- No Backflow Preventer: This is a critical safety component. Without it, contaminated garden water can be siphoned back into your drinking water supply, posing a serious health risk. Never skip this.
- Poor Component Protection: Leaving electronics exposed to the elements will lead to rapid failure. Invest in a good waterproof enclosure. Similarly, protect tubing from direct sunlight where possible to prolong its life.
- Underestimating Power Needs: Solenoid valves consume a fair amount of current when active. Ensure your 12V power supply can provide enough amperage for all valves you intend to run simultaneously. You can learn more about power supply basics at nouvelles-technologie.com/beginners-guide-to-understanding-arduino-power-supply/.
- Rushing the Code: Test your code incrementally. First, get the sensor reading correctly. Then, control the relay. Then, integrate the timing or moisture-based logic. Debugging small sections is much easier.
- Not Planning Tubing Layout: haphazardly running tubing can lead to inefficient watering and pressure drops. Sketch out your garden layout and plan your main lines, lateral lines, and emitter placements. This saves tubing and ensures even distribution.
- Forgetting About Maintenance: Drip systems, especially with outdoor components, require occasional checks. Clean filters, inspect emitters for clogs, and check tubing for damage.
Eco-Friendly Variations for Your Automatic Drip System Arduino
An automatic drip system Arduino is already a step towards eco-friendly gardening through water conservation. However, you can further enhance its environmental benefits with a few clever modifications and considerations.
- Rainwater Harvesting Integration: Connect your drip system to a rainwater harvesting barrel or tank. Instead of using municipal water, your Arduino can draw from this collected source. You might need a small 12V submersible pump controlled by another relay if your tank isn’t elevated enough for gravity feed. This significantly reduces your reliance on treated tap water, conserving resources and potentially saving money.
- Solar Power: Power your Arduino and 12V solenoid valves using a small solar panel, a charge controller, and a rechargeable battery. This makes your entire watering system independent of grid electricity, reducing its carbon footprint. Ensure your solar setup is appropriately sized for the power draw of your components, especially the solenoids when they are active. This is an excellent project for off-grid gardens or remote areas.
- Greywater Diversion (with caution): In some regions and for certain plants, you might be able to integrate a greywater system (from laundry or shower water, filtered, and without harsh chemicals) to feed your drip lines. This requires careful planning, adherence to local regulations, and often more advanced filtration, but it represents the ultimate in water recycling for your garden. Research local guidelines thoroughly before attempting this.
- Optimize for Plant Needs: Beyond basic sensor input, refine your code to understand specific plant water requirements. For example, if you have a vegetable garden, vegetables generally need consistent moisture. Incorporate different watering zones for plants with diverse needs. This minimizes over-watering for less thirsty plants and ensures adequate hydration for moisture-loving ones.
- Mulching Around Plants: While not directly an Arduino modification, mulching is an eco-friendly practice that complements your drip system perfectly. A 2-4 inch layer of organic mulch around plants significantly reduces evaporation from the soil surface, meaning your Arduino-controlled system needs to water less frequently and for shorter durations, amplifying water savings.
- Utilize Weather Data (Advanced): For truly smart and eco-conscious watering, an ESP32-based system can retrieve local weather forecasts online. If rain is predicted, your system can automatically skip or reduce upcoming watering cycles. This prevents unnecessary watering and further conserves water. This would involve connecting your ESP32 to a weather API. You can find useful projects for ESP32 on nouvelles-technologie.com/category/esp32-projects/.
Seasonal Considerations for Your Automatic Drip System Arduino
While an automatic drip system Arduino offers incredible convenience, it’s not a set-it-and-forget-it solution for all seasons. Adapting your system’s operation to seasonal changes is key to maintaining plant health and prolonging the life of your equipment.
- Spring:
- Reactivation and Inspection: As temperatures rise, carefully inspect all plumbing components for any winter damage (cracked tubing, loose connections). Test your Arduino and electronic components.
- Sensor Calibration: Re-calibrate your soil moisture sensors. Soil composition and compaction can change over winter.
- Initial Watering Schedules: Start with conservative watering. Don’t over-water young plants or those just emerging from dormancy. As plants grow and temperatures increase, gradually increase watering duration or frequency.
- Summer:
- Increased Watering Needs: This is typically when your system will be most active. Plants generally require more water due to higher temperatures, increased sunlight, and active growth. Adjust your Arduino code for longer durations or more frequent cycles.
- Monitor Evaporation: Even with drip irrigation, evaporation from the soil surface can be substantial. Ensure adequate mulch around plants to minimize this.
- Check for Clogs: Higher usage can mean more potential for sediment build-up. Regularly check emitters for clogs and clean filters. Your system may alert you to low flow if integrated with sensors.
- Troubleshooting: Hot weather can stress electronics, especially if not adequately protected. Ensure your enclosure is vented or shaded to prevent overheating.
- Autumn:
- Decreased Watering: As temperatures fall and daylight hours shorten, plants’ water needs gradually decrease. Reduce watering frequency and duration. Over-watering in autumn can lead to root rot.
- Prepare for Dormancy: For perennial plants, gradually reduce water to encourage dormancy. For annuals, you might continue watering until frost.
- Harvest Considerations: If you have edible plants, adjust watering near harvest time to enhance flavor and prevent splitting (e.g., tomatoes often taste better when slightly stressed for water before picking).
- Winter:
- System Shutdown (for freezing climates): In regions with freezing temperatures, it is absolutely essential to drain and winterize your entire drip system to prevent pipes and components from freezing and bursting. This involves disconnecting from the water source, opening all end caps, and allowing water to drain. Store electronic components indoors.
- Battery Management: If using a solar-powered system, ensure batteries are charged before storing or are kept in a temperature-controlled environment if kept outdoors to prevent damage.
- Minimal Watering (for mild climates): In frost-free areas, plants may still require occasional watering, especially evergreens. Your Arduino system can run on a much reduced schedule, perhaps watering only when specific soil dryness thresholds are met after prolonged dry spells.
Expert Resources for Further Learning
Enhancing your knowledge beyond this guide will solidify your understanding and empower you to customize and troubleshoot your automatic drip system Arduino. Here are some invaluable resources from gardening and electronics experts:
- GardeningKnowHow.com – Drip Irrigation Basics: GardeningKnowHow.com offers a fantastic overview of drip irrigation principles, emphasizing proper plant placement and system design. Understanding these non-electronic gardening fundamentals is crucial for effective automation.
- RHS.org.uk – Water Management in Gardens: The Royal Horticultural Society (RHS.org.uk) provides in-depth articles on sustainable water management in gardens, including best practices for irrigation, responsible water use, and choosing water-wise plants. This broader ecological context will help you optimize your automated system for environmental benefit.
- Extension.umn.edu – Drip Irrigation for Home Gardens: The University of Minnesota Extension (extension.umn.edu) offers practical, research-backed advice on designing and installing drip irrigation systems specifically for home gardens. Their guides often include information on calculating water needs and selecting the right components.
- Arduino Official Website and Forums: The official Arduino website provides extensive documentation, tutorials, and a vibrant community forum. If you encounter specific coding or wiring issues, the Arduino forum is an excellent place to ask questions and find solutions from experienced users.
- YouTube Tutorials: Search for “Arduino soil moisture sensor tutorial” or “Arduino relay 12V solenoid” on YouTube. Visual guides can be incredibly helpful for understanding wiring connections and troubleshooting.
Conclusion: A Smarter, Greener Garden Awaits!
You’ve now embarked on an exciting journey, transforming a traditional gardening task into an intelligent, automated process. Building an automatic drip system Arduino is more than just a tech project; it’s an investment in your garden’s health, your personal convenience, and a more sustainable way of living. By combining the precision of drip


