Ultimate Guide: 10 Best Pathway Design Materials for Garden Paths
Creating beautiful and functional garden paths is an art form that significantly enhances your outdoor living space. The right pathway design can transform a simple garden into a captivating landscape, guiding visitors through your botanical treasures, defining different garden zones, and adding an essential layer of aesthetic appeal. Choosing the best materials for garden paths is not just about looks; it’s about durability, maintenance, safety, and how well it integrates with your overall garden style. This comprehensive guide will walk you through the top materials, offering insights into their pros, cons, and suitability for various garden designs.
[lwptoc]
Why This Matters for Your Garden: Functionality Meets Aesthetics
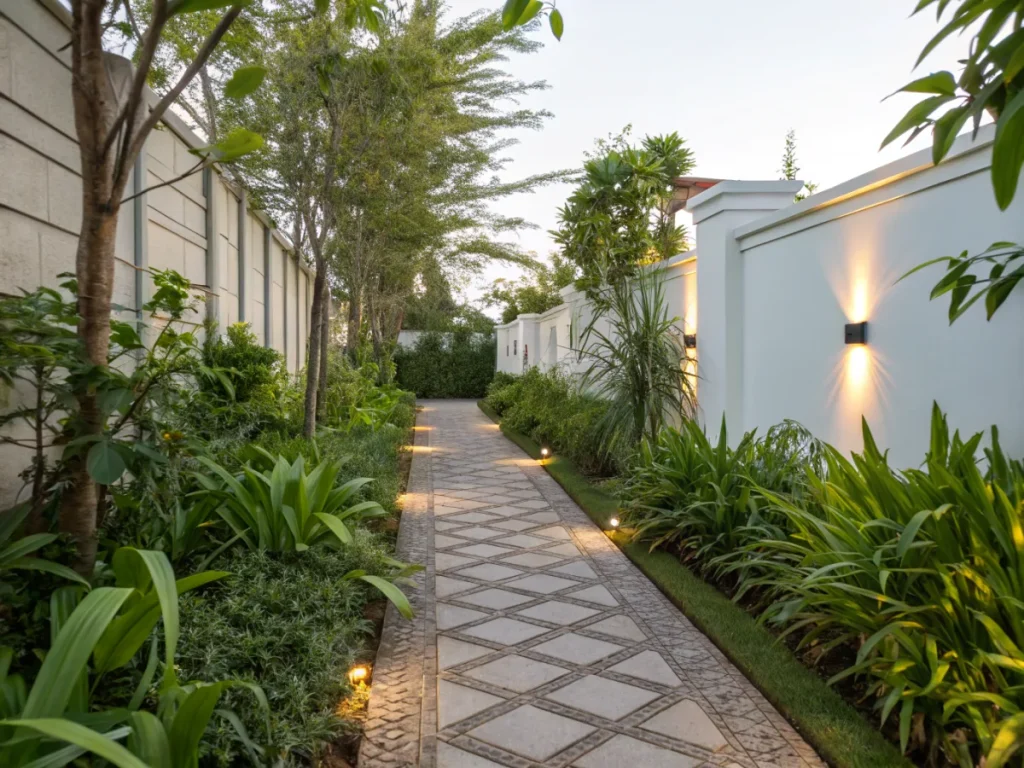
A well-designed garden path serves multiple purposes beyond mere navigation. It establishes the flow of your garden, suggesting routes and inviting exploration. Strategically placed pathways can highlight focal points, offer different perspectives of your landscape, and even make small gardens feel larger by creating visual depth.
Functionally, paths provide a clean, dry surface for walking, protecting your lawn and planting beds from foot traffic. They reduce soil compaction in key areas and can improve accessibility, especially for those with mobility challenges, ensuring everyone can enjoy your garden. Furthermore, the material you choose directly impacts the maintenance requirements, longevity, and overall character of your garden.
Considerations for Your Pathway Design:
- Garden Style: Does your garden lean formal, rustic, modern, or natural?
- Traffic Level: Is it a primary thoroughfare or an occasional stroll path?
- Maintenance Capability: How much time and effort are you willing to invest in upkeep?
- Budget: Material costs, installation, and long-term maintenance all factor in.
- Climate: Will the material withstand frost, heavy rain, or intense sun?
- Safety: Is it slip-resistant, especially when wet?
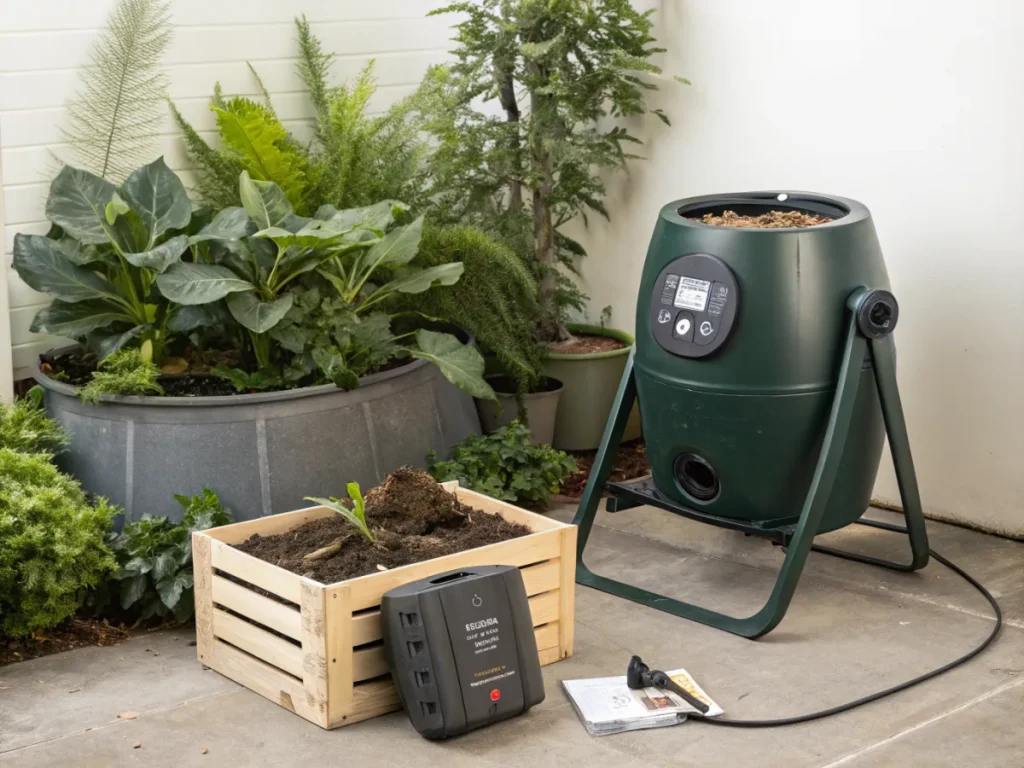
What You Need for Your Pathway Project
Before diving into materials, let’s consider the essential tools and resources you’ll need for most pathway design projects. Preparation is key to a successful, durable path. Having the right equipment makes the job much smoother and safer.
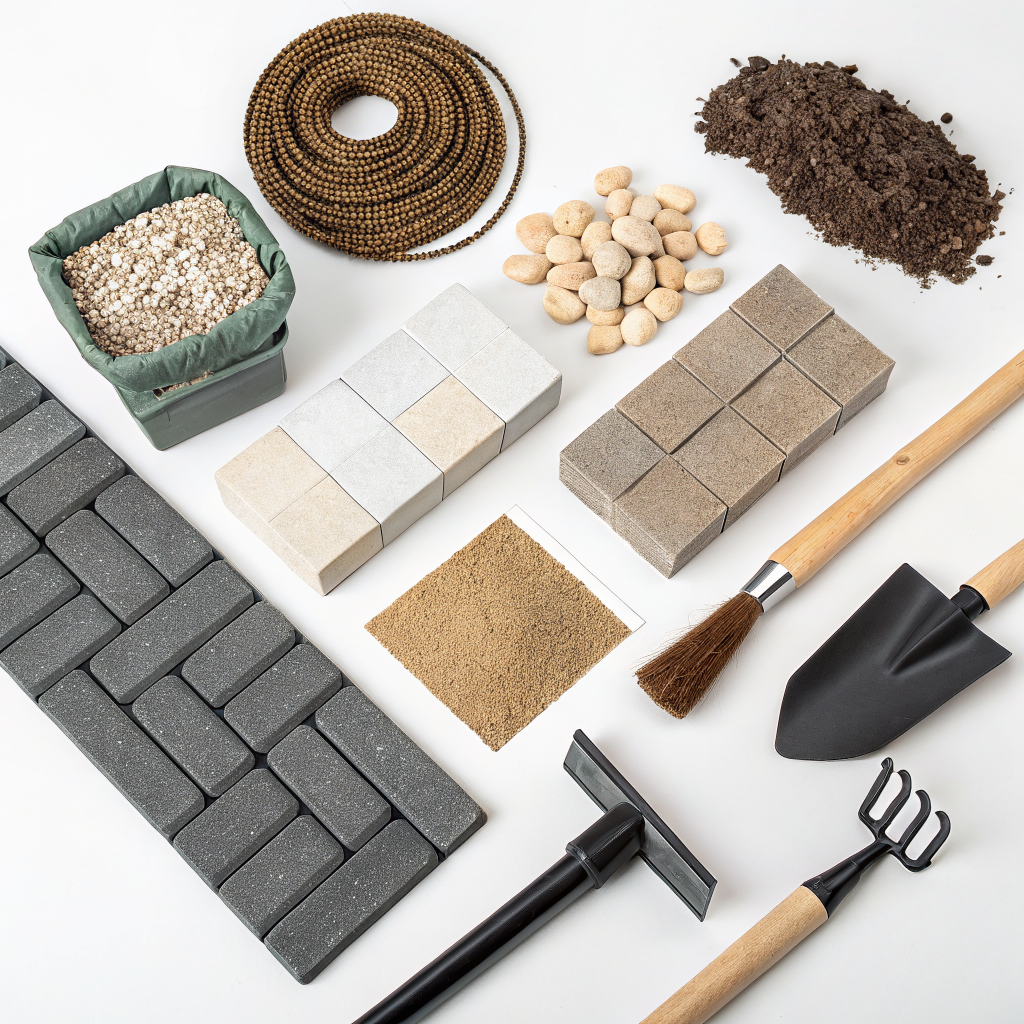
- Basic Hand Tools: Shovel, rake, wheelbarrow, tamper, measuring tape, string line, level, utility knife.
- Edging Materials: Landscape fabric, plastic or metal edging, gravel stop edging, depending on path material.
- Base Materials: Crushed aggregate (e.g., gravel, crushed stone, decomposed granite) for a stable foundation.
- Path Material: The chosen pathway design best materials for garden paths (pavers, gravel, wood chips, etc.).
- Safety Gear: Gloves, safety glasses, sturdy boots.
- Optional Power Tools: Plate compactor (for larger areas), circular saw (for cutting pavers or wood).
- Plants for Edging: Low-growing groundcovers, hardy perennials, or ornamental grasses to soften path edges.
- Weed Barrier: Landscape fabric to prevent weeds from growing through your path.
Step-by-Step Guide to Installing Your Garden Path
While specific steps vary slightly with each material, the core process for installing most garden paths remains consistent. This general outline will help you understand the workflow involved.
Step 1: Plan and Mark Your Pathway
Begin by meticulously planning the route of your pathway. Use stakes and string, or a garden hose, to lay out the path’s exact dimensions and curves. Visualize the flow and how it connects different areas of your garden. Consider sun exposure, drainage, and how the path interacts with existing plants and structures.Proper garden planning ensures long-term success.
Step 2: Excavate and Prepare the Base
Dig out the area to the required depth, typically 4-8 inches, depending on your chosen material and traffic. Ensure the base is level or has a slight slope (1-2%) for drainage away from structures. Remove all roots, rocks, and debris. Compact the soil thoroughly using a hand tamper or plate compactor. Lay down a layer of landscape fabric, overlapping seams by at least 6 inches, to suppress weeds.
Step 3: Lay the Foundation (Sub-base and Base)
For most durable paths, a stable foundation is crucial. Spread a 3-4 inch layer of crushed aggregate (like ¾-inch gravel) over the landscape fabric. Rake it evenly and compact it again. Follow with a 1-2 inch layer of smaller base material, such as crushed stone or concrete sand, to create a smooth, level bed for your top layer. Compact this layer thoroughly as well, ensuring proper drainage.
Step 4: Install Edging (Optional but Recommended)
Edging helps contain your path material, prevents spreading, and provides a neat, finished look. Install plastic, metal, or natural stone edging along the path’s perimeter. Ensure it is securely anchored, either flush with the path surface or slightly above to contain loose materials. This step is particularly important for gravel or mulch paths.
Step 5: Apply Your Chosen Pathway Material
This is where your chosen material comes into play. If using pavers or stepping stones, place them carefully, ensuring they are level and spaced correctly. For loose materials like gravel or mulch, spread an even layer to the desired depth. Work in sections, checking for evenness and compaction as you go. For example, a good resource can be found at Gardening Know How’s guide on building a garden path.
Step 6: Finish and Refine
Once the main material is laid, sweep in jointing sand between pavers or press down loose materials for stability. Water the path lightly to settle the materials. Clean up any debris, and then step back to admire your new garden path. Consider adding low-voltage lighting along the path for evening ambiance and safety.Explore more landscaping project ideas on our site for inspiration.
Pro Tips and Common Mistakes to Avoid
Even with the best intentions, pathway construction can encounter pitfalls. Heed these tips to ensure a successful outcome.
Pro Tips:
- Plan for Drainage: Water management is paramount. Ensure your path either slopes slightly away from structures or incorporates subsurface drainage.
- Quality Base is Key: A strong, compacted sub-base and base layer prevent settling, cracking, and uneven surfaces. Don’t skimp on this step.
- Consider Path Width: Main paths should be wide enough (at least 36-48 inches) for two people to walk abreast. Secondary paths can be narrower (24-30 inches).
- Integrate with Surroundings: Use materials and a design that complement your home’s architecture and the overall garden style.
- Borrow Views: Design your path to lead the eye to specific focal points or scenic views within and beyond your garden.
- Test Before Committing: Lay out a rough version of your path with a hose or rope and walk it a few times to get a feel for the flow.
- Rent Equipment: For larger projects, renting a plate compactor or power tools can save significant time and effort.
Common Mistakes to Avoid:
- Insufficient Base Preparation: This is the number one cause of path failure, leading to uneven surfaces, sinking, and weed growth.
- Poor Drainage: Standing water on or around your path will degrade materials, encourage moss, and create slip hazards.
- Ignoring Edging: Especially for loose materials, lack of proper edging leads to material migration and a messy appearance.
- Choosing the Wrong Material: Selecting a material based purely on aesthetics without considering its practical implications (maintenance, durability, safety) for your climate and traffic.
- Too Many Curves: While curves add interest, excessive or impractical curves can make a path feel unnatural or difficult to navigate.
- Not Factoring in Maintenance: Some materials require more upkeep than others. Be realistic about your capacity for sweeping, weeding, or repairing.
- Underestimating Cost: Factor in not just the material cost, but also delivery, base materials, edging, and any tool rentals.
Eco-Friendly Pathway Variations
For the environmentally conscious gardener, many pathway design best materials for garden paths offer sustainable options. Reducing your carbon footprint and supporting local ecosystems can be integrated into your landscaping choices.
- Permeable Pavers: These allow rainwater to percolate through, reducing runoff and replenishing groundwater. Look for brands specifically designed for water permeability.
- Decomposed Granite (DG): A natural, finely crushed granitic rock that compacts tightly, offering a stable yet permeable surface. It often has a natural, earthy look.
- Recycled Materials: Consider paths made from recycled rubber, plastic lumber, or crushed concrete (if locally sourced). These repurpose waste materials and conserve natural resources.
- Salvaged Stone/Brick: Give old materials a new life. Salvaged bricks or natural stone can add character and reduce demand for new production.
- Local Materials: Choosing materials sourced locally reduces transportation costs and emissions. Research what natural stones or aggregates are quarried or produced near you.
- Mulched Paths: Wood chips or shredded bark are biodegradable, improving soil health around the path as they break down. They are also excellent for water retention.
- Gravel with Open Grid Systems: Laying gravel over a permeable grid system stabilizes the gravel, prevents migration, and ensures excellent drainage.
- Living Paths: For low-traffic areas, consider planting tough, low-growing groundcovers like creeping thyme or sedum between stepping stones. This integrates the path beautifully into the garden ecosystem. Consult resources like the RHS Guide to Garden Path Materials for more eco-friendly ideas.
Seasonal Considerations for Your Pathway Design
The performance and appearance of your garden path will vary with the seasons. Planning for these changes ensures enjoyment year-round.
- Winter:
- Slippery Surfaces: Some materials (e.g., smooth natural stone, some pavers) can become very slippery when wet or icy. Consider slip-resistant textures.
- Snow Removal: Will you need to shovel? Loose gravel paths can be challenging to clear without displacing material.
- Frost Heave: Ensure proper base preparation to prevent frost heave, which can heave and crack rigid path materials.
- Spring:
- Weed Growth: Spring brings a surge of weed growth. Loose materials like gravel or mulch will require more weeding. Proper landscape fabric is crucial. For information on weed control, see UMN Extension’s gardening resources.
- Mud and Erosion: Heavy spring rains can cause erosion on poorly drained paths or those without proper edging.
- Summer:
- Heat Absorption: Dark, dense materials like asphalt or dark pavers can absorb significant heat, making the path very hot to walk on barefoot. Light-colored materials reflect heat.
- Plant Encroachment: Fast-growing plants might try to creep onto the path, requiring regular trimming.
- Autumn:
- Leaf Debris: Falling leaves can make paths slippery and obscure the surface. Regular sweeping is often needed.
- Moss and Algae: Shady, damp paths can develop moss or algae growth, especially with prolonged autumn dampness.
- Drainage Check: Before winter, ensure all drainage systems are clear of debris.
Expert Resources for Further Exploration
To deepen your knowledge and gather more specific advice, these external resources offer valuable insights into pathway design and material selection:
- Gardening Know How: How To Build A Garden Path – A practical guide covering basic construction steps and material considerations.
- Royal Horticultural Society (RHS): Garden Path Materials – Offers detailed advice on various path materials, their characteristics, and suitability, with a focus on UK gardening practices.
- University of Minnesota Extension: Garden Beds and Borders – While broad, their landscaping and gardening sections often contain excellent advice on hardscaping principles, including path integration and maintenance.
Conclusion: Paving Your Way to a Beautiful Garden
Choosing the right pathway design best materials for garden paths is a foundational decision that impacts both the aesthetics and functionality of your outdoor space. From the rustic charm of gravel to the structured elegance of pavers, each material offers unique benefits and challenges. By carefully considering your garden’s style, your climate, maintenance preferences, and budget, you can select a material that not only complements your landscape but also provides years of enjoyment.
Remember that the best path is one that guides you smoothly through your garden, enhances its beauty, and stands the test of time. Invest in proper preparation, choose quality materials, and don’t be afraid to infuse your personality into the design. With thoughtful planning and execution, your garden paths will become cherished features of your outdoor sanctuary, inviting you and your guests to explore its wonders at every turn.Find more DIY guide and garden inspiration on our blog.
Frequently Asked Questions About Garden Path Materials
Q1: What is the most durable material for a garden path?
A1: Poured concrete, natural stone (like granite or flagstone slate), and high-quality concrete pavers are generally considered the most durable materials for garden paths, often lasting for decades with proper installation and minimal maintenance.
Q2: What is the most budget-friendly option for a garden path?
A2: Gravel, wood chips, and mulch are typically the most budget-friendly options upfront. However, remember to factor in potential ongoing costs for replenishment and weeding. Crushed limestone or recycled asphalt can also be inexpensive options in some regions.
Q3: How wide should a garden path be?
A3: For a main path where two people might walk side-by-side, aim for a width of 36 to 48 inches (90-120 cm). Secondary or casual paths can be narrower, typically 24 to 30 inches (60-75 cm). Ensure adequate space for wheelbarrows or garden tools if needed.
Q4: How do I prevent weeds from growing through my garden path?
A4: The best defense against weeds is thorough base preparation, including laying down a high-quality landscape fabric beneath your base layers. For loose materials, maintaining a sufficient depth and using an edging system also helps. Regular light weeding is still recommended.