The Ultimate 7-Step Guide to Build a Keyhole Garden Bed for Sustainable Gardening
Are you looking for an innovative, efficient, and wonderfully sustainable way to grow food? The keyhole garden bed, an ingenious design perfected in African permaculture, offers a solution that not only maximizes growing space but also cleverly integrates composting directly into your garden. This self-feeding system nourishes your plants with nutrient-rich compost tea, reducing water usage and creating a thriving micro-ecosystem.
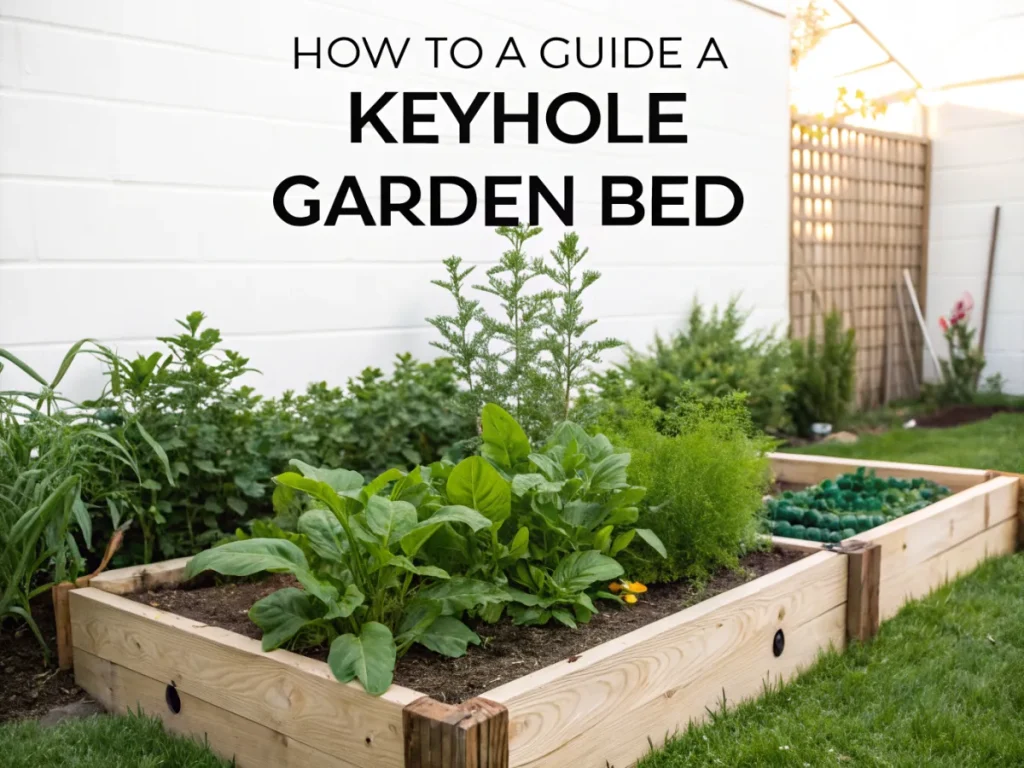
Inspired by designs that originated in arid regions, keyhole gardens are circular or kidney-shaped raised beds with a central composting basket accessible via a narrow, keyhole-shaped cutout. This unique structure allows for easy addition of kitchen scraps and garden waste, which then break down and release vital nutrients and moisture directly to the surrounding soil. If you’re ready to embrace a gardening method that’s both productive and remarkably eco-conscious, read on to discover how to build keyhole garden bed.
[lwptoc]
Why Building a Keyhole Garden Bed Matters for Your Garden
Building a keyhole garden bed offers a myriad of benefits for gardeners of all skill levels, particularly those interested in sustainable and low-input methods. Its self-composting nature is perhaps its most compelling feature, turning kitchen and garden waste into a continuous supply of plant food. This closed-loop system dramatically reduces the need for external fertilizers and amendments.
Beyond nutrient cycling, keyhole gardens are incredibly water-efficient. The central compost basket acts like a sponge, holding moisture and releasing it slowly into the surrounding soil, minimizing evaporation and runoff. This is especially advantageous in drought-prone areas or for gardeners looking to conserve water resources. Moreover, the raised bed design allows for better drainage and soil aeration, creating an ideal growing environment for a wide variety of plants.
The compact footprint and ergonomic design also make keyhole gardens accessible and productive in smaller spaces. Their raised structure means less bending and kneeling, making gardening more comfortable for everyone. They are an excellent choice for urban gardens, community plots, or anyone wanting to maximize yields from a limited area while simultaneously practicing sustainable waste management. Embracing this design means cultivating a thriving garden that gives back to the environment.
What You Need to Build Keyhole Garden Bed: Tools, Materials, and Plants
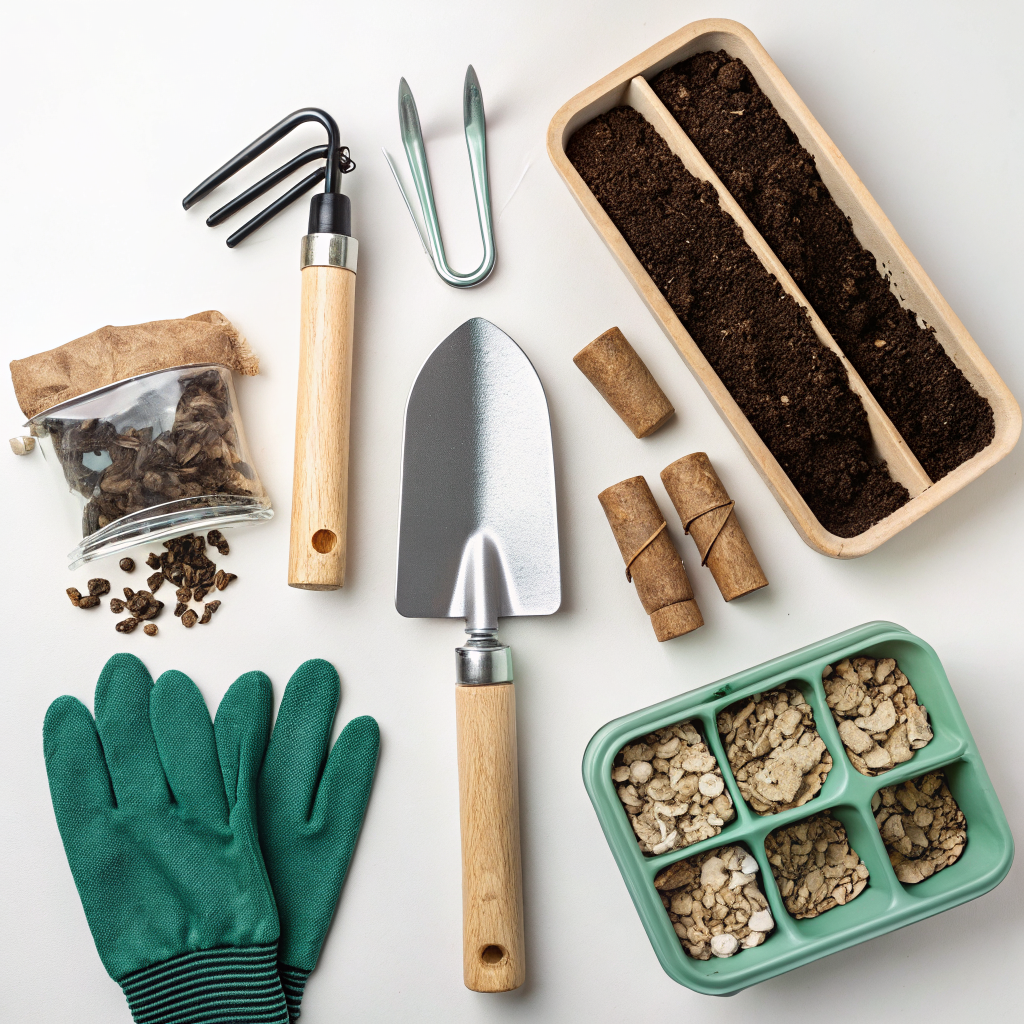
Before embarking on your keyhole garden project, gathering all necessary tools and materials will ensure a smooth and efficient build. The beauty of this project is its adaptability; many components can be repurposed or sourced affordably. Planning ahead will save time and ensure you have everything on hand.
Essential Tools:
- Shovel and/or spade
- Wheelbarrow (for moving materials)
- Measuring tape
- Level (for ensuring a stable base)
- Pencil or marker
- Saw (if cutting lumber for sides)
- Drill (if using screws for framework)
- Staple gun (for securing cardboard/liner)
- Gloves for protection
- Safety glasses
Materials for the Bed Structure:
- Retaining Wall Material:
- Cinder blocks, bricks, natural stone, recycled concrete pieces (most durable and long-lasting)
- Rot-resistant wood (cedar, redwood, treated lumber – ensure it’s food-safe if treated)
- Galvanized metal sheets (corrugated roofing material often works well)
- Wattle fencing (woven branches for a rustic look)
- For the Central Composting Basket:
- Hardware cloth (1/4 or 1/2 inch mesh), strong wire fencing, or even an old laundry basket (ensure it has plenty of holes for drainage and aeration).
- Zip ties or wire to secure the basket seam.
- Lining Materials (Optional but Recommended):
- Cardboard (untreated, for weed suppression and initial carbon layer)
- Newspaper (untreated)
- Permeable landscaping fabric (for initial base layer)
- Fill Materials (Lasagna Gardening Layers):
- Brown Layers (Carbon-rich): Dried leaves, straw, shredded paper, wood chips (untreated), small branches, aged sawdust.
- Green Layers (Nitrogen-rich): Grass clippings (fresh), kitchen scraps (fruit/veg peels, coffee grounds, tea bags), plant trimmings, manure (well-aged).
- Good Quality Topsoil: A significant amount of good quality, well-draining garden soil for the top layers where plants will be rooted.
- Compost: Finished compost or well-rotted manure to enrich the soil.
- Water source: To moisten layers during construction.
Plants to Consider:
Keyhole gardens excel with a wide range of vegetables and herbs. Consider plants with varying root depths and nutrient needs to create a diverse polyculture. Leafy greens, root vegetables (like carrots and radishes), bush beans, peas, herbs, and even some flowering plants for pollinators thrive in this environment. Avoid plants that spread aggressively or require extensive space. Remember to choose plants suited to your local climate and growing season. Look for best garden hedges for surrounding windbreaks if desired.
Step-by-Step Guide to Build Keyhole Garden Bed
Building a successful keyhole garden bed involves a series of logical steps, much like constructing a layered cake for your plants. Patience and attention to detail during each phase will contribute to its long-term success and productivity. Follow these steps carefully to create your flourishing self-feeding garden.
Step 1: Choose Your Site and Plan the Layout
Selecting the right location is crucial for your keyhole garden’s success. Choose a spot that receives at least 6-8 hours of direct sunlight per day, as most vegetables require this for optimal growth. Ensure the area is relatively level and has good drainage. A standard keyhole garden typically has an outer diameter of 6-8 feet (1.8-2.4 meters) and stands about 3 feet (about 1 meter) tall. The central compost basket should be about 1 foot (30 cm) in diameter, and the keyhole entry around 1.5-2 feet (45-60 cm) wide at its opening. Mark out your chosen dimensions on the ground using string, spray paint, or a garden hose. Consider how you will power irrigation, if needed, at this stage.
Step 2: Construct the Outer Wall
Begin by laying the foundation for your circular or kidney-shaped outer wall. If using cinder blocks or bricks, start with a level base layer and build upwards, stacking them carefully. For stability, stagger the blocks like brickwork. If using wood, cut your planks to size and secure them with screws or nails, creating the curved shape. Ensure the wall is sturdy and can withstand the weight of the soil and compost. Aim for a height of about 3 feet, gradually tapering down to about 2 feet at the entrance of the keyhole. This slope will aid in water distribution.
Step 3: Install the Central Composting Basket
Once the outer wall is established, it’s time to create the heart of your keyhole garden – the composting basket. Position it precisely in the center of your circular bed. Form your hardware cloth or wire fencing into a cylinder, approximately 1 foot (30 cm) in diameter, and securely fasten the seam with wire or zip ties. Bury the bottom 6-12 inches (15-30 cm) of the basket into the ground for stability, ensuring it stands upright. This basket will be your main conduit for adding organic materials and moisture to the bed.
Step 4: Create the Base and Drainage Layers
With the structure in place, prepare the base of your garden bed. Start by laying down a layer of cardboard or several sheets of newspaper over the entire base area, inside the walls but around the compost basket. This acts as a weed barrier and adds carbon to the soil as it decomposes. Next, create a good drainage layer. Place larger, coarser materials at the very bottom, such as small branches, twigs, or small rocks. This prevents waterlogging and provides aeration. A layer of inverted sod, if available, can also work well, with the grass side down.
Step 5: Fill The Bed with Organic Layers (Lasagna Gardening Method)
Now comes the fun part – filling your keyhole garden! This is where the “lasagna gardening” method shines, creating a rich and fertile growing medium. Alternate layers of brown (carbon-rich) and green (nitrogen-rich) materials, moistening each layer as you add it.
- Rough Brown Layer: Start with a thick layer of dried leaves, straw, or wood chips.
- Green Layer: Add a layer of fresh grass clippings, kitchen scraps, or fresh plant trimmings.
- Brown Layer: Follow with another brown layer.
- Manure/Compost Layer: Incorporate a layer of well-rotted manure or finished compost to introduce beneficial microbes and nutrients.
- Repeat: Continue alternating brown and green layers, like a lasagna, building up the bed. Ensure each layer is thoroughly moistened. As you build, ensure the layers slope downwards from the outer wall towards the central compost basket. This slight incline helps gravity distribute nutrients and moisture efficiently.
Periodically add handfuls of good garden soil or finished compost throughout the layers to introduce beneficial microorganisms and help with decomposition. Aim to fill the bed to within 6-12 inches (15-30 cm) of the top of your outer wall, allowing for subsequent settling.
Step 6: Top Off with Quality Soil and Final Preparations
Once your organic layers are in place and have settled slightly, top off the entire bed with at least 6-12 inches (15-30 cm) of high-quality topsoil mixed with plenty of finished compost. This is the primary rooting zone for your plants. Make sure the soil is well-distributed and maintains the slight slope towards the central compost tower. Water the entire bed deeply to encourage further settling and activate the decomposition process. At this point, your keyhole garden bed is almost ready for planting!
Step 7: Plant Your Keyhole Garden and Begin Composting
After a day or two, once the initial settling has occurred, your keyhole garden is ready for planting. Carefully arrange your chosen plants, considering their mature size and sunlight requirements. Plant taller plants on the north side if possible to avoid shading smaller plants. Once planted, give everything a good watering. Now, the keyhole magic truly begins: regularly add kitchen scraps (fruit/vegetable peels, coffee grounds, tea bags), grass clippings, and small garden trimmings into the central compost basket. Keep this composting material moist; you can even pour greywater from washing dishes into it. This continuous feeding of the compost basket will provide a steady supply of nutrients and moisture to your plants, creating a truly self-sustaining system. Remember to monitor moisture levels and add water to the compost basket as needed, especially during dry spells. You can learn more about maintaining your systems for peak performance.
Pro Tips for Your Keyhole Garden Bed and Common Mistakes to Avoid
Building a keyhole garden bed is a rewarding endeavor, but a few expert tips can enhance its performance and longevity. Avoiding common pitfalls will also save you time and effort, ensuring your keyhole garden thrives from the start. Learn from the experiences of others to make your project a resounding success.
Pro Tips:
- Moisture is Key: Always keep the central compost basket moist. It’s the engine of your keyhole garden. Pouring a bucket of water or even greywater into it a few times a week helps create nutrient-rich “compost tea” that leaches into the soil.
- Diverse Layers: When filling your bed, aim for a balanced mix of “browns” (carbon-rich, like dry leaves, straw) and “greens” (nitrogen-rich, like kitchen scraps, grass clippings). This balance leads to efficient decomposition.
- Plant Thoughtfully: Place heavy feeders (e.g., tomatoes, squash) closer to the compost basket, as they will benefit most from the concentrated nutrients. Place plants with lower nutrient needs further away.
- Mulch, Mulch, Mulch: Once planted, add a layer of organic mulch (straw, wood chips, shredded leaves) to the topsoil. This conserves moisture, suppresses weeds, and regulates soil temperature.
- Regular Harvesting: Keep harvesting your crops as they mature. This encourages more production and prevents plants from going to seed prematurely.
- Winter Protection: In colder climates, consider covering your keyhole garden with a layer of straw or a low tunnel in winter to extend the growing season or protect dormant plants.
- Observation is Crucial: Pay attention to your plants and the garden bed. Are plants showing nutrient deficiencies? Is the compost breaking down effectively? Adjust your watering and feeding as needed.
Common Mistakes to Avoid:
- Not Enough Moisture in the Compost Basket: A dry compost basket won’t break down organic matter efficiently, and nutrients won’t leach into the soil. Keep it consistently damp.
- Using Unsuitable Materials: Avoid adding diseased plants, invasive weeds, pet waste, or meat products to your compost basket, as these can attract pests or introduce pathogens. Avoid pressure-treated wood not rated for food gardens.
- Forgetting Drainage: While the compost tower helps with moisture, a good drainage layer at the bottom of the bed is essential to prevent waterlogging, especially in clay soils.
- Not Leveling the Base: A wobbly or unleveled base will compromise the structural integrity of your keyhole garden over time. Take the time to level the site properly.
- Overpacking Layers: While you need many layers, don’t compact them too much. Airflow is crucial for aerobic decomposition.
- Planting Too Densely: While keyhole gardens are productive, overcrowding can lead to poor air circulation, competition for nutrients, and increased risk of disease. Give your plants room to grow.
- Neglecting Winter Prep: In cold regions, leaving the garden exposed can damage soil structure and perennial plants. Protect it for the off-season.
Eco-Friendly Variations for Your Keyhole Garden Bed
The very essence of a keyhole garden is sustainability, but you can take its eco-friendliness even further with various adapted designs and material choices. These variations not only reduce your environmental footprint but can also enhance the garden’s efficiency and aesthetic appeal.
- Salvaged Materials Galore: Embrace the “reduce, reuse, recycle” philosophy by constructing your entire keyhole garden from salvaged materials. Think old tires (stacked and painted), broken concrete or brick rubble (carefully stacked), repurposed plastic drums cut in half, or even old wooden pallets (check for heat-treatment, not chemical, if using for food). This drastically cuts down on material costs and diverts waste from landfills.
- Wattle Fencing Walls: For a truly rustic and natural keyhole garden, consider using wattle fencing for the outer walls. This involves weaving pliable branches (like willow, hazel, or even bamboo) around upright stakes. It’s a beautiful, labor-intensive but highly sustainable option that integrates seamlessly with a natural garden design.
- Living Walls (Edible Green Facade): While more complex, some innovative designs incorporate living walls around the exterior. Small pockets or terraced sections can be created using geotextile fabric or mesh to grow cascading herbs or small flowers, maximizing vertical space and insulation.
- Rainwater Harvesting Integration: Strategically place your keyhole garden near a downspout or set up a small rainwater harvesting system like a rain barrel. You can then use the collected rainwater to moisten the central compost basket, further reducing your reliance on municipal water and closing another resource loop.
- Polyculture and Companion Planting Focus: While not a structural variation, intentionally designing your plant layout using polyculture (growing multiple plant species together) and companion planting principles enhances biodiversity and natural pest control. This reduces the need for external inputs like pesticides and creates a more resilient ecosystem within your garden.
- Mycorrhizal Fungi Inoculation: Enhance the soil health and nutrient uptake by introducing mycorrhizal fungi inoculants when you add your topsoil or plant new seedlings. These beneficial fungi form symbiotic relationships with plant roots, extending their reach for water and nutrients, making your garden even more self-sufficient.
Seasonal Considerations for Your Keyhole Garden Bed
A keyhole garden bed, like any living system, benefits from seasonal awareness and adapted care. Understanding how to manage your garden throughout the year will maximize its productivity and ensure its longevity. From refreshing its nutrients to protecting it from extreme weather, seasonal planning is vital.
Spring: Reawakening and Planting
Spring is the season of renewal. As temperatures rise, inspect your keyhole garden. If the soil level has dropped significantly due to decomposition over winter, top it up with a fresh layer of good quality compost and a few inches of topsoil. Lightly fork this in without disturbing the deeper layers. Ensure the central compost basket is active and moist. This is the ideal time for planting your spring and early summer crops. Consider starting seeds indoors or buying healthy starts to get a head start. Replenish your mulch layer to conserve moisture as the weather warms.
Summer: Growth and Maintenance
Summer is peak growth season. Regular watering of the central compost basket is paramount, as the heat will increase evaporation. Continue adding kitchen scraps and garden waste to the basket frequently; the warmth will accelerate decomposition. Monitor your plants for pests and diseases, addressing issues organically. Harvest regularly to encourage continuous production. Ensure your mulch layer is thick enough to suppress weeds and maintain soil moisture, which becomes even more critical during hot, dry spells. Mid-season feeding with a liquid organic fertilizer can boost heavy feeders.
Autumn: Harvest and Preparation for Dormancy
Autumn brings the final harvests and the beginning of preparation for colder months. As summer crops finish, clear out spent plants. Continue adding organic waste to the compost basket, but slow down on any new nitrogen-rich additions as decomposition naturally slows. Consider planting cool-season crops like kale, spinach, and lettuces for an extended harvest. Towards late autumn, once all crops are harvested or frost has arrived, apply a thick layer of straw, shredded leaves, or other organic matter over the entire top of the keyhole garden. This acts as a protective blanket, insulating the soil, suppressing winter weeds, and providing slow-release nutrients as it breaks down over winter.
Winter: Rest and Protection
In colder climates, winter is a period of dormancy. The primary goal is to protect the soil and any dormant perennials from harsh freezes. The thick mulch applied in autumn will be crucial here. Avoid disturbing the bed too much. You can continue adding small amounts of kitchen scraps to the compost basket if it remains unfrozen, though decomposition will be very slow. In areas with extremely cold winters, some gardeners opt to cover the entire keyhole garden with a tarp or a low hoop house to offer additional protection and keep the soil slightly warmer. Use the winter months for planning next year’s crops and sourcing materials for any spring top-ups.
Expert Resources for Your Keyhole Garden Journey
To deepen your understanding and fine-tune your keyhole garden practices, explore these authoritative external resources. They offer comprehensive insights into various aspects of organic gardening, composting, and sustainable practices, complementing your hands-on experience.
- For an excellent overview of composting principles applicable to your keyhole garden, this guide from the University of Minnesota Extension provides practical advice on what to compost and how.
- To delve deeper into organic fertilization and soil health, resources like the Royal Horticultural Society’s guide on feeding plants can offer valuable insights into supporting your keyhole garden’s productivity.
- For general troubleshooting and a vast array of gardening tips that can be applied to keyhole beds, Gardening Know How provides extensive articles on various gardening topics.
Conclusion
Building a keyhole garden bed is more than just constructing a raised garden; it’s an adoption of a holistic, sustainable gardening philosophy. By integrating composting directly into your growing space, you create a self-feeding, water-efficient system that thrives on waste and requires minimal external inputs. This ingenious design, rooted in African permaculture, offers a practical and rewarding way to grow fresh produce, reduce your ecological footprint, and connect more deeply with the natural cycles of your garden.
From the initial planning and construction to the joyful process of planting, harvesting, and composting, each step in creating your keyhole garden brings you closer to a more resilient and productive growing space. Embrace the challenge, enjoy the journey, and prepare to be amazed by the bounty and sustainability that your keyhole garden will provide. Happy gardening!
FAQ: Building a Keyhole Garden Bed
<p><strong>Q1: How long does it take for a keyhole garden to be ready for planting?</strong></p>
<p>A1: Once constructed and filled with layers, a keyhole garden can generally be planted immediately. However, it's beneficial to give the layers a few days to settle and water deeply after construction. The initial decomposition process will begin quickly, but the full nutrient cycling takes time to establish, so topping with good quality compost and topsoil is crucial for immediate planting success.</p>

<p><strong>Q2: What should I avoid putting in the central compost basket?</strong></p>
<p>A2: To prevent attracting pests and introducing pathogens, avoid adding meat, bones, dairy products, oily foods, pet waste, diseased plant material, and aggressive weeds (like bindweed or couch grass) that might re-root. Stick to fruit and vegetable scraps, coffee grounds, tea bags, grass clippings, and small, non-woody garden trimmings.</p>

<p><strong>Q3: Can I build a keyhole garden on concrete or a patio?</strong></p>
<p>A3: Yes, keyhole gardens are fantastic for hard surfaces! Since they are raised beds, they are self-contained. Ensure good drainage through the layers and consider placing a permeable barrier (like landscape fabric) at the very bottom to prevent soil from washing out, if the surface has any cracks or gaps. The raised design works perfectly for urban settings or areas with poor native soil.</p>

<p><strong>Q4: How often do I need to water a keyhole garden?</strong></p>
<p>A4: A keyhole garden's watering needs are significantly reduced due to its design. The central compost basket should be kept consistently moist by adding water or greywater regularly (a few times a week, or daily in very hot, dry weather). This moisture then leaches into the surrounding soil. Monitor the soil directly for your plants' needs, especially during establishment or extreme heat, but generally, less frequent, deeper watering focused on the compost tower is sufficient.</p>


