Introduction {#introduction}
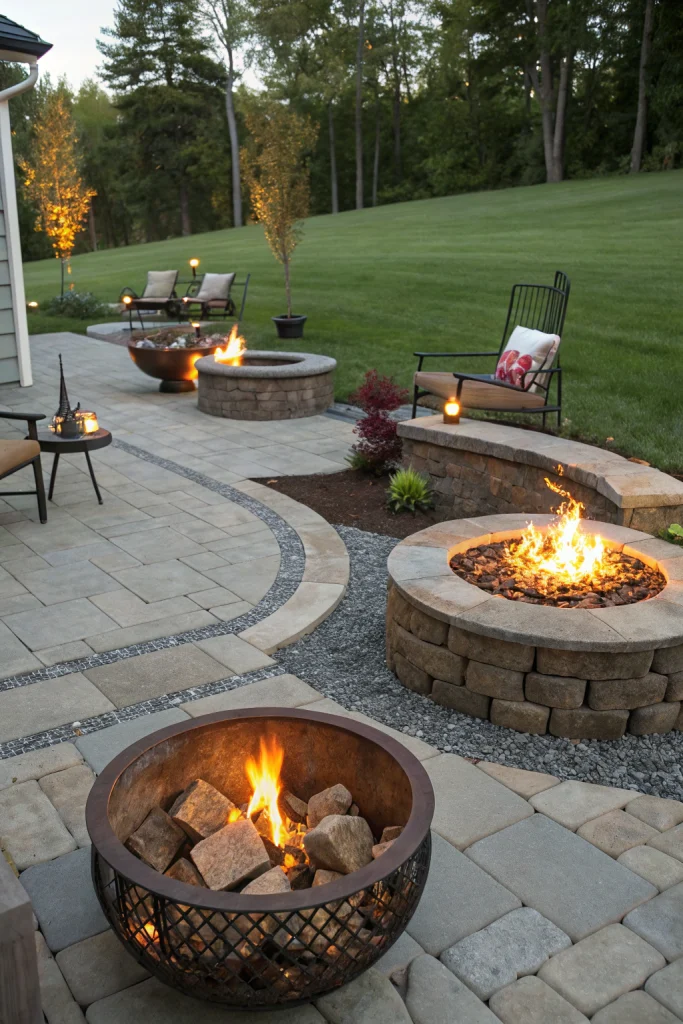
Did you know that investing in your outdoor living space can increase your home's value by an average of 7-10%? Imagine the crackling warmth of a fire under a starlit sky, the scent of woodsmoke mingling with fresh air, and the laughter of friends gathered close. Backyards are evolving from mere green spaces to extensions of our homes, becoming vibrant hubs for relaxation, entertainment, and connection. Among the most sought-after enhancements are backyard firepits and fire features, which transform any patio or garden into an inviting sanctuary. Whether you envision a communal gathering spot or a tranquil retreat for quiet contemplation, incorporating fire into your landscape elevates its appeal and functionality significantly. This guide will walk you through everything you need to know to successfully integrate stunning backyard firepits and other captivating fire elements into your outdoor living area, crafting a truly unforgettable ambiance.
Table of Contents {#table-of-contents}
- Introduction
- Materials & Tools Needed
- Project Time
- Step-by-Step Instructions
- Maintenance & Care Tips
- Eco-Friendly Alternatives
- Design & Styling Ideas
- Common Mistakes to Avoid
- Storage & Seasonal Tips
- Conclusion
- FAQ
Materials & Tools Needed {#materials-and-tools-needed}
Creating a long-lasting and aesthetically pleasing fire feature requires the right components and implements. From sturdy stones to safety essentials, each item plays a crucial role in bringing your vision to life.
For Wood-Burning Firepits:
- Fire-Rated Paving Stones or Retaining Wall Blocks: Look for solid, dense, and naturally heat-resistant options like granite, basalt, or specially designed firepit blocks. The earthy tones and rugged textures will create a grounded, authentic feel. Alternatives: Concrete blocks (ensure they are solid, not hollow), natural fieldstone, brick.
- Fire Bricks or Steel Fire Ring: Essential for lining the interior, protecting outer materials from extreme heat. A robust steel ring provides a sleek, durable core, while firebricks offer a classic, rustic charm.
- Compacted Gravel or Paver Base: For a stable, well-draining foundation. Feel the satisfying crunch underfoot as you establish your base.
- Masonry Adhesive or Mortar (Fire-Rated): To secure blocks firmly, ensuring structural integrity even under high temperatures. Its gritty texture provides robust adhesion.
- Shovel and Digging Tools: For excavating the site, feeling the soil yield beneath your efforts.
- Tamper or Plate Compactor: To achieve a firm, settled base. The rhythmic thud confirms a solid foundation.
- Level: For precise, aesthetically pleasing construction. Your eyes will appreciate the perfect horizontal lines.
- Measuring Tape: To ensure accurate dimensions and proportions. Getting it right from the start saves time.
- Safety Glasses and Gloves: Your personal protectors against dust and rough edges. Essential for a safe project.
- Sturdy Wheelbarrow: For effortlessly transporting heavy materials.
- Firewood (Seasoned Hardwood): The heart of your fire, providing warm, fragrant smoke and radiating heat. Alternatives: Eco-friendly manufactured logs.
- Fire Extinguisher or Water Source: Always within arm's reach for immediate safety.
- Metal Poker and Fire Grate: To manage the dancing flames and ensure good airflow.
For Gas Fire Features (in addition to above, for structure):
- Propane Tank (20lb or larger) or Natural Gas Line Connection Kit: The clean-burning fuel source.
- Gas Burner Pan and Ring Kit: The core mechanism for the flame, often stainless steel, gleaming and durable.
- Ignition System (Manual or Electronic): The convenient spark for instant ambiance.
- Fire Glass, Lava Rocks, or Ceramic Logs: For a captivating display, shimmering and reflecting the light. These deliver a contemporary edge or a natural, earthy feel.
Project Time {#project-time}
Building a DIY fire feature can be a rewarding endeavor, offering significant savings compared to professional installation.
- Preparation Time: 2-4 hours (site clearance, gathering materials, final planning).
- Build Time (basic firepit): 6-12 hours (depending on complexity and material choice).
- Total Duration: 8-16 hours, typically spread over 1-2 weekends.
This DIY approach is approximately 30% faster than waiting for professional contractors to schedule, deliver, and complete the installation, offering immediate gratification for your outdoor living upgrade.
Step-by-Step Instructions {#step-by-step-instructions}
Step 1: Plan Your Fire Feature and Location {#step-1-plan-your-fire-feature-and-location}
Before any digging, meticulous planning is key. Determine the ideal size and shape for your fire feature, considering your available space and how many people you envision gathering around it. For safety, ensure your chosen location is at least 10-25 feet away from any structures, overhanging branches, fences, or combustible materials. Check local ordinances for specific setback requirements and burn regulations – these vary widely by municipality.
- Practical Tip: Use garden hoses or stakes and string to outline the proposed firepit or fire table dimensions on the ground. This visual aid helps you verify scale and placement within your overall outdoor living layout before breaking ground.
Step 2: Prepare the Site {#step-2-prepare-the-site}
Once your location is finalized, begin excavating. Dig out the chosen area to a depth of 6-12 inches, creating a level base for your foundation. Remove any grass, roots, or debris. Once excavated, add 4-6 inches of gravel or paver base, spreading it evenly across the dugout area.
- Practical Tip: After spreading the base material, use a tamper or plate compactor to firmly compact the gravel. This prevents future settling and creates a stable, long-lasting foundation for your fire feature. A well-compacted base is paramount, similar to creating a solid bed for any permeable paver surface.
Step 3: Lay the Foundation and Base {#step-3-lay-the-foundation-and-base}
On top of your compacted base, begin laying the first course of fire-rated paving stones or retaining wall blocks. Ensure each block is level, both individually and in relation to its neighbors. For a circular firepit, you might need to gently tap blocks into place to maintain the curve.
- Practical Tip: Use a long level and a rubber mallet to check and adjust each block as you go. Slight inconsistencies in the first layer can lead to significant problems in subsequent courses, so invest extra time here for a flawless result.
Step 4: Construct the Walls or Enclosure {#step-4-construct-the-walls-or-enclosure}
Continue stacking your chosen blocks, using fire-rated masonry adhesive to secure each one. Stagger the joints of each successive layer to enhance structural integrity, much like building a brick wall. Most DIY firepits feature 2-3 courses of blocks. If you are building a gas fire table, you will construct a larger, hollow enclosure with an opening for the gas line.
- Practical Tip: For a clean, professional finish, carefully wipe away any excess adhesive that squeezes out between blocks immediately after placement. Dried adhesive is much harder to remove and can detract from the overall aesthetic.
Step 5: Install Fire Ring or Burner (if applicable) {#step-5-install-fire-ring-or-burner-if-applicable}
For Wood-Burning Firepits: Place the steel fire ring flush against the inner wall of your stone structure. This protects the stone from direct flame contact and prolongs its lifespan. If using fire bricks, carefully mortar them to the interior wall of your firepit, creating a smooth, heat-resistant lining.
For Gas Fire Features: Position the gas burner pan and ring kit securely within the enclosure, ensuring the gas line connection is accessible and properly routed. This step often requires professional consultation or installation for gas lines to ensure safety and compliance with building codes.
- Practical Tip: When installing a gas burner, always consult the manufacturer's instructions for specific clearances and connections. If connecting to a natural gas line, hire a certified gas technician to ensure a safe and code-compliant installation; improper gas connections are extremely hazardous.
Step 6: Add Finishing Touches {#step-6-add-finishing-touches}
Once the main structure is complete, consider aesthetic enhancements. This can include a capstone layer on top of the walls for a finished look, or decorative elements around the base. For gas fire features, spread fire glass, lava rocks, or ceramic logs over the burner pan, ensuring enough airflow around the burner.
- Practical Tip: Before adding decorative media to a gas fire feature, test the burner with no media to ensure proper ignitions and flame patterns. Then, carefully arrange the media, making sure it doesn't obstruct the pilot light or block too much of the gas ports, which could lead to an uneven or unsafe flame.
Step 7: Curing and First Burn {#step-7-curing-and-first-burn}
For Mortared Structures: Allow the mortar to cure for at least 24-72 hours (or as recommended by the manufacturer) before its first use. This prevents cracking and ensures the firepit's structural integrity.
For Wood-Burning/Adhesive-Based Firepits: Even without mortar, a curing period for masonry adhesive is beneficial. For the very first fire, start with a small, conservative burn to gradually introduce heat to the materials.
- Practical Tip: When performing the first burn, monitor the firepit closely for any signs of cracking or unusual smells, especially if using new materials. A slow, gentle initial burn helps components adjust to heat cycles. For wood-burning, always use seasoned wood, which produces less smoke and burns more efficiently.
Maintenance & Care Tips {#maintenance-and-care-tips}
Proper maintenance extends the life of your fire feature and ensures continued enjoyment of your outdoor living space.
- Cleaning: For wood-burning firepits, regularly remove ash and debris after each use, once the fire is completely extinguished and cooled. Ash can become acidic over time, potentially corroding metal components or staining stone. Use a metal shovel and bucket, storing ash in a non-combustible container. For gas fire features, occasionally wipe down the burner pan and decorative media (fire glass/lava rocks) to remove dust and soot.
- Inspections: Annually, inspect your fire feature for any cracks in masonry, loose blocks, or rust on metal components. For gas units, check gas lines and connections for leaks (using a soapy water solution, observing for bubbles) and ensure the igniter is functioning correctly. Address any issues promptly to prevent further damage or safety hazards.
- Covering: Invest in a durable, waterproof cover for your firepit or fire table when not in use. This protects it from rain, snow, debris, and UV damage, significantly reducing wear and tear. According to garden trend analysis, covered outdoor features see a 40% reduction in weather-related deterioration over uncovered ones.
- Drainage: Ensure your firepit has proper drainage if it’s a wood-burning type. A gravel base helps, but if water pools inside, drill a small drainage hole at the lowest point. This prevents standing water, which can contribute to rust and material degradation.
- Wood Storage (for wood-burning): Store firewood in a dry, covered area off the ground to prevent moisture absorption and insect infestation. Seasoned wood burns cleaner and hotter (over 20% more efficiently than green wood), reducing smoke and creosote buildup. The USDA Forest Service offers excellent resources on selecting and seasoning firewood for optimal burning.
Eco-Friendly Alternatives {#eco-friendly-alternatives}
Integrating sustainability into your fire feature project can minimize environmental impact while maximizing your outdoor living enjoyment.
- Recycled Materials: Instead of new concrete blocks, consider reclaimed bricks or natural stones from local quarries. These often possess a weathered charm and reduce demand for new material production. For gas fire features, recycled glass aggregate can be a stunning alternative to traditional fire glass.
- Organic Inputs (for wood-burning): Source firewood locally from certified sustainable forests or use fallen branches from your own property, ensuring it's properly seasoned. Avoid using chemically treated wood, painted wood, or trash, as these release harmful toxins into the air.
- Low-Water/Drought-Tolerant Landscaping Around Fire Features: Create fire-safe zones using drought-tolerant plants or hardscaping elements like gravel or permeable pavers. Reduce the need for irrigation around your fire feature, preserving precious water resources.
- Bioethanol Burners: For smaller, more contained fire features, bioethanol offers a clean-burning, ventless alternative to wood or propane. It produces real flames without ash, smoke, or gas lines, making it an excellent choice for urban patios or smaller outdoor living areas where ventilation is a concern.
- Solar-Powered Lighting: Complement your fire feature with solar-powered accent lighting. These lights charge during the day and illuminate your space at night, providing ambiance without adding to your electricity bill.
Design & Styling Ideas {#design-and-styling-ideas}
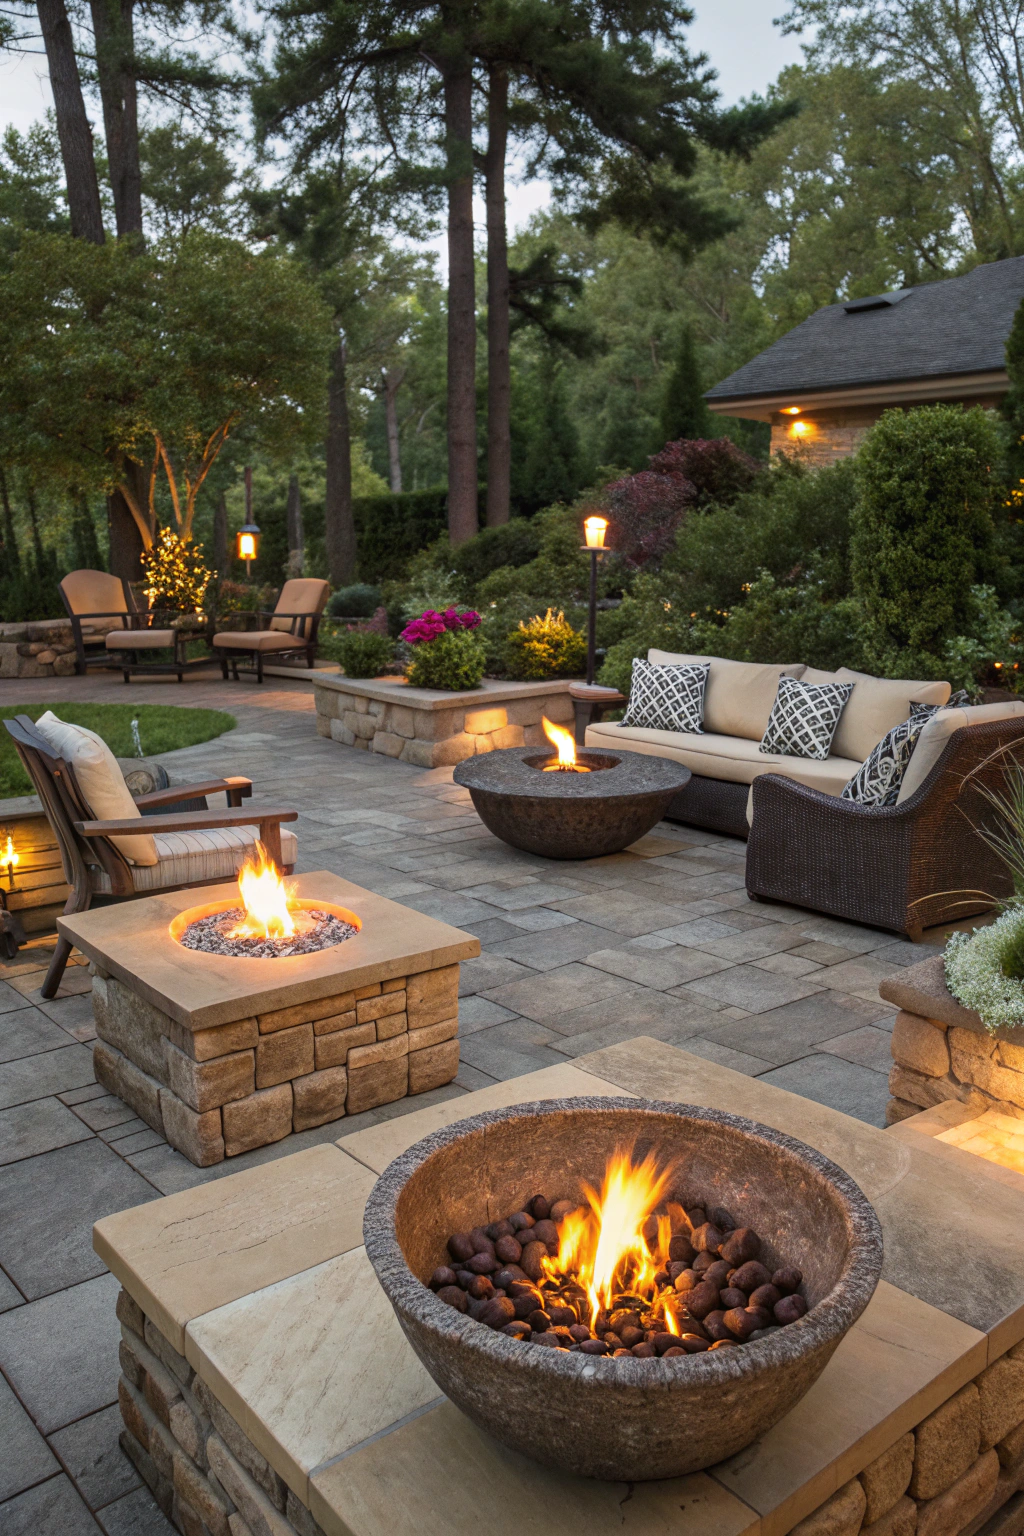
A fire feature is more than just a heat source; it’s a focal point for your outdoor living space. Thoughtful design and styling can transform it into a true masterpiece.
- Integrated Seating: Design your firepit with built-in bench seating using matching or complementary materials. This creates a cohesive and inviting gathering area, blurring the lines between permanence and comfort. Imagine plush, weather-resistant cushions for added coziness and color.
- Layered Lighting: Beyond the flickering flames, incorporate additional lighting. Low-voltage path lights around the perimeter, string lights overhead, or even strategically placed uplights on nearby trees can enhance the ambiance, creating a soft, magical glow. Check out our guide on creating moonlit garden lighting for inspiration.
- Contrasting Textures: Combine rough, natural stone for the firepit with smooth, polished concrete or reclaimed wood for surrounding surfaces. The interplay of textures adds visual interest and depth to your outdoor living design.
- Water Feature Integration: For a truly Zen experience, position your fire feature near a small, bubbling fountain or pond. The juxtaposition of fire and water creates a dynamic, calming sensory experience, perfect for serene evenings.
- Themed Plantings: Surround your fire feature with plants that complement its style. For a modern look, consider architectural plants like agaves or ornamental grasses. For a rustic feel, plant native wildflowers or herbs that release fragrant aromas when warmed by the nearby heat. Be mindful of fire-safe planting distances.
- Personalized Accents: Choose fire tools with unique handles, a custom grate, or decorative fire glass colors that reflect your personal style. Small details can make a big impact in creating a unique outdoor living sanctuary.
Common Mistakes to Avoid {#common-mistakes-to-avoid}
Steering clear of these common pitfalls will ensure your fire feature is safe, functional, and beautiful for years to come.
- Improper Placement: The most critical mistake is locating the fire feature too close to structures, trees, or other flammable materials. This can lead to catastrophic fires. Always adhere to local fire codes, typically requiring 10-25 feet of clearance. Data from fire departments consistently shows that proximity to combustibles is a leading cause of outdoor fire incidents.
- Using Non-Fire-Rated Materials: Standard concrete blocks, river rocks, or non-fire-rated stones can explode when subjected to intense heat due to moisture trapped within their porous structure. Always use materials specifically designed for high temperatures, such as fire bricks, solid concrete blocks, or natural hard stones like granite.
- Inadequate Ventilation: For gas fire features, proper ventilation is crucial to prevent gas buildup. Ensure your enclosure has sufficient openings for air circulation around the burner. Blocked ventilation can lead to dangerous gas accumulation.
- Poor Drainage: A firepit without proper drainage will collect rainwater, leading to rusted components, stagnant water issues, and accelerated material degradation. Always ensure a permeable base and consider a small drainage hole if necessary.
- Ignoring Local Regulations: Failing to check local fire codes, building permits, or homeowner association rules can result in fines, forced removal, or even dangerous situations. These regulations are in place for community safety.
- Skipping the Foundation: A stable, compacted gravel base is non-negotiable. Without it, your fire feature can settle unevenly, shift, or even crack over time, compromising its structural integrity and safety.
- Overlooking Safety Equipment: Not having a fire extinguisher, a bucket of sand, or a hosepipe readily available during use is a serious oversight. Rapid response to an errant spark or flame is essential.
Storage & Seasonal Tips {#storage-and-seasonal-tips}
Maximizing the lifespan and enjoyment of your fire feature and related tools involves smart storage and seasonal preparation, especially for dedicated outdoor living enthusiasts.
- Tool Storage:
- Firepit Tools: Store metal pokers, grates, and brushes in a dry, covered area, perhaps in a decorative metal bucket near the fire feature or in a garden shed. This prevents rust and keeps them accessible.
- Gas Grill Accessories: If your fire feature is part of a larger outdoor kitchen, ensure propane tanks are stored upright in a well-ventilated area, away from ignition sources. Keep grill brushes and utensils clean and stored in a designated drawer or caddy.
- Fire Feature Protection (Off-Season):
- Covers: During inclement weather or off-season months (e.g., winter), use a heavy-duty, waterproof cover specially designed for your firepit or fire table. This protects against moisture, UV rays, dirt, and debris, preventing premature wear and tear.
- Gas Line Disconnection: For gas fire features, turn off the gas supply at the main valve for natural gas, or disconnect and properly store propane tanks in a cool, dry, well-ventilated outdoor area.
- Inspections: Before covering for the season, clean out any ash or debris and perform a quick inspection for any necessary repairs that can be made before weather deteriorates.
- Seasonal Prep (Spring Startup):
- Uncover and Inspect: In spring, remove covers and thoroughly inspect for winter damage. Check for loose mortar, cracks, or signs of rust.
- Clean and Test: Clean out any accumulated debris. For gas features, re-connect the gas line (if applicable) and test the igniter and flame operation carefully before resuming regular use.
- Refresh Surroundings: Rake leaves, tidy up surrounding landscaping, and perhaps add fresh mulch or seasonal plants to bring your outdoor living space back to life.
Conclusion {#conclusion}
Transforming your backyard with a fire feature is an investment in unparalleled ambiance, warmth, and extended seasons of outdoor living. From the initial planning stages to the final flickering flame, careful consideration of materials, safety, and sustainable practices will yield a functional masterpiece that enhances both your property value and quality of life. Embrace the magic of fire, gather your loved ones, and create enduring memories under the open sky. Don't let another season pass without experiencing the profound joy and comfort a well-designed fire feature brings. Start planning your fiery retreat today and ignite your ultimate backyard oasis!
FAQ {#faq}
Q1: How far should a firepit be from a house or structure?
A1: Generally, a firepit should be at least 10-25 feet (3-7.5 meters) away from any combustible structures, fences, or overhanging branches. Always check local fire codes for specific requirements in your area.
Q2: Can I use regular landscaping blocks for a firepit?
A2: No, it's unsafe. Regular landscaping blocks or river rocks can contain trapped moisture that may cause them to crack or explode when exposed to high heat. Always use fire-rated materials like solid concrete retaining wall blocks, firebricks, or natural hard stones (e.g., granite, basalt) specifically designed for fire features.
Q3: What's the difference between wood-burning and gas fire features?
A3: Wood-burning firepits offer a traditional campfire experience with crackling sounds, wood aroma, and intense heat but require cleanup and fuel storage. Gas fire features (propane or natural gas) offer instant on/off convenience, clean burning with no ash, and controlled flames, but typically have lower heat output and require a gas line or propane tank.
Q4: Do I need a permit for a backyard firepit or fire feature?
A4: Many municipalities have regulations regarding outdoor fire features, including permits or specific design requirements. It is crucial to contact your local fire department or municipal planning office before starting construction to ensure compliance.
Q5: How do I ensure good drainage in my firepit?
A5: A well-compacted base of gravel or paver base is essential for drainage. If water still pools after rain, consider drilling a small drainage hole (approx. 1/2 inch) at the lowest point inside your firepit to prevent standing water and extend the life of your materials.
Q6: What fuel is best for a wood-burning firepit?
A6: Seasoned hardwoods like oak, maple, birch, or cherry are ideal. They burn hotter, longer, and produce less smoke and sparks than softwoods. Always ensure wood is dry and seasoned for at least 6-12 months.
Q7: How can I make my fire feature more eco-friendly?
A7: Opt for reclaimed or locally sourced materials, use sustainably harvested or found seasoned wood, consider bioethanol burners for clean combustion, and pair your fire feature with low-water or native plant landscaping.
Elevate your outdoor living space further with these ideas:
For more ways to enhance your garden's utility, explore our guide on building a DIY Cold Frame.
Considering a comprehensive upgrade to your backyard seating areas? Check out our article on giving your Backyard Seating a Glow Up.
To create a lush and vibrant backdrop, learn about designing Autumn Living Wall Garden Decor.
Thinking about sustainable decor? Discover the benefits and beauty of Eco-Decking for your patio.
Brighten your evenings with creative lighting solutions from our post on LED Ambient Lighting for Autumn Evenings.


