The Ultimate Guide: 7 Steps to a Self-Watering Raised Bed for Under $50
Are you dreaming of a thriving garden but dread the daily watering chore? Do you want to conserve water and give your plants the consistent moisture they crave? This comprehensive guide will show you how to build a highly efficient self watering raised bed DIY for less than $50. Imagine fresh produce, vibrant flowers, or bountiful herbs without the constant oversight – it’s not just a dream, it’s an achievable reality!
[lwptoc]
Why a Self-Watering Raised Bed Matters for Your Garden
In today’s world, efficiency and sustainability are increasingly important, especially in our gardens. A self-watering raised bed, often referred to as a wicking bed, is an ingenious solution that addresses several common gardening challenges. It functions on the principle of capillary action, drawing water up from a reservoir below into the soil above, mimicking natural processes and providing a consistent supply of moisture directly to plant roots.
One of the most significant benefits is water conservation. Traditional watering methods, especially overhead irrigation, can lead to significant water loss through evaporation and runoff. Wicking beds drastically reduce this waste, often using 50% less water than conventional gardens. This not only saves you money on your water bill but also contributes to responsible resource management, a win-win for both your wallet and the planet.
Beyond water efficiency, these beds promote healthier plant growth. By providing a steady, consistent water supply, plants avoid the stress of drying out between waterings. This reduces the risk of common issues like blossom end rot in tomatoes, nutrient deficiencies due to inconsistent moisture, and general plant stress. The roots are encouraged to grow downwards towards the water source, developing a stronger, more resilient root system.
Another often overlooked advantage is the reduction in weeding. Because the top layer of soil stays drier, weed seeds find it harder to germinate and establish themselves. This means less time spent pulling weeds and more time enjoying your flourishing garden. Furthermore, self-watering systems can be a game-changer for busy individuals or those who travel frequently, offering a degree of independence from daily watering duties.
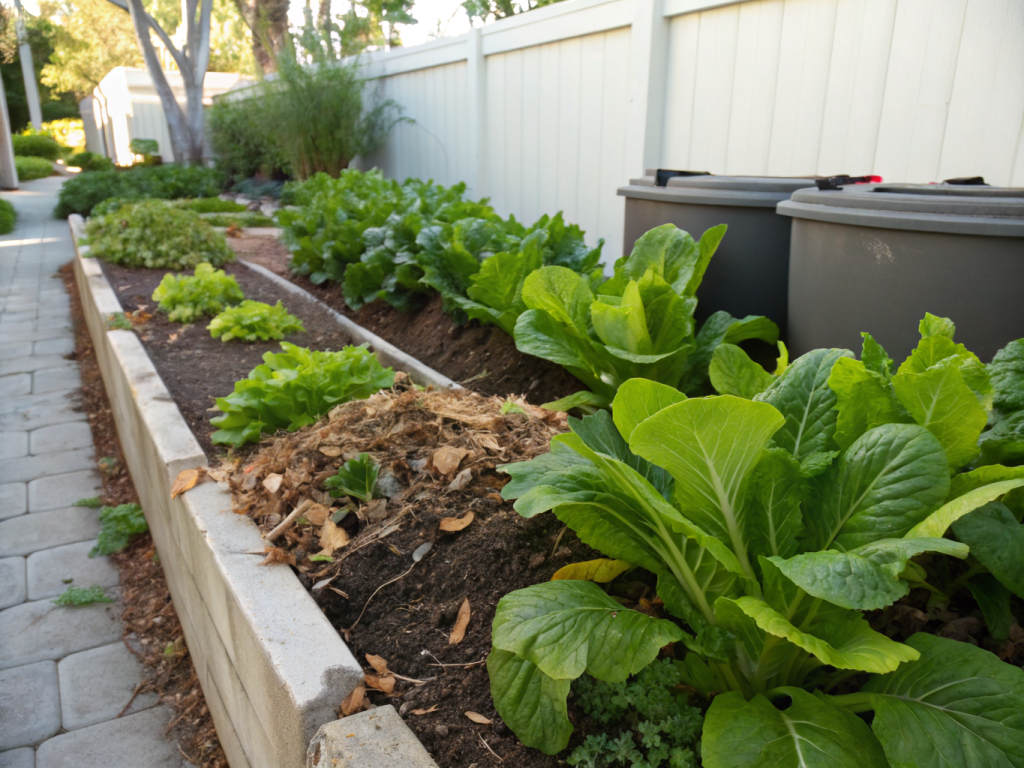
The consistent moisture also leads to better nutrient absorption. When soil moisture fluctuates wildly, nutrients can be leached away or become unavailable to plants. A wicking bed maintains a more stable soil environment, allowing plants to efficiently take up the nutrients they need for robust growth and higher yields. This method is particularly excellent for moisture-loving plants like leafy greens, tomatoes, and many root vegetables.
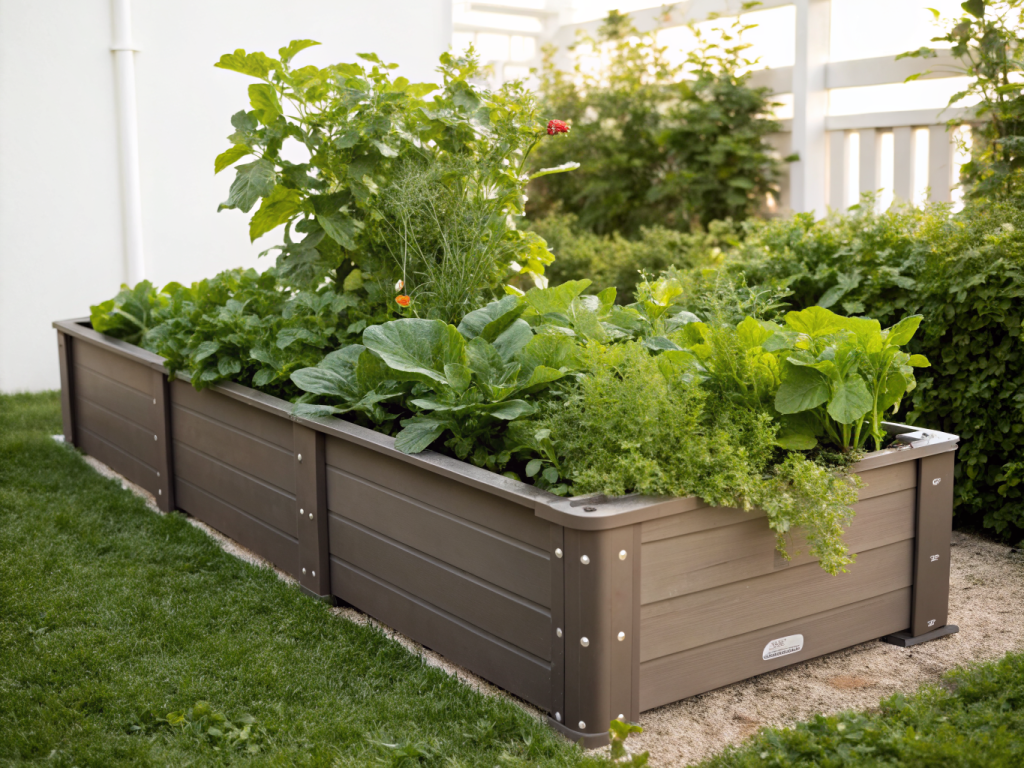
Finally, a raised bed itself offers ergonomic benefits, reducing bending and kneeling, making gardening more accessible and enjoyable for people of all ages and physical abilities. Combining this with a self-watering feature creates an incredibly low-maintenance, high-yield gardening system. Investing a little time upfront in building a self watering raised bed DIY will pay dividends in ease, productivity, and sustainability for many growing seasons to come.
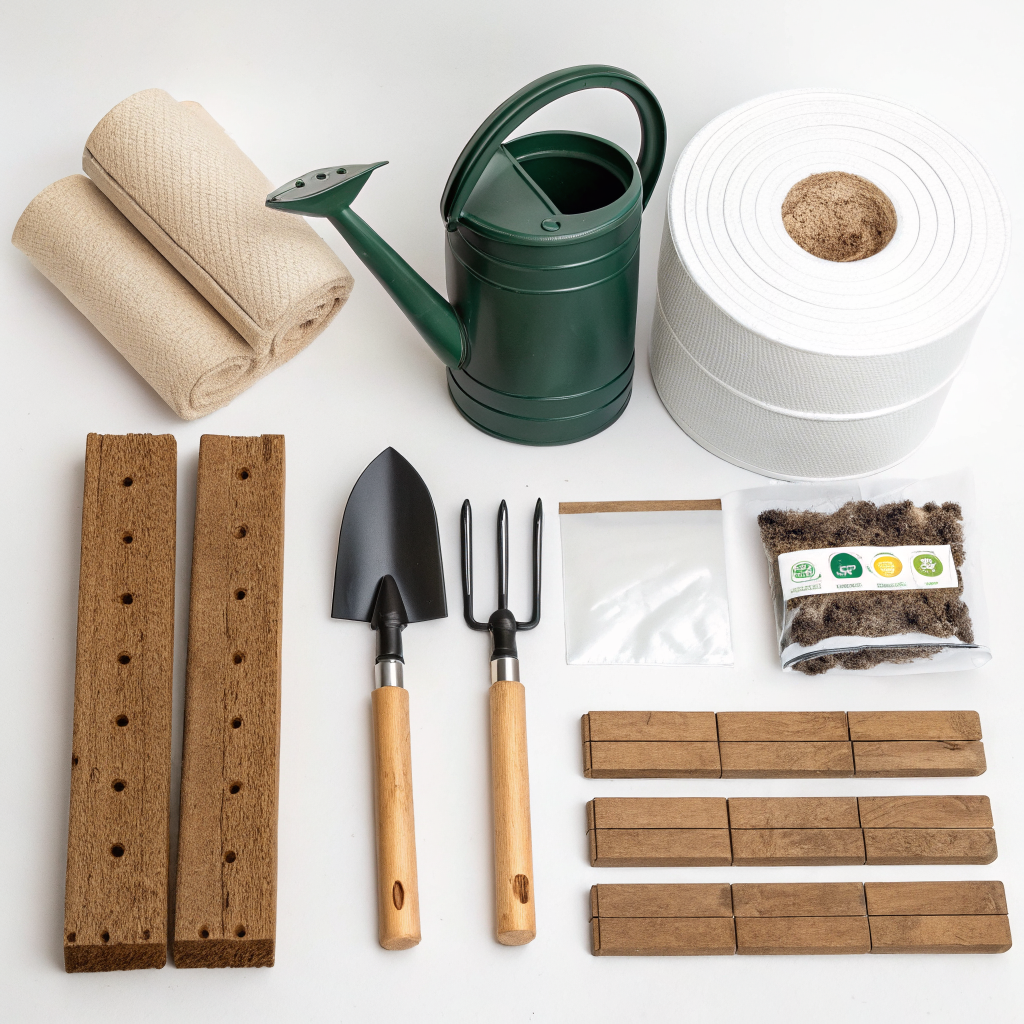
What You Need: Tools, Materials, and Plants
Building your budget-friendly self watering raised bed DIY requires a careful selection of materials, most of which can be found affordably at hardware stores or even repurposed from around your home. The key is to prioritize water retention and structural integrity without breaking the bank.
Materials:
- Lumber for the Frame:
- Two 8-foot long 2×6 boards (untreated pine or cedar are good budget options – just ensure untreated if growing edibles).
- Two 6-foot long 2×6 boards.
- Four 2×2 stakes (approximately 18-24 inches long) or corner brackets for internal support.
- Budget Tip: Look for reclaimed wood or pallets, but be sure they are untreated and safe for gardening.
- Base/Pond Liner:
- Heavy-duty pond liner or thick, food-grade plastic sheeting (e.g., 6 mil polyethylene) – enough to line the entire bottom and extend up the sides.
- Budget Tip: Repurpose a sturdy tarp if it’s thick enough and free from holes.
- Water Reservoir System:
- Schedule 40 PVC pipe (minimum 3-4 inches diameter, total length depends on bed size, usually two 2-foot sections for a 4×2 bed).
- End caps for PVC pipes.
- Drill with a 1/2-inch drill bit (or similar size) for perforations.
- Gravel or perforated drainage pipe (French drain type) can also be used, but PVC is often more efficient.
- Wicking Material (for water transfer):
- Landscape fabric or an old geotextile blanket to separate the soil from the reservoir. Avoid anything that will biodegrade quickly.
- A small amount of sand or perlite to help capillary action, if desired, though soil will often suffice.
- Filler Material for Reservoir (Optional but Recommended):
- Plastic bottles (empty, caps on, puncture a few holes) or plastic milk jugs.
- Perforated drainage pipes.
- Crushed rock or gravel (ensure it’s clean and doesn’t affect soil pH).
- The goal is to displace water volume without adding too much weight.
- Inlet Pipe:
- Small diameter PVC pipe (1-inch diameter, 18-24 inches long) with a cap or a flexible hose/tubing.
- Overflow Drain:
- Hose barb, bulkhead fitting, or simply a hole drilled a few inches below the soil line in the plastic liner.
- Fasteners:
- Deck screws (2.5-3 inches).
- Staple gun with heavy-duty staples (for liner).
- Growing Medium:
- High-quality potting mix (not garden soil, as it compacts too much). Look for mixes with coir, compost, and perlite.
- Compost (optional, for enriching the potting mix).
- Budget Tip: Make your own potting mix using compost, coco coir, and perlite if you have access to bulk materials.
Tools:
- Measuring tape
- Pencil
- Saw (hand saw, circular saw, or miter saw)
- Drill/driver
- Staple gun
- Level (optional, but helpful for even construction)
- Shovel and/or trowel for filling
- Gloves and safety glasses
Plant Recommendations for Your Self-Watering Bed:
Self-watering beds excel with moisture-loving plants. Consider these options for great success:
- Leafy Greens: Lettuce, spinach, kale, Swiss chard thrive with consistent moisture and are less likely to bolt.
- Herbs: Basil, mint (keep contained!), cilantro, parsley love stable moisture.
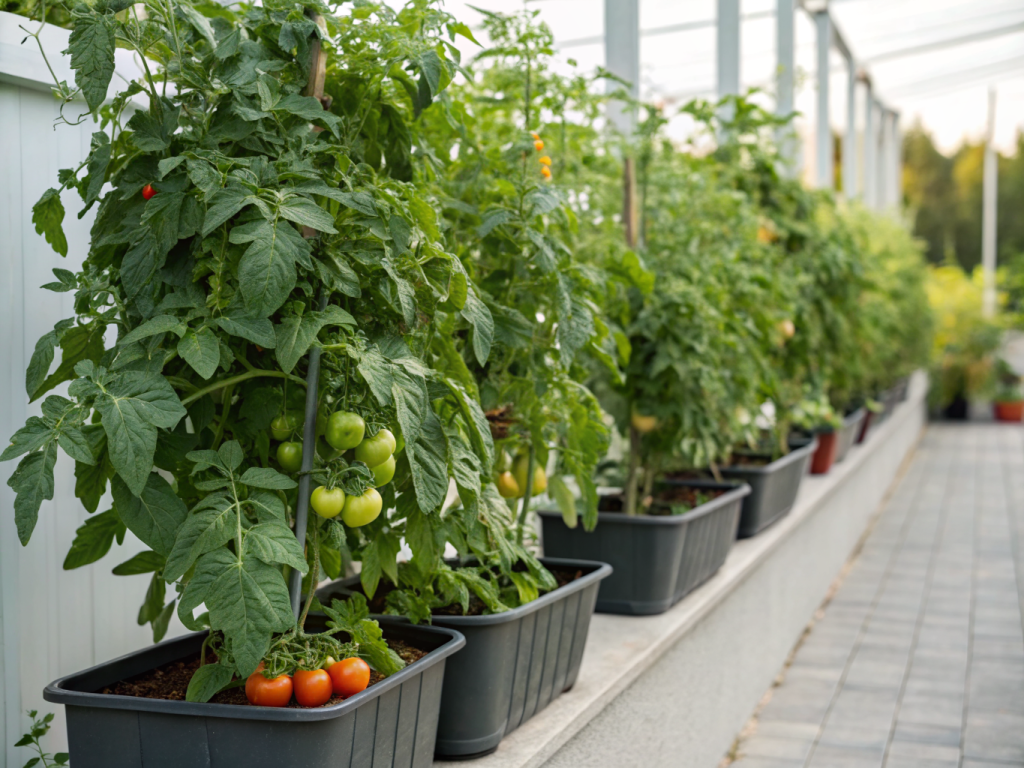
- Fruiting Vegetables: Tomatoes, peppers, eggplants, cucumbers, zucchini all perform well, producing fewer issues like blossom end rot.
- Root Vegetables: Carrots, radishes, and even some smaller potatoes can do well if the bed is deep enough and soil isn’t too heavy.
- Flowers: Many annuals and perennials that prefer consistently moist soil, such as impatiens, petunias, and cannas.
Avoid plants that prefer very dry conditions, like some succulents or drought-tolerant herbs, as they may become waterlogged.
Step-by-Step Guide: Building Your Wicking Wonderland
This section breaks down the construction of your self watering raised bed DIY into manageable parts. Take your time, measure twice, and enjoy the process of creating something truly beneficial for your garden.
Step 1: Construct the Raised Bed Frame
- Cut Your Lumber: Using your saw, cut the 2×6 boards to your desired lengths. For a common 4×2 foot bed, you’ll have two 4-foot pieces and two 2-foot pieces for the perimeter. Cut the 2×2 stakes to about 18-24 inches.
- Assemble the Rectangle: Lay out your cut lumber on a flat, level surface to form a rectangle. The shorter pieces will typically fit between the longer pieces (or vice-versa, just be consistent).
- Attach Corners: Use deck screws to join the boards at each corner. Pre-drilling pilot holes can prevent splitting. If using 2×2 stakes, position one stake flush with the inside corner and screw through the 2x6s into the stake from both sides. This provides excellent structural stability.
- Ensure Squareness: Use a measuring tape to measure the diagonals of your frame. If the measurements are equal, your frame is square. Adjust as necessary before fully tightening all screws.
Pro Tip for Frame Stability: For larger or deeper beds, consider adding a cross brace in the middle by attaching another 2×4 across the width or length of the bed. This prevents bowing when filled with soil and water.
Step 2: Install the Water Reservoir System
- Prepare PVC Pipes: Take your 3-4 inch diameter PVC pipes. Using your drill with a 1/2-inch bit, drill numerous holes along the entire length of the pipes. These holes will allow water to seep into the wicking material.
- Place Pipes in Bed: Lay the perforated PVC pipes on the bottom of your constructed raised bed frame. You’ll typically run these pipes lengthwise. For a 4-foot long bed, two 2-foot sections of pipe with end caps on each can work well, leaving space between them.
- Add Reservoir Filler (Optional but Recommended): This is where your empty plastic bottles, milk jugs, or even clean gravel come in. Fill the spaces between and around the PVC pipes with these materials. The goal is to fill volume in the reservoir area without adding excessive weight or cost from water. Ensure adequate space for water flow.
Step 3: Line the Bed and Create the Wicking/Overflow Outlets
- Position Liner: Drape your heavy-duty pond liner or thick plastic sheeting over the entire inside of the raised bed, ensuring it covers the bottom and extends up all four sides. Leave plenty of excess for now. Press it down firmly into the corners, around the PVC pipes, and filler material.
- Install Overflow Drain: This is a crucial step to prevent waterlogging. At one end of the bed, about 2-3 inches below where your soil surface will eventually be (calculate this based on your bed’s depth), cut a small hole in the plastic liner. This is your overflow. You can simply leave it as a hole, or for a cleaner finish, install a simple bulkhead fitting or hose barb here. This allows excess water to drain out once the reservoir is full, making it impossible to overwater.
- Create the Inlet Pipe Aperture: On the opposite end or a corner, position your smaller diameter PVC pipe (the inlet pipe) vertically, extending from the bottom of the reservoir to a few inches above the top of your bed frame. This is where you’ll pour water. Cut a small opening in the liner for the pipe to pass through, ensuring a snug fit.
- Secure Liner: Once the overflow and inlet are in place, smooth out the liner. Use your staple gun to secure the top edge of the liner to the inner perimeter of the wooden frame. Trim any excessive overhang, leaving a clean finish.
Step 4: Add the Wicking Barrier and Soil
- Place Wicking Barrier: Lay a layer of landscape fabric or thick geotextile material directly over the entire reservoir system (PVC pipes and filler). This layer acts as a barrier, preventing soil from falling into the water reservoir while still allowing water to wick upwards into the soil. Ensure it completely covers the reservoir.
- Add Potting Mix: Begin filling your bed with high-quality potting mix. Do NOT use heavy garden soil, as it compacts too much and inhibits wicking action. A good potting mix is light, airy, and drains well, yet retains moisture. Fill the bed to a few inches below the top of the frame. You can mix in a good amount of compost for added nutrients.
Step 5: Plant and Water
- Plant Your Garden: Now it’s time for the fun part! Arrange your chosen plants according to their light and spacing requirements. Dig small holes in the potting mix, place your seedlings or seeds, and gently backfill.
- Initial Watering (Top-Down): For the very first watering, and any time you replant, water your plants from the top, just as you would a regular container garden. This helps settle the soil around the roots and encourages initial establishment. Water until you see a little bit of drainage from the overflow hole.
- Fill the Reservoir: Once the initial top watering is done, use your inlet pipe to fill the water reservoir. Pour water slowly until you see it begin to flow out of the overflow drain. This indicates your reservoir is full.
Congratulations! You have successfully built your self watering raised bed DIY. Maintenance from here on out primarily involves checking the water level every few days or weeks (depending on weather and plant needs) and refilling the reservoir as needed.
Pro Tips and Common Mistakes for Your Self-Watering Raised Bed DIY
Building a self-watering raised bed is an excellent step towards a more efficient garden, but a few expert tips can elevate your success, while avoiding common pitfalls can save you headaches.
Pro Tips for Optimal Performance:
- Choose the Right Soil: This cannot be stressed enough. Use a lightweight, high-quality potting mix or a specially formulated raised bed mix. These mixes are designed to retain moisture yet remain aerated, crucial for capillary action. Avoid heavy garden soil or topsoil, as they compact easily, hindering water movement and suffocating roots.
- Layering for Success: Consider a layer of sandy soil or perlite directly above your wicking fabric if your potting mix is extremely lightweight. This can enhance capillary action and ensure consistent moisture transfer. However, for most quality potting mixes, the wicking fabric directly beneath the soil is sufficient.
- The Importance of the Overflow Hole: Never skip the overflow drain. It prevents the soil from becoming waterlogged, which can lead to root rot and other plant diseases. It’s the critical feature that transforms a simple reservoir into a “self-watering” system, ensuring the perfect balance of moisture.
- Monitor Initial Moisture: For the first week or two after planting, continue to check the top layer of soil. While the wicking system is fantastic, sometimes it takes a little time for the capillary action to fully establish, especially with new soil and small plants. Top-water lightly if the surface seems too dry.
- Regular Reservoir Checks: Depending on the weather, plant size, and type, your reservoir might need refilling anywhere from every few days to once every couple of weeks. Get into the habit of checking the water level through your inlet pipe. You can use a stick or simply observe when water stops flowing in easily.
- Nutrient Management: Since nutrients can be leached out with the continuous upward water movement, consider using slow-release organic fertilizers mixed into your potting soil at the beginning of the season. Alternatively, a dilute liquid feed applied directly to the reservoir can work, but be mindful of potential buildup.
- Plant Spacing: While a self-watering bed can support dense planting due to consistent moisture, remember that plants still need adequate air circulation and light. Overcrowding can lead to fungal issues.
Common Mistakes to Avoid:
- Using Garden Soil: As mentioned, this is the most frequent mistake. Garden soil is too dense for wicking beds, impeding water movement and preventing proper aeration for roots. Always opt for potting mix.
- No Overflow Drain: Without an overflow, your reservoir can fill during heavy rains, drowning your plant roots. This defeats the purpose of a wicking bed and leads to unhealthy plants.
- Insufficient Wicking Material: If your wicking material (like landscape fabric) is too thin, it might break down quickly or not transfer water effectively. Ensure it’s sturdy and has good capillary properties.
- Leaky Liner or Frame: A poorly installed or damaged liner means your water reservoir won’t hold water, rendering the self-watering system useless. Similarly, loose frame joints can compromise the bed’s integrity over time. Double-check all seals and fastenings.
- Forgetting Initial Top Watering: New seedlings and plants need water directly around their root zone to establish themselves. Relying solely on the reservoir for the first few days can lead to transplant shock or failure to thrive.
- Incorrect Reservoir Filler: Using materials that absorb too much water (like untreated wood chips that will rot) or are too fine (like sand that can clog pipes) can impede the reservoir’s function. Stick to plastic bottles, gravel, or PVC.
- Placing in Full Sun Without Mulch: While self-watering beds are great for retaining moisture, extreme sun can still dry out the topsoil rapidly and heat the water in the reservoir. A layer of mulch on top of the soil helps conserve moisture and regulate soil temperature, especially in hot climates.
By keeping these tips in mind and avoiding common pitfalls, your self watering raised bed DIY will be a thriving, low-maintenance haven for your plants, providing you with consistent harvests and gardening enjoyment year after year.
Eco-Friendly Variations for Your Self-Watering Raised Bed
Embracing a self-watering raised bed is already a step towards eco-conscious gardening due to its water-saving nature. However, with a few modifications and material choices, your self watering raised bed DIY can become even more environmentally friendly and sustainable.
- Reclaimed & Repurposed Materials:
- Lumber: Instead of new lumbe, source untreated reclaimed wood from demolition sites, old fences, or hardwood pallets (ensure they are ‘HT’ heat-treated, not chemically treated ‘MB’ or painted). Be absolutely certain any wood used for edible gardens is chemical-free.
- Reservoir Filler: Beyond plastic bottles, consider discarded plastic containers like old laundry detergent bottles (rinsed thoroughly), or even broken plastic garden pots. These divert waste from landfills.
- Liner Alternatives: While pond liner is effective, consider heavy-duty repurposed tarps or even old shower curtains if they are thick and durable enough. The key is preventing leaks.
- Rainwater Harvesting Integration:
- Connect your self-watering bed’s inlet pipe directly to a rainwater harvesting system, such as a rain barrel or downspout diverter. This ensures your reservoir is filled with naturally pure, chlorine-free water. This closes the loop on water usage and significantly reduces reliance on municipal water.
- You can also position your beds to catch direct rainfall, though an enclosed reservoir is better for preventing evaporation.
- Natural Wicking Materials:
- While landscape fabric is common, explore natural alternatives for the wicking barrier if available. Thick layers of untreated burlap or wool fabric (if it doesn’t break down too quickly) might work, though testing is recommended for durability and effective wicking.
- Consider using a coarse sandy layer mixed with a bit of aged wood chips as a natural separation and wicking layer, though this can be more complex to manage than fabric.
- Composting & Vermicomposting Integration:
- If you have a larger raised bed, consider integrating a vermicomposting tube. This is a perforated pipe (PVC or similar) inserted into the soil where you add kitchen scraps and worms. The worms convert the scraps into nutrient-rich castings and worm tea, which then seep into your self-watering system, naturally fertilizing your plants. Learn more about composting at Composting for Beginners: A Simple Start.
- Organic & No-Till Principles:
- Once your bed is built, commit to organic gardening practices. Use organic potting mix, compost, and natural fertilizers.
- Adopt a no-till approach by disturbing the soil as little as possible. This preserves soil structure, beneficial microorganisms, and the wicking action.
- Mulching for Moisture & Temperature Control:
- Always apply a layer of organic mulch (straw, leaves, wood chips) on top of the soil. This drastically reduces evaporation, suppresses weeds, and helps regulate soil temperature, further enhancing the water conservation efforts of your self watering raised bed DIY. This also adds organic matter to the soil as it breaks down. More details on mulching can be found at The Benefits of Mulching Your Garden.
- Planting for Biodiversity:
- Choose a diverse range of plants, including beneficial insect attractors, to create a mini ecosystem within your bed. This reduces pest problems naturally and supports local biodiversity. Find ideas for companion planting at Companion Planting for a Healthy Garden.
By incorporating these eco-friendly variations, your self-watering raised bed not only conserves water but also contributes to reduced waste, promotes natural ecological processes, and supports a more sustainable gardening lifestyle.
Seasonal Considerations for Your Self-Watering Raised Bed
While a self watering raised bed DIY simplifies hydration, seasonal changes still require some attention to ensure year-round success. Adapting your approach with the turning of the seasons will maximize your yield and the longevity of your bed.
Spring: The Awakening
- Inspection and Maintenance: Before planting, inspect your raised bed. Check the integrity of the frame, ensure the liner is still intact, and clear any debris from the inlet and overflow pipes.
- Soil Amendment: If you didn’t amend your soil in the fall, now is the time. Gently mix in fresh compost and a slow-release organic fertilizer to replenish nutrients for the upcoming growing season.
- Initial Fill: Thoroughly water the soil from the top after planting, then fill the reservoir. In spring, plants are smaller and days are cooler, so reservoir refills will be less frequent initially.
- Seed Starting: For seeds, ensure the soil surface remains consistently moist. The wicking action is excellent, but very shallow seeds might need light top watering until they germinate and send roots deeper.
Summer: Peak Performance
- Frequent Reservoir Checks: This is when your self-watering system truly shines. Hot, sunny days and thirsty, mature plants mean the reservoir will empty much faster. Check the water level every few days, or daily during heatwaves.
- Monitor Overflow: Ensure the overflow drain is clear and functioning. Heavy summer thunderstorms can quickly top off the reservoir, and excess water needs a way out to prevent waterlogging.
- Mulching is Key: A thick layer of organic mulch (straw, aged wood chips) on the soil surface is indispensable in summer. It keeps the soil cooler, reduces surface evaporation, and suppresses weeds, all of which conserve water in the reservoir.
- Nutrient Boost: As plants produce fruits and flowers, their nutrient demands increase. Consider a dilute liquid organic fertilizer added to the reservoir every few weeks, or a side-dressing of compost.
Autumn: Winding Down
- Harvesting and Cleanup: As the season progresses, harvest your last crops. Remove spent plants, diseased foliage, and any significant weed growth.
- Reservoir Management: As temperatures drop and plant growth slows, your plants will require less water. Reduce the frequency of reservoir refills. You might even let the reservoir dry out completely towards the end of the season, especially before a deep freeze.
- Soil Amendment for Winter: If you’re planning for next spring, apply a thick layer of compost or well-rotted manure to the top of the soil. This enriches the soil over winter and protects it. You can also plant a cover crop to improve soil health.
Winter: Dormancy and Protection
- Drain the Reservoir: In regions with freezing temperatures, it is crucial to drain the water reservoir completely. Frozen water expands, which can damage the PVC pipes, the bed liner, and even crack the wooden frame.
- Protect the Frame: If your raised bed is made of untreated wood, consider covering it with a tarp or a layer of plastic sheeting to protect it from excessive moisture and prolong its life.
- Winter Crops (Optional): In milder climates, use your self-watering bed for cold-tolerant crops like kale, spinach, or overwintering onions. You might need to add a hoop house or cold frame over the bed for extra protection. Water sparingly; the wicking action will still largely work, but plant needs are minimal.
- Planning for Next Season: Use the quieter winter months to plan your next planting scheme, order seeds, and perhaps even build another self watering raised bed DIY!
By understanding and responding to these seasonal needs, your self-watering raised bed will remain a productive and low-maintenance asset in your garden, delivering bountiful harvests across the changing year.
Expert Resources for Further Learning
Delving deeper into the science and best practices of gardening can significantly enhance your success with your new self-watering raised bed. Here are three reputable external resources that offer a wealth of information, from general gardening tips to specific advice on wicking beds and soil health:
- Gardening Know How: This comprehensive online resource provides a vast library of articles covering almost every imaginable gardening topic. From plant care guides to pest control, soil health, and specific growing techniques, Gardening Know How is an excellent starting point for any gardening question. Their articles are generally easy to understand and backed by practical advice. You can find their extensive resources at Gardening Know How.
- Royal Horticultural Society (RHS): As one of the world’s leading horticulture organizations, the RHS offers authoritative and scientifically-backed information for gardeners of all levels. Their website features plant profiles, gardening advice, pest and disease identification, and sustainable gardening practices. While based in the UK, much of their advice is universally applicable and highly valuable. Explore their knowledge base at Royal Horticultural Society.
- University Extension Programs (e.g., University of Minnesota Extension): University extension programs across the United States (and similar cooperative programs globally) are invaluable resources, often providing localized, research-based information on gardening, agriculture, and environmental stewardship. The University of Minnesota Extension, for example, offers excellent guides on topics like raised bed gardening, soil testing, vegetable varieties suitable for specific climates, and sustainable practices. These programs usually have free fact sheets and publications. A good example is the University of Minnesota Extension website, but search for your local university extension for region-specific advice.
These resources will provide you with a deeper understanding of plant needs, soil science, and advanced gardening techniques, helping you to get the most out of your self watering raised bed DIY and achieve even greater gardening success.
Conclusion: Your Thriving, Low-Maintenance Garden Awaits!
You’ve done it! By following these steps, you’ve successfully constructed a durable, efficient, and budget-friendly self watering raised bed DIY. This project isn’t just about building a container; it’s about investing in a smarter, more sustainable, and ultimately more enjoyable gardening experience. You’re now equipped to conserve water, reduce gardening fuss, and provide your plants with the consistent moisture they need to truly thrive.
Imagine the bounty: consistent yields of your favorite vegetables, vibrant flowers that burst with color, or fragrant herbs ready for the picking, all with significantly less daily effort. This wicking bed design frees you from the constant worry of under- or over-watering, allowing you to focus on the joy of growing rather than the chore of maintenance. It’s a testament to how simple DIY solutions can have a profound impact on our daily lives and our environmental footprint.
Embrace the self-watering revolution in your garden. Watch your plants flourish, enjoy healthier harvests, and revel in the efficiency of your new system. This project demonstrates that a truly productive and eco-conscious garden doesn’t require a huge financial outlay, just a little ingenuity and elbow grease. Happy gardening!
FAQ: Self-Watering Raised Bed DIY
Q1: How often do I need to refill the reservoir of my self-watering raised bed?
A1: The frequency of refilling depends on several factors: plant size and type, the current weather (temperature, sun exposure, wind), and the size of your reservoir. In cooler weather with smaller plants, you might only need to refill every 1-2 weeks. During peak summer with mature, thirsty plants, you might find yourself refilling every 3-7 days. Regularly check the inlet pipe with a stick or by pouring water to see how much it holds.
<h4>Q2: Can I use regular garden soil instead of potting mix in my self-watering raised bed?</h4>
<p>A2: No, it is strongly recommended not to use regular garden soil. Garden soil is typically too dense and heavy; it compacts easily, which severely hinders the capillary action needed for the wicking system to work effectively. It also lacks the aeration necessary for healthy root growth in a contained environment. Always opt for a high-quality, lightweight potting mix designed for containers or raised beds, as it promotes better aeration and drainage while retaining moisture efficiently.</p>

<h4>Q3: What happens if it rains heavily? Will my plants get waterlogged?</h4>
<p>A3: This is precisely why the overflow drain is a critical component of your self-watering raised bed DIY. Once the reservoir is full, any additional water from rain or manual filling will simply drain out through the overflow hole. This prevents the soil from becoming saturated and waterlogged, protecting your plants from root rot and ensuring they receive the perfect amount of moisture.</p>

<h4>Q4: How important is the overflow hole? Can I skip it?</h4>
<p>A4: The overflow hole is absolutely essential and should not be skipped. Without it, excessive rainfall or overfilling the reservoir would lead to standing water in the soil, suffocating plant roots and causing severe damage or death. It acts as a safety valve, ensuring your plants receive just the right amount of water without the risk of waterlogging. It is a defining feature that distinguishes a simple container with a reservoir from a truly effective self-watering system.</p>