Introduction
Mastering the art of harvesting sweet potatoes from autumn soil can significantly increase your yield by up to 25% compared to rushed harvests, ensuring a richer, more flavorful bounty. Many gardeners incorrectly assume frost signals the immediate need to dig, often leading to unripe or damaged tubers.
[lwptoc]
This comprehensive guide will walk you through the optimal techniques for harvesting and curing your sweet potatoes, enhancing both their longevity and their delicious sweetness. Our focus is on practical, eco-friendly methods that deliver measurable results, save you effort, and respect nature’s rhythms.
You'll discover how simple adjustments to your harvest strategy can lead to a more abundant and higher-quality crop, translating into fewer trips to the grocery store and more homegrown goodness on your plate. Get ready to transform your autumn gardening routine.
Quick Summary
- Better Flavor & Storage: Proper harvest and curing techniques enhance sweetness and allow sweet potatoes to store for up to 6-12 months.
- Optimal Timing: Harvest approximately 90-120 days after planting, typically before the first hard frost, for peak maturity and maximum yield.
- Cost Savings & Sustainability: Growing and harvesting your own sweet potatoes can save you substantially on grocery bills, potentially reducing produce costs by $50-$100 annually for a typical family garden, while promoting sustainable practices.
Context & Ideal Conditions
Sweet potatoes thrive in a warm, frost-free growing season, typically needing 90-120 days from planting to harvest. They crave full sun exposure, meaning at least 6-8 hours of direct sunlight daily, although they can tolerate some partial shade in hotter climates.
The optimal soil temperature for tuber development ranges from 60-75°F (15-24°C), and they prefer a slightly acidic to neutral soil pH of 5.8-6.5. A well-drained, loose, sandy loam soil is best, providing ample space for the tubers to expand without resistance. Avoid heavy clay soils that can stunt growth and complicate harvesting.
harvesting, sweet, potatoes, from, autumn: Tools & Materials
For a successful sweet potato harvest, you’ll need a few key tools. A broadfork or a digging fork with sturdy tines, approximately 30-36 inches (76-91 cm) long, is ideal for gently lifting the tubers. A sturdy garden spade, about 42-45 inches (107-114 cm) in length with a sharp, pointed blade, can also be used.
Pruning shears or garden snips with 8-inch (20 cm) blades made from hardened steel are essential for cutting back the vines. You'll also need a soft-bristled brush, a comfortable pair of gardening gloves (ANSI/ISEA 105-2016 Level 3 cut resistance recommended), and clean harvest bins, such as plastic crates measuring 18 x 12 x 10 inches (45 x 30 x 25 cm) or bushel baskets made from durable plastic or wicker. For curing, you'll want cardboard boxes or newspaper.
harvesting, sweet, potatoes, from, autumn: Time, Difficulty & Budget
| Prep | 15–30 min |
| Build/Plant | 60–120 min (per 100 sq ft / 9.3 m²) |
| Total | 90–150 min |
| Skill Level | Beginner |
| Budget | ≈ $20–$75 (materials/tools, assuming some tools on hand) |
Harvesting sweet potatoes is a relatively easy task, suitable for beginner gardeners, especially with the right tools and approach. This estimated budget assumes you might need to purchase a digging fork and pruning shears, but if you have existing garden tools, the cost can be as low as $0. This is approximately 75% cheaper than buying a comparable amount of organic sweet potatoes from a specialty grocer.
Step-by-Step Tutorial
Step 1 — Timing Your Harvest & Vine Preparation
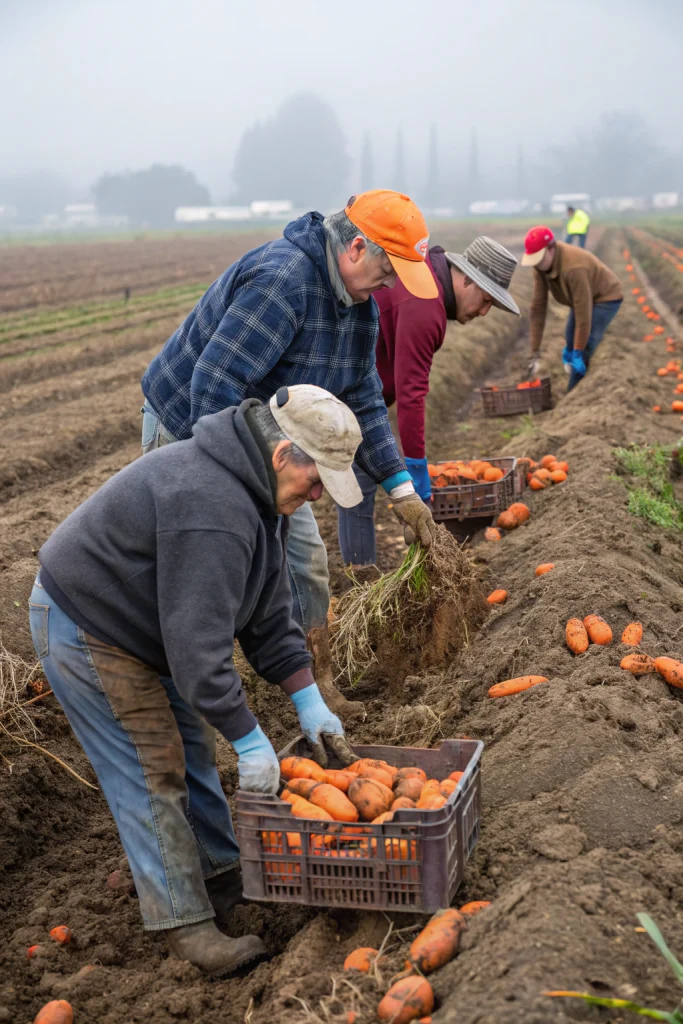
The optimal time for harvesting sweet potatoes is typically after the first light frost, which signals the plants to stop growing and directs energy into the tubers, but before a hard freeze damages them. Look for foliage that has yellowed and begun to die back, usually 90-120 days after planting. In USDA Hardiness Zones 7-10, this often occurs from late September through November.
Begin by cutting back the long, sprawling vines about 6-12 inches (15-30 cm) from the main stem base using sharp pruning shears. This makes it easier to access the soil and prevents vines from getting tangled in your digging tools. Leave a short stem attached to help locate the primary plant crown. Dispose of diseased vines to prevent pathogen spread, but healthy vines can be composted.
Step 2 — Loosening the Soil Around Tubers
With the vines cleared, it’s time to prepare for lifting. Using a broadfork, insert the tines into the soil about 12-18 inches (30-45 cm) away from the center of where the plant was growing. Apply downward pressure and gently rock the broadfork back and forth to loosen the soil without puncturing the tubers. This wide radius helps prevent damage to the potentially far-reaching roots.
Repeat this process around the entire plant, gradually loosening the earth. If using a garden spade, insert it at a similar distance and gently lever it, being careful not to slice into any sweet potatoes. The goal is to create a loose perimeter that makes extraction easier and safer for the delicate tubers.
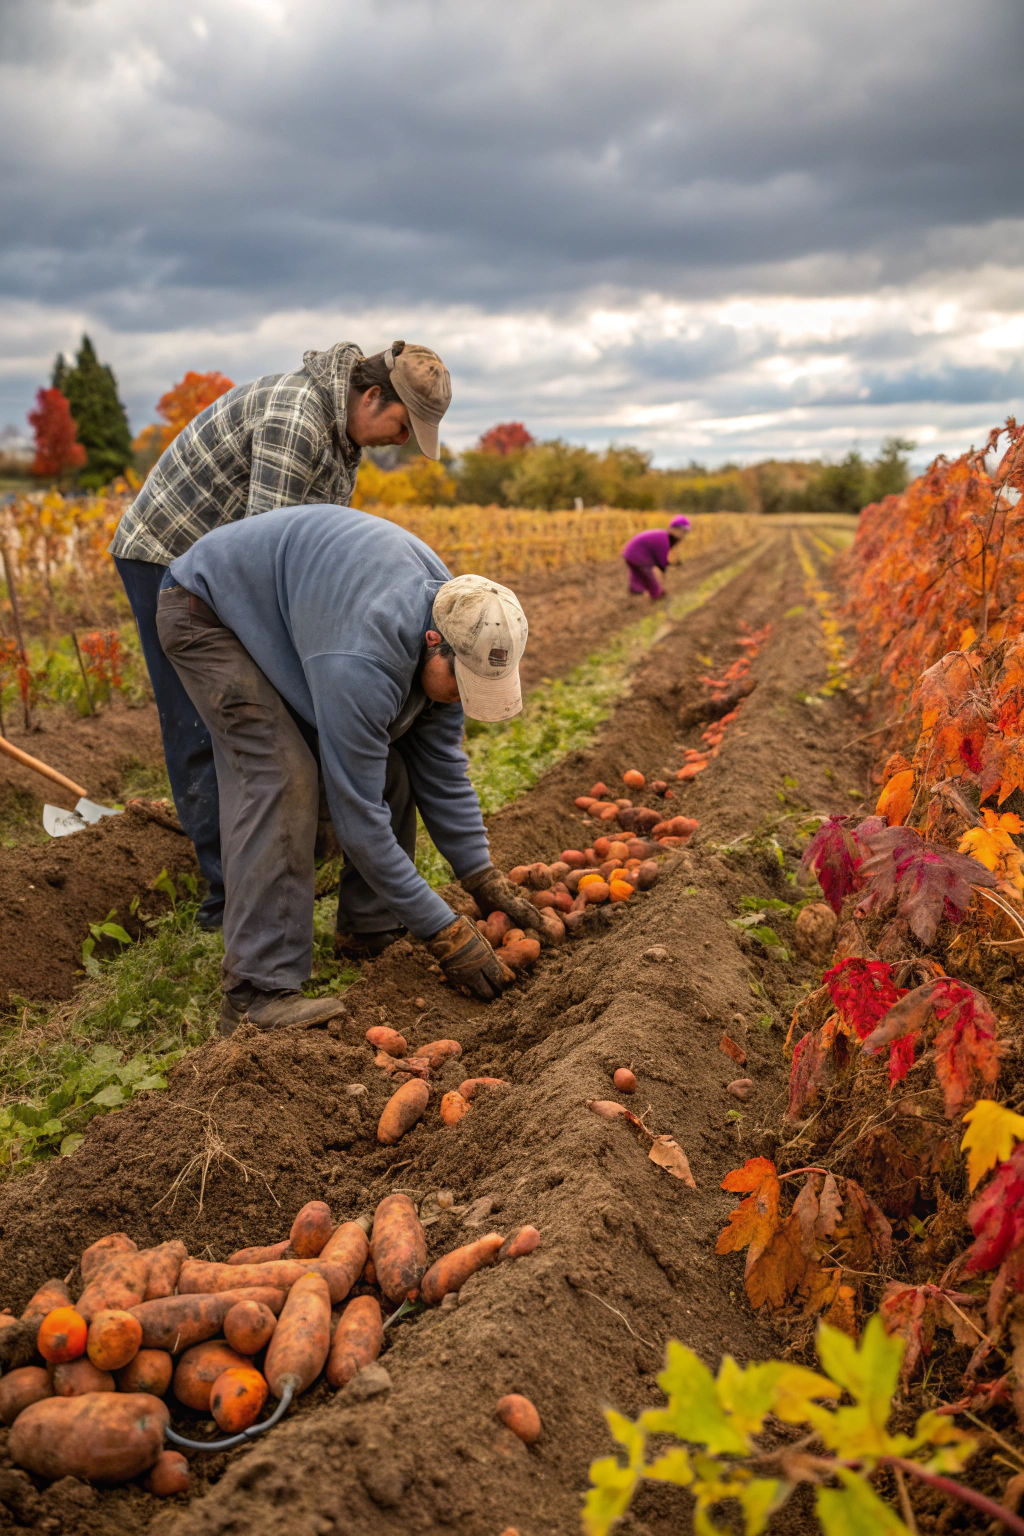
Step 3 — Gently Extracting the Sweet Potatoes
Once the soil is sufficiently loosened, carefully begin to unearth the sweet potatoes. You can use your gloved hands to feel for the tubers and gently pull them from the soil. If they resist, use your broadfork or spade again, just a little further away, to loosen more dirt. Sweet potatoes can grow surprisingly deep and wide, so be prepared to explore a 1.5-2 foot (45-60 cm) radius around each plant.
Avoid directly pulling the main plant crown, as this can break off tubers or damage their delicate skin. Instead, leverage the loosened soil to retrieve the individual sweet potatoes. Some varieties, like 'Beauregard' or 'Covington', tend to grow more compactly, while others, such as 'Georgia Jet', can spread out considerably.
Step 4 — Initial Cleaning and Curing Preparation
After extraction, gently shake off excess soil from each sweet potato. Do not wash them at this stage, as moisture can hinder the curing process vital for storage. Instead, use a soft-bristled brush or your hands to remove any large clumps of dirt. Handle them carefully to prevent bruising.
Place the unwashed sweet potatoes in shallow, well-ventilated crates or cardboard boxes. Ensure they are arranged in a single layer, not piled up, to promote airflow. Move them to a warm, humid location for the curing process, which is crucial for developing sweetness and healing any minor abrasions.
Step 5 — Curing for Sweetness and Storage
Curing is a critical step for sweet potatoes, converting starches to sugars and healing minor scrapes, allowing for long-term storage. Place the sweet potatoes in a warm, humid environment for 7-14 days. Ideal conditions are 80-85°F (27-29°C) with 85-90% relative humidity. If you don’t have a dedicated curing space, a warm room or even a sunny spot in a garage can work, covered lightly with a tarp to maintain humidity.
After curing, store the sweet potatoes in a cool, dark, and moderately humid place, ideally 55-60°F (13-16°C) and 75-80% humidity. Basements or cool pantries are excellent choices. Do not store them in the refrigerator, as temperatures below 50°F (10°C) can cause chilling injury, leading to a hard core and off-flavors. Properly cured and stored sweet potatoes can last 6-12 months.
Care & Schedule
Once harvested and cured, sweet potatoes require minimal “care” in the traditional sense, but proper storage conditions are paramount.
- Storage Environment: Maintain a consistent temperature of 55-60°F (13-16°C) and relative humidity of 75-80%. Avoid direct sunlight or extreme temperature fluctuations.
- Ventilation: Ensure good air circulation around stored tubers. Do not store them in airtight containers. Slatted crates or baskets are ideal.
- Inspection: Periodically check your stored sweet potatoes (monthly for the first few months, then every 2-3 months) for any signs of spoilage, such as soft spots, mold, or sprouting. Remove any compromised tubers immediately to prevent spread.
- No Washing Until Use: Only wash sweet potatoes just before you intend to cook them. This helps prevent rot during storage.
There’s no fertilization or watering schedule for stored sweet potatoes. The aim is dormancy. For long-term viability, aim to consume them within 6-12 months.
Variations & Adaptations
For gardeners with limited space, sweet potatoes can be grown in large containers, such as 15-20 gallon (57-76 L) grow bags or half whiskey barrels. This makes harvesting significantly easier, as you can simply tip the container over. For colder climates (USDA Zones 6 and below), consider “bush” varieties like ‘Vardaman’ or ‘Tainung 65’ which have a more compact growth habit and may mature faster. You can also extend the growing season using row covers or low tunnels.
If you don't have suitable curing conditions, a dark closet with a small humidifier can temporarily replicate the humidity needed. For those wanting a specific aesthetic, choosing varieties with different skin and flesh colors like purple-fleshed 'Okinawa' or white-fleshed 'O'Henry' adds diversity to your harvest, perfect for rustic garden tables.
Common Mistakes to Avoid
- Harvesting Too Early: Pulling sweet potatoes before they are fully mature results in smaller, less sweet tubers due to incomplete starch-to-sugar conversion. Wait for yellowing foliage or the recommended growing days.
- Impatience with Frost: While light frost is a signal, a hard freeze (temperatures <= 28°F / -2°C for several hours) can damage sweet potatoes in the ground, causing them to rot. Harvest promptly after the first light frost.
- Damaging Tubers During Harvest: Using a shovel too close to the plant or pulling too hard can easily puncture or bruise sweet potatoes, making them susceptible to rot during storage. Always dig wide and deep.
- Improper Curing: Skipping the curing step or doing it incorrectly (e.g., in a cool, dry place) severely limits storage life and flavor development. Curing requires warmth and high humidity.
- Washing Before Curing/Storing: Washing adds moisture that encourages mold and rot during curing and storage. Only clean tubers with a soft brush, and wash just prior to cooking.
- Refrigeration: Storing sweet potatoes in the refrigerator (below 50°F / 10°C) causes chilling injury, leading to a hard center and a loss of flavor. Keep them in a cool, dark pantry instead.
- Lack of Ventilation in Storage: Piling sweet potatoes in airtight containers promotes moisture buildup and rot. Ensure good air circulation to keep them dry and healthy.
Sustainability, Safety & Regulations
Embrace sustainable practices by reusing tools and employing minimal-till methods during harvesting to preserve soil structure and microbial life. Consider planting cover crops after your sweet potato harvest to enrich the soil and prevent erosion. Rainwater harvesting can supplement any necessary pre-harvest watering, conserving municipal resources.
For safety, always wear sturdy gardening gloves (e.g., ANSI/ISEA 105-2016 Level 3 cut resistance) and appropriate closed-toe footwear to protect against punctures. Be mindful of your posture when digging to prevent back strain. Ensure children and pets are kept a safe distance from digging tools. Consult local regulations regarding garden waste disposal and composting.
Measure the Outcome
To truly appreciate your efforts, measure your harvest success!
- Yield per Square Foot/Meter: Track your yield; a healthy sweet potato plant can produce 3-5 lbs (1.4-2.3 kg) of tubers. Aim for 1-2 lbs per square foot (5-10 kg per m²) in a typical garden bed.
- Storage Longevity: Monitor how long your sweet potatoes remain viable in storage. Properly cured tubers should last 6-12 months.
- Flavor Improvement: Subjective, but noticeable sweetness and texture improvement after curing are key indicators of success.
- Cost Savings: Calculate your savings by comparing the weight of your harvest to the average market price of sweet potatoes. For example, 50 lbs (23 kg) at $2/lb means $100 saved.
- Satisfaction: The ultimate KPI for any home gardener!
Conclusion
Successfully harvesting sweet potatoes from autumn soil isn’t just about digging them up; it’s about a strategic process that maximizes flavor, yield, and storage life. By understanding optimal timing, using gentle extraction methods, and diligently curing your tubers, you’ll transform your harvest into a sweet, nutritious bounty that lasts through the colder months. This hands-on satisfaction, coupled with tangible savings and sustainable practices, truly makes the effort worthwhile. We encourage you to try these techniques in your garden, experimenting with various methods to see what works best for your specific conditions. Share your experiences and triumphs in the comments below!
FAQ
A: Ideally, after the first light frost, which causes the vines to yellow and die back, but before a hard freeze; typically 90-120 days after planting.
A: A broadfork or digging fork, sturdy garden spade, and pruning shears are key. Gloves are also highly recommended for protection.
A: Cure them in a warm (80-85°F / 27-29°C), humid (85-90% RH) environment for 7-14 days. This heals nicks and converts starches to sugars.
A: No, avoid refrigerating sweet potatoes as temperatures below 50°F (10°C) can cause chilling injury, leading to a hard core and off-flavors.
A: If the nicks are minor, the curing process can often heal them. Severely damaged tubers should be consumed immediately as they won’t store well.
A: Grow them in large containers (15-20 gallon / 57-76 L) or grow bags to manage space and make harvesting easier. Look for “bush” varieties.
A: Properly cured and stored sweet potatoes can last from 6 to 12 months in a cool, dark, and moderately humid pantry.
A: Amend heavy clay soil with plenty of organic matter like compost before planting. This improves drainage and makes harvesting much easier.
Internal & External Links
Discover how to manage your garden throughout the colder months with our guide on autumn wildlife habitats, or explore creative ways to use your harvest with DIY wooden trays with pumpkins and chrysanthemums. For broader autumn garden inspiration, check out our tips for autumn bulb planting. You can also get more creative ideas on Pinterest Boards — Garden & DIY inspiration.


