The Ultimate 7-Step Guide to Growing Container Tomatoes for Beginners
Dreaming of fresh, sun-ripened tomatoes, even if you don’t have a sprawling backyard? You’ve come to the right place! Growing tomatoes in containers is not only possible but incredibly rewarding, especially for beginners. This comprehensive guide will walk you through everything you need to know, from choosing the right variety to harvesting your delicious bounty, making your balcony, patio, or even a sunny windowsill a productive tomato patch. Get ready to transform your urban space or small garden into a culinary haven with your very own homegrown container tomatoes!
[lwptoc]
Why Growing Container Tomatoes Matters for Your Garden (and Your Plate!)
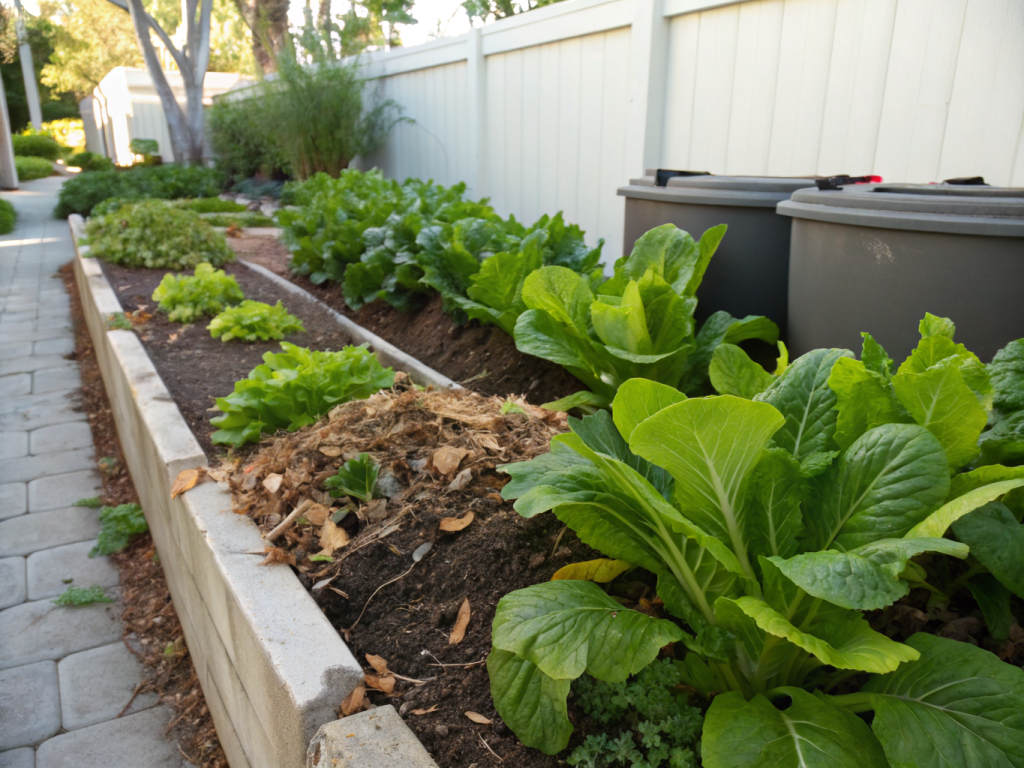
Growing tomatoes in containers offers a myriad of benefits, making it an excellent choice for a wide range of gardeners. First and foremost, it’s a fantastic solution for those with limited space, whether you live in an apartment, condo, or simply have a small garden plot. Containers allow you to utilize vertical space and sunny spots that might otherwise go unused.
Portability is another huge advantage. You can easily move your tomato plants to capture the best sunlight throughout the day or protect them from harsh weather conditions like sudden storms or intense heatwaves. This flexibility is invaluable for nurturing delicate young plants.
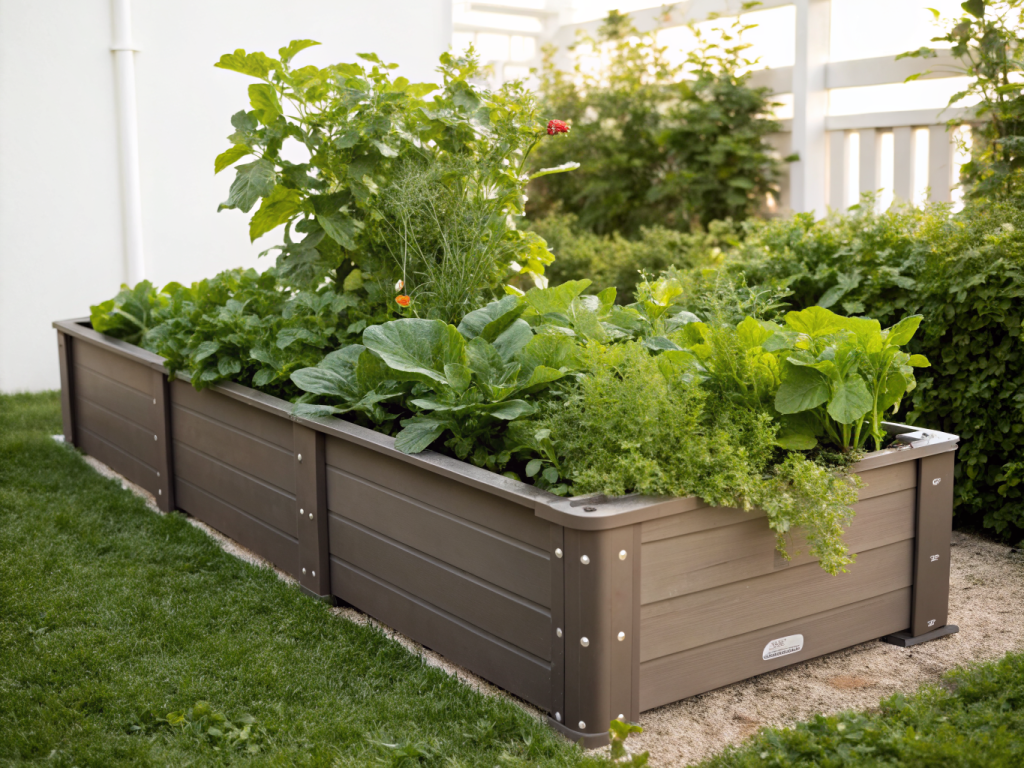
Container gardening also provides better control over soil conditions. You can tailor the potting mix to meet the specific nutritional needs of tomatoes, and it often reduces issues with soil-borne diseases and pests that can plague in-ground plants. This targeted approach can lead to healthier, more vigorous plants and a more abundant harvest.
For beginners, container growing simplifies many aspects of gardening. Weeding is significantly reduced, and you have greater oversight of each individual plant’s health. The focus shifts from managing a large garden bed to providing optimal care for a few productive plants, making the learning curve much gentler and more enjoyable. Plus, the sheer joy and satisfaction of picking a warm, ripe tomato that you grew yourself are unparalleled!
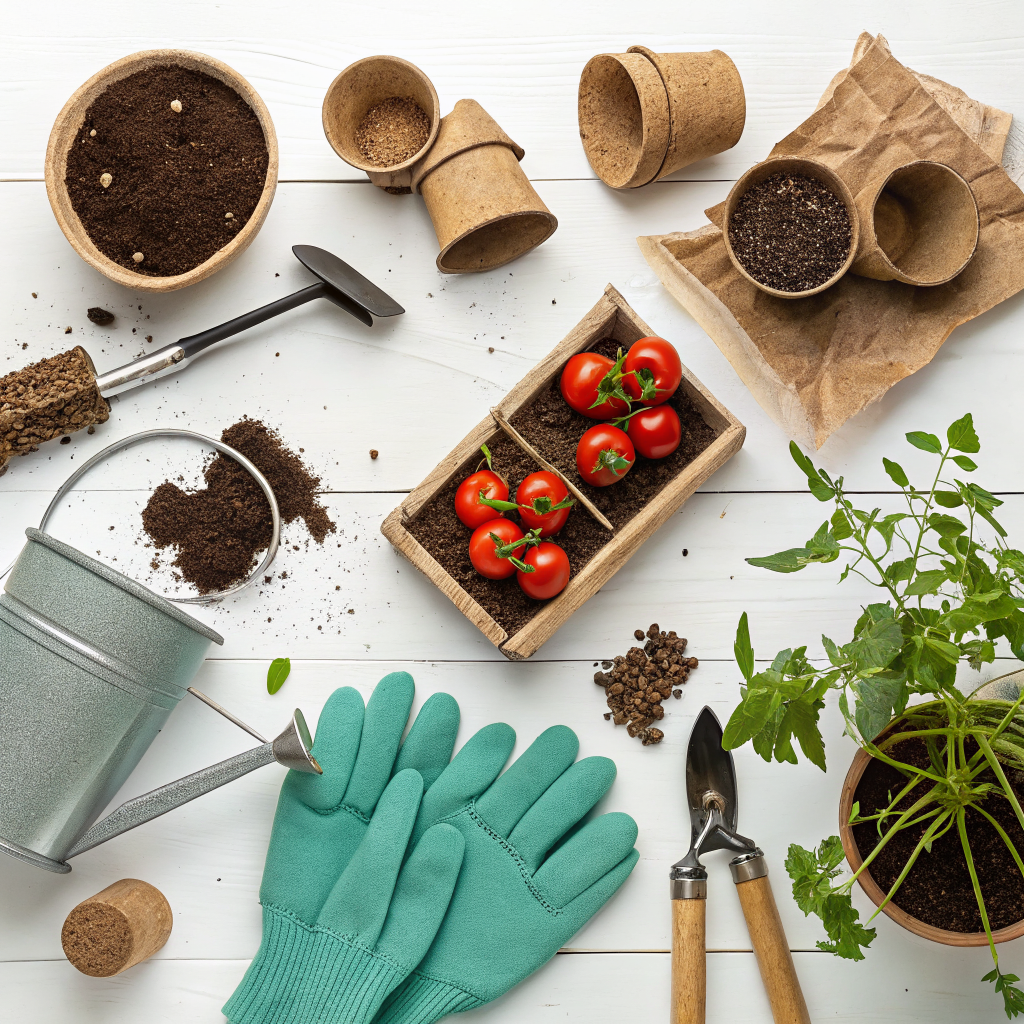
Essential Gear: What You Need for Container Tomatoes
Before you dive into planting, gathering the right supplies will set you up for success. Don’t worry, you don’t need a massive investment; just a few key items will do the trick.
1. The Right Container
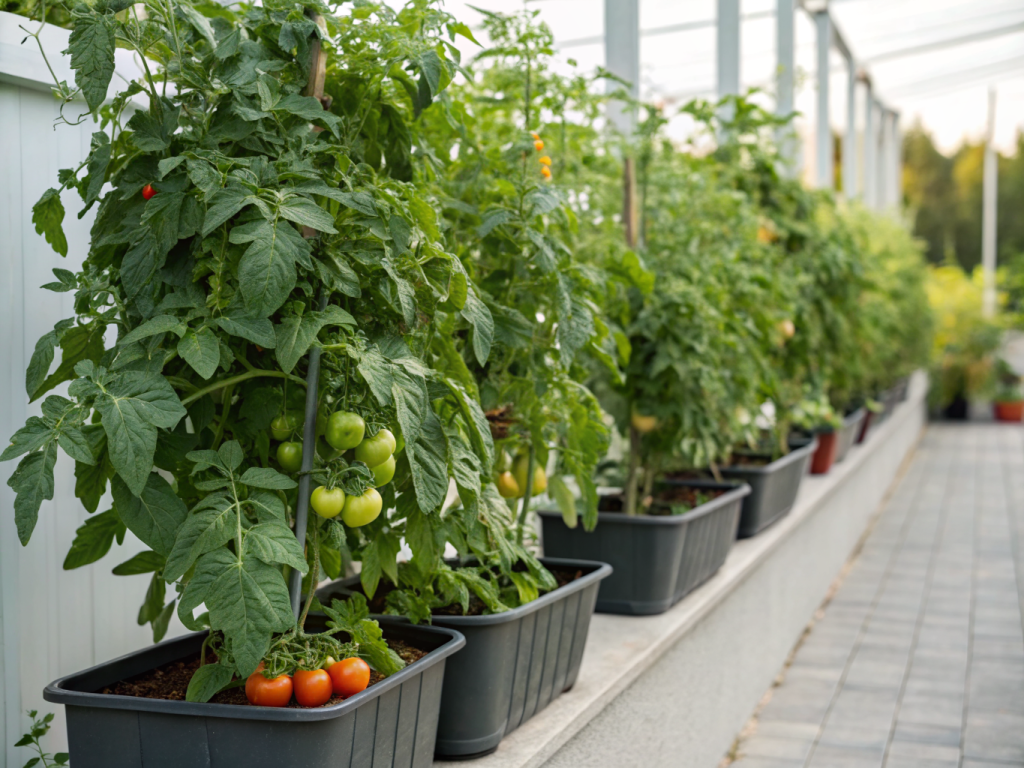
- Size Matters: Tomatoes are heavy feeders and need plenty of root space. For most varieties, aim for a container that is at least 15-20 inches in diameter and depth (approximately 15-25 gallons). Smaller determinant varieties can thrive in 10-gallon pots, but bigger is generally better for indeterminate types.
- Material: Terracotta pots look classic but dry out quickly. Plastic pots retain moisture better. Fabric grow bags (like Smart Pots) offer excellent aeration and drainage, preventing root circling, and are lightweight. Whatever you choose, ensure it has plenty of drainage holes.
- Color: Lighter-colored containers reflect sunlight, keeping roots cooler, which is beneficial in hot climates. Darker containers absorb heat, which can be good in cooler climates or during spring.
2. Quality Potting Mix
- Not Garden Soil: Never use soil from your garden in containers; it’s too dense, can compact, and may harbor pests and diseases.
- Well-Draining and Rich: Opt for a high-quality, lightweight potting mix specifically formulated for containers or vegetables. Look for mixes that contain compost, perlite, or vermiculite for drainage and aeration.
- Recipe for Success: A good general mix might be 1/3 compost, 1/3 coir or peat moss, and 1/3 perlite/vermiculite for excellent structure and nutrient retention.
3. Tomato Plants (or Seeds!)
- Variety Selection: For beginners, “Bush” or “Determinate” varieties are often easier to manage as they grow to a predetermined size and ripen their fruit over a shorter period. Examples include ‘Celebrity’, ‘Roma’, ‘and ‘Patio’. Indeterminate varieties grow and produce fruit throughout the season but require more rigorous staking and pruning.
- Start with Transplants: If you’re a beginner, buying healthy young tomato starts from a local nursery is the easiest way to begin. Look for plants with sturdy stems, no yellowing leaves, and no signs of pests.
- Starting from Seed: If you’re feeling adventurous, start seeds indoors 6-8 weeks before your last frost date. This gives you more variety choices. Learn more about seed starting for beginners on our blog!
4. Support System
- Crucial for Success: All tomatoes, even determinate varieties, benefit from support to prevent sprawling, disease, and fruit damage.
- Options: Sturdy tomato cages, stakes (wood or metal), or trellises are all viable. For containers, a strong, heavy-duty cage that can be secured to the pot is often ideal. Insert the support system at planting time to avoid damaging roots later.
5. Watering Can or Hose with a Gentle Sprayer
- Consistent Moisture: Tomatoes are thirsty plants and consistent watering is key to preventing blossom end rot and promote fruit development.
- Good Drainage: Essential to prevent waterlogging.
6. Fertilizer
- Specialized Needs: Tomatoes are heavy feeders. Choose a balanced slow-release granular fertilizer or liquid feed tailored for tomatoes or vegetables. Look for higher phosphorus (P) and potassium (K) numbers for fruiting.
7. Basic Gardening Tools
- Trowel: For planting.
- Pruning Shears/Bypass Pruners: For pruning and harvesting.
- Gloves: To protect your hands.
Beginner Tip: Don’t try to grow too many plants in your first foray. Start with 1-3 container tomato plants to learn the ropes. Success with a few will encourage you to expand next season!
Step-by-Step Planting and Care Guide for Container Tomatoes
Now that you have all your supplies, let’s get those tomatoes planted and thriving! Follow these steps for successful container tomatoes.
Step 1: Choose Your Variety Wisely
As mentioned, variety selection is crucial. For container success, especially for beginners (our focus keyword: container tomatoes beginners!), prioritize determinate or “bush” varieties. These are genetically programmed to grow to a certain height (usually 3-4 feet), produce their fruit in a relatively concentrated period, and then typically decline. This makes them more manageable for container life compared to indeterminate varieties, which can grow indefinitely, requiring much more aggressive pruning and larger support systems. Look for labels that say ‘Compact’, ‘Patio’, ‘Bush’, or mention suitability for containers. Popular determinate options include ‘Bush Goliath’, ‘Celebrity’, ‘Roma VF’, ‘Sub-Arctic Plenty’, and various cherry tomato varieties like ‘Tiny Tim’ or ‘Micro Tom’. Always check the mature size on the plant tag or seed packet.
Step 2: Prepare Your Container and Soil
Ensure your chosen container has ample drainage holes. If it doesn’t, drill several 1/2-inch holes in the bottom. Place a small piece of mesh or a coffee filter over the holes to prevent soil washing out, but avoid using gravel at the bottom as it can impede drainage. Fill your container with a high-quality potting mix, leaving about 2-3 inches of space from the rim. Gently moisten the potting mix; it should be damp but not soggy.
Step 3: Planting Your Tomato Transplants
Tomato plants love to be planted deeply. If your transplant is leggy or has yellowing lower leaves, you can remove those leaves and plant the stem deeper into the pot. Tomatoes can grow roots along their buried stems, leading to a stronger root system. Dig a hole large enough to accommodate the root ball. Carefully remove the tomato plant from its nursery pot, gently teasing apart any root-bound roots. Place the plant in the hole, ensuring the lower part of the stem is covered with soil. Backfill with more potting mix, gently firming it around the base of the plant to remove air pockets. Water thoroughly until water drains from the bottom of the container. This helps settle the soil around the roots.
Step 4: Install Support System Immediately
This step is often overlooked by beginners but is vitally important. Insert your chosen tomato cage, stake, or trellis immediately after planting. Waiting until the plant is larger risks damaging the root system as you try to force the support into the soil. For cages, place it over the plant and push it firmly into the potting mix. If using stakes, drive one or two sturdy stakes deeply into the pot near the stem. As the plant grows, gently tie the main stem to the support using soft ties, strips of old cloth, or twine, ensuring not to constrict the stem. Consistent support prevents stems from breaking under the weight of fruit and keeps foliage off the soil, reducing disease.
Step 5: Watering and Feeding Your Container Tomatoes
Container tomatoes dry out much faster than in-ground plants and require consistent moisture. Water deeply and regularly, typically daily in hot weather, sometimes even twice a day. The key is to keep the soil consistently moist but never waterlogged. Stick your finger an inch or two into the soil; if it feels dry, it’s time to water. Yellowing leaves can be a sign of too little or too much water. Fertilize your plants every 2-4 weeks with a balanced liquid fertilizer formulated for tomatoes, following the product’s instructions. Alternatively, you can mix a slow-release granular fertilizer into the potting mix at planting time (our blog explores great soil amendments for container gardening). Monitor your plants for signs of nutrient deficiency, such as purple stems or pale leaves.
Step 6: Pruning and Pest Management
For determinate varieties, pruning is less intensive but still beneficial. Focus on removing any suckers (small shoots that emerge from the crotch between the main stem and a leaf branch) below the first flower cluster. Above that, you can allow them to grow as they will produce fruit. Remove any yellow, diseased, or dead leaves to improve air circulation. Keep an eye out for common pests like aphids, hornworms, or spider mites. A strong spray of water can dislodge many pests. For persistent issues, use organic insecticidal soap or neem oil. Early detection is crucial. Regularly inspect the undersides of leaves. For more in-depth organic pest control tips, check out our dedicated article.
Step 7: Harvesting Your Delicious Bounty
Patience will be rewarded! Tomatoes are ready for harvest when they are fully colored, firm, and easily detach from the vine. Gently twist or use pruning shears to snip the fruit off, leaving a small piece of the stem attached if desired, as this can prolong shelf life. Harvesting regularly encourages the plant to produce more fruit. Enjoy your homegrown, sun-ripened container tomatoes in salads, sauces, or simply sliced with a sprinkle of salt!
Pro Tips and Common Mistakes for Container Tomatoes
Even with a great plan, there are always ways to optimize and pitfalls to avoid. Here are some seasoned tips and common mistakes to watch out for.
Pro Tips:
- Mulch for Moisture: Apply a 1-2 inch layer of organic mulch (like straw or shredded leaves) on top of the potting mix. This helps retain moisture, regulate soil temperature, and suppresses weeds.
- Sun is Key: Tomatoes need at least 6-8 hours of direct sunlight per day. If they’re not getting enough, fruit production will suffer, and plants may become leggy.
- Rotate Containers: If possible, move your containers slightly each year or replace the potting mix entirely to prevent the buildup of pathogens.
- Blossom Drop Cures: If flowers are dropping without setting fruit, it could be due to extreme temperatures (too hot or too cold), lack of pollination, or inconsistent watering. Gently shake the plant if you don’t have many pollinators during flowering.
- Bottom Watering: For consistent moisture, consider placing your plant’s container in a saucer filled with water for 15-30 minutes. The plant will absorb water from the bottom up.
Common Mistakes to Avoid:
- Too Small a Container: As stressed before, inadequate root space is the number one killer of container tomato dreams. Invest in large pots!
- Using Garden Soil: Garden soil compacts in pots, suffocates roots, and often carries diseases. Always use fresh, high-quality potting mix.
- Inconsistent Watering: Fluctuations between dry and wet soil lead to issues like blossom end rot (a common problem where the bottom of the fruit turns black and leathery) and cracked fruit. Consistency is vital.
- Insufficient Sunlight: Tomatoes are sun lovers. Placing them in a shady spot will result in spindly plants and very little fruit.
- Lack of Support: Even determinate varieties get heavy with fruit. Without support, stems can break, and fruit can rot on the ground.
- Over-fertilizing (especially Nitrogen): Too much nitrogen will promote lush leafy growth at the expense of fruit production. Use a balanced fertilizer with higher P and K once flowering and fruiting begin.
Remember: Gardening is a learning process. Don’t be discouraged by setbacks. Each season offers new opportunities to learn and refine your technique!
Eco-Friendly Variations for Sustainable Container Tomato Growing
Embracing sustainable practices in your container garden not only benefits the environment but can also lead to healthier, more robust plants.
- Compost Power: Instead of chemical fertilizers, rely on compost, worm castings, and other organic matter. Mixing a generous amount of finished compost into your potting mix at the beginning of the season provides a slow, steady release of nutrients. You can also “top dress” with compost throughout the growing season.
- Rainwater Harvesting: Collect rainwater in barrels or buckets to water your plants. Rainwater is naturally soft and free of chlorine and other chemicals found in tap water, which plants prefer.
- DIY Potting Mix: Create your own eco-friendly potting mix using ingredients like coir (a coconut fiber byproduct, sustainable alternative to peat moss), compost, perlite, and a dash of organic slow-release fertilizer. This reduces reliance on commercially prepared mixes often shipped long distances.
- Recycled Containers: repurpose large food-grade buckets (from restaurants or bakeries), old tires (ensure they are safe and large enough), or other sturdy containers. Just make sure they are clean and have adequate drainage.
- Companion Planting: Some plants can benefit tomatoes. Marigolds (Tagetes spp.) can deter nematodes, while basil planted nearby is said to improve tomato flavor and deter some pests. Borage can attract beneficial pollinators.
- Pest Control with Nature: Encourage beneficial insects (ladybugs, parasitic wasps) by planting flowering herbs and native plants. When pests appear, first try non-toxic methods like hand-picking or a strong spray of water before resorting to organic pesticide sprays.
- Watering Efficiency: Consider using self-watering containers or drip irrigation kits for containers. These systems deliver water directly to the root zone, minimizing evaporation and water waste.
Seasonal Considerations for Container Tomatoes
Understanding the life cycle of your tomato plants and adjusting your care as the seasons change is crucial for continuous success.
Spring: The Beginning
- Timing: Plant your tomatoes after all danger of frost has passed in your area. Check your local last frost date.
- Hardening Off: If you’ve started seeds indoors or bought transplants, gradually introduce them to outdoor conditions (sun, wind, varying temperatures) over 7-10 days before planting them permanently outside. This “hardening off” process prevents shock.
- Early Care: Ensure consistent watering, especially if spring weather is dry. Protect young plants from sudden cold snaps with cloches or blankets.
Summer: Growth and Harvest
- Peak Growth: This is when your plants will be actively growing, flowering, and setting fruit.
- Watering Becomes Critical: Daily watering, sometimes twice, may be necessary in hot, sunny weather. Don’t let containers dry out completely.
- Consistent Feeding: Continue with your regular fertilization schedule.
- Pruning and Support: Keep an eye on suckers and tie plants to their supports as they grow.
- Harvest Time: Begin harvesting fruit as it ripens. Regular harvesting encourages more production.
Late Summer/Early Fall: Winding Down
- Decreased Production: As temperatures drop and daylight hours shorten, fruit production will naturally slow down.
- Ripening Green Tomatoes: If frost is imminent and you still have green tomatoes, you can pick them and ripen them indoors in a paper bag with an apple (which releases ethylene gas).
- End of Season: Once frost hits or plants stop producing, it’s time to remove them. Dispose of diseased plant material to prevent carryover to next season. Clean and store your containers and stakes.
Climate Adaptation: In very hot climates, consider providing afternoon shade during extreme heatwaves to prevent blossom drop and sunscald on fruit. Conversely, in cooler climates, planting in darker containers can help absorb more warmth.
Expert Resources for Your Tomato Journey
Learning never stops in the garden! Here are some excellent external resources to deepen your knowledge of tomato care:
- Gardening Know How: Their comprehensive article on growing tomatoes covers everything from basic care to troubleshooting common problems. Visit gardeningknowhow.com for more detailed guides.
- Royal Horticultural Society (RHS): For science-backed advice on all things gardening, the RHS provides invaluable information. Explore their section on growing tomatoes for cultivation tips and variety recommendations. Visit rhs.org.uk regularly.
- University of Minnesota Extension: University extension offices offer region-specific, research-based advice. Their guide on growing tomatoes in Minnesota provides excellent general principles applicable to many regions. Check out more at extension.umn.edu.
Conclusion: Your Container Tomato Adventure Awaits!
You now have a robust blueprint for growing delicious tomatoes in containers, even if you’re a complete beginner. From selecting the perfect pot and plant to watering, feeding, and harvesting, every step has been covered. Remember that gardening is an ongoing journey of observation and learning. Don’t be afraid to experiment, pay close attention to what your plants are telling you, and most importantly, enjoy the process.
There’s immense satisfaction in nurturing a tiny seedling into a fruit-laden plant, and the taste of a homegrown tomato, still warm from the sun, is an experience that store-bought simply cannot replicate. So, roll up your sleeves, grab your trowel, and embark on your container tomato adventure. Happy growing, and prepare for a season of fresh, flavorful rewards!
Frequently Asked Questions About Container Tomatoes for Beginners
Q1: My tomato leaves are turning yellow. What’s wrong?
A1: Yellowing leaves can indicate several issues. It’s most commonly due to overwatering (leading to root rot) or underwatering (stress). It can also be a sign of nutrient deficiency (especially nitrogen), lack of sunlight, or even disease. Check the soil moisture first, then assess light conditions and review your fertilizing schedule. Ensure good drainage and adequate container size.
Q2: Why are my tomato flowers falling off without producing fruit?
A2: This is often called “blossom drop.” Common causes include extreme temperatures (either too hot, above 90°F/32°C, or too cold, below 55°F/13°C), insufficient pollination (gently shaking the plant can help), or inconsistent watering. Stress from nutrient deficiencies or pest infestations can also contribute. Try to maintain consistent watering and protect plants from temperature extremes.
Q3: How often should I water my container tomatoes?
A3: Container tomatoes generally need to be watered much more frequently than in-ground plants. In hot, sunny weather, daily watering is often necessary, and sometimes even twice a day. The best way to tell is to check the soil: stick your finger about 1-2 inches deep. If it feels dry, it’s time to water thoroughly until water drains from the bottom. Avoid letting the soil completely dry out between waterings. Fabric grow bags and smaller pots will dry out faster.
Q4: Do I need to prune determinate tomato varieties in containers?
A4: While determinate varieties require less pruning than indeterminate ones, some pruning is still beneficial. Focus on removing any suckers that appear below the first flower cluster, as these often divert energy from main fruit production. Also, remove any yellow, diseased, or dead leaves to improve air circulation and reduce the risk of fungal diseases. This helps the plant focus its energy on fruit development and keeps it tidy.