Introduction
Creating october garden compost with fallen leaves can boost your soil’s organic matter by 1.5% in just one season, potentially increasing vegetable yields by up to 20% compared to gardens relying solely on synthetic fertilizers. By diverting these natural materials from landfills, you also save an average of $30-$50 per year on purchased soil amendments.
This comprehensive guide will show you how to transform autumn's bounty into nutrient-rich compost, providing a sustainable and cost-effective way to enhance your garden's health. We'll cover everything from material selection to common pitfalls, ensuring you reap measurable benefits for seasons to come.
[lwptoc]
Embracing leaf composting isn't just good for your garden; it's a powerful statement for environmental stewardship. Reduce waste, enrich your soil, and establish a thriving ecosystem right in your backyard, all while saving money and improving plant vitality.
Quick Summary
- Eco-Friendly Soil Booster: Transform garden waste into nutrient-rich soil amendment.
- Cost-Effective: Save approximately $30-$50 annually on commercial compost and fertilizers.
- Time Commitment: Initial setup takes 1–2 hours, with minimal weekly maintenance.
Context & Ideal Conditions
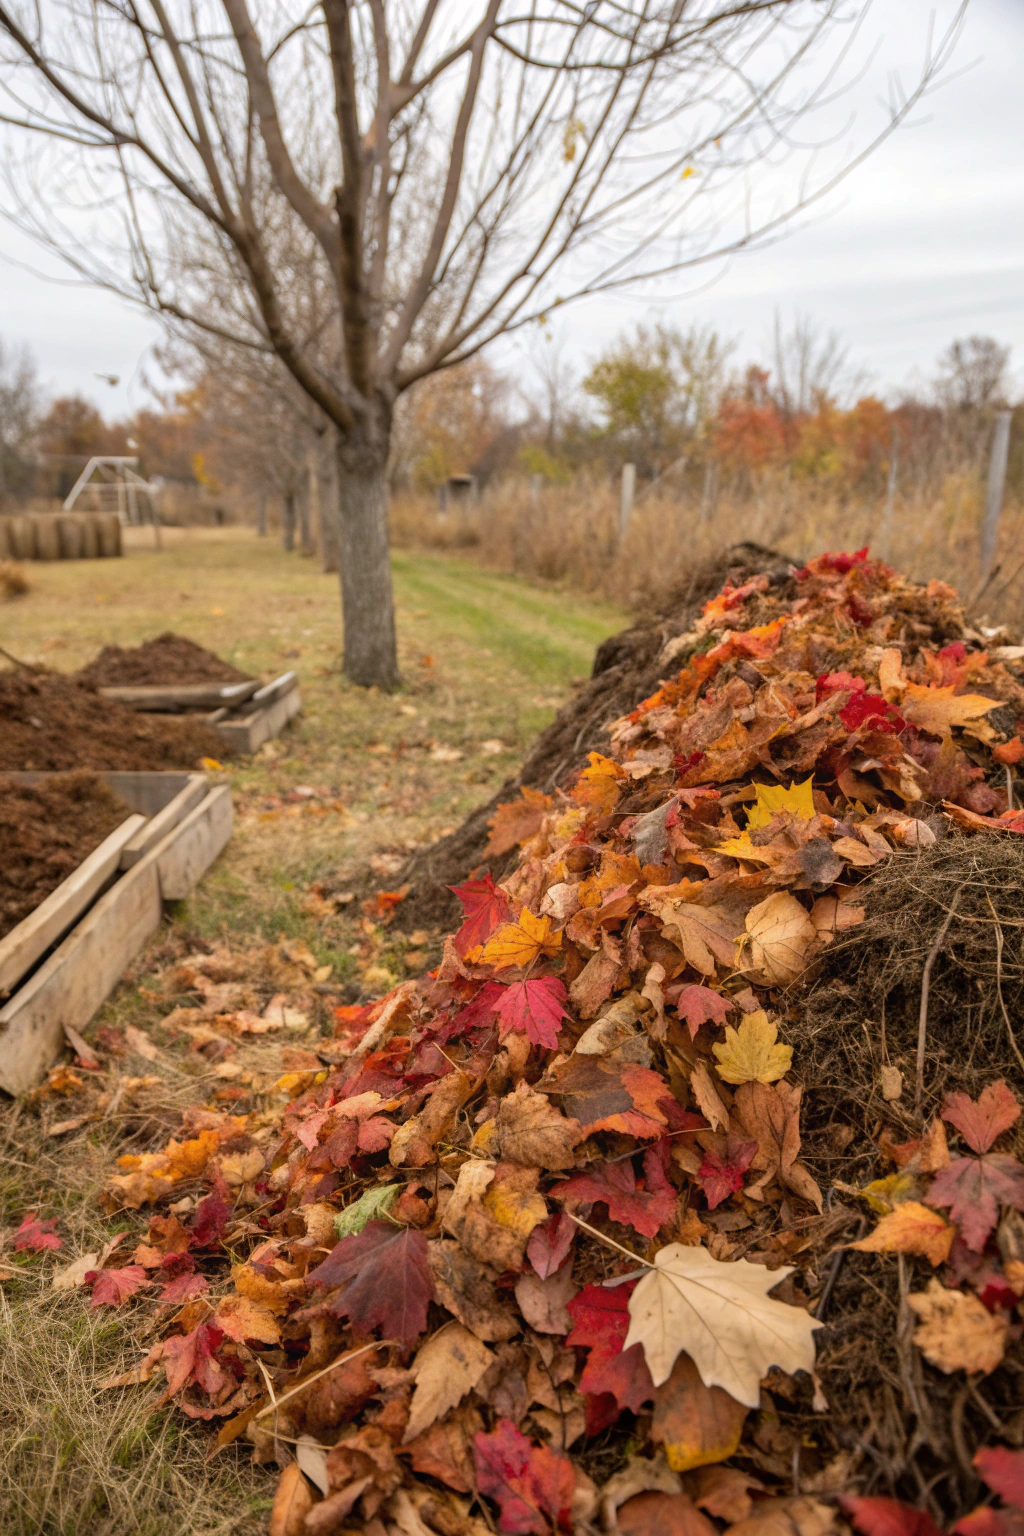
October is the prime month for gathering fallen leaves and starting your compost pile. Ambient temperatures ranging from 50–70°F (10–21°C) encourage optimal microbial activity. For a successful compost pile, aim for a location that receives partial shade to prevent excessive drying and retains consistent moisture.
The ideal compost pH should be slightly acidic to neutral, between 6.0 and 7.5. While the pH of leaves is generally neutral, monitoring it helps ensure a balanced environment for decomposition. Your compost bin or pile should be placed on bare soil to allow direct contact with beneficial microorganisms and earthworms.
october, garden, compost, with, fallen: Tools & Materials
To build a robust compost pile to process your bounty of fallen leaves, you’ll need a few essential tools and materials.
- Compost Bin (optional but recommended): A wire mesh bin measuring 3 ft x 3 ft x 3 ft (0.9 m x 0.9 m x 0.9 m) offers optimal volume for decomposition. Alternatively, a plastic tumbler compost bin with a capacity of 37 gallons (140 L) or more works well for smaller spaces.
- Pitchfork or Composting Fork: A sturdy, long-handled tool such as a Fiskars Ergo D-handle steel garden fork is essential for turning and aerating the pile. The long handle helps reach the core of the pile for thorough mixing.
- Leaf Shredder/Mulcher (optional): A compact electric shredder, like a Sun Joe CJ603E 15-Amp Shredder, significantly reduces leaf volume and speeds up decomposition. Without a shredder, a lawnmower with a bag attachment can also finely chop leaves.
- Garden Gloves: Puncture-resistant gloves (e.g., Wells Lamont leather gloves) are crucial for protecting your hands during collection and turning.
- Water Hose with Spray Nozzle: For consistent moisture addition.
- “Green” Material: Fresh grass clippings, kitchen scraps (fruit/vegetable peels, coffee grounds) make up 30-50% of your total volume to provide nitrogen.
- “Brown” Material: Primarily fallen leaves (oak, maple, birch are excellent choices due to their favorable carbon-to-nitrogen ratio), shredded cardboard, or straw, making up 50-70% of your total volume for carbon.
- Thermometer: A compost thermometer with a 20-inch (50 cm) probe length can monitor internal temperatures, indicating microbial activity.
- Wheelbarrow or Garden Cart: A 6 cubic foot (170 L) wheelbarrow or heavy-duty garden cart for transporting materials efficiently.
october, garden, compost, with, fallen: Time, Difficulty & Budget
| Prep | 30–45 min |
| Build/Plant | 60–90 min |
| Total | 90–135 min |
| Skill Level | Beginner |
| Budget | ≈ $20–$150 (materials/tools) |
This DIY composting project is approximately 40% cheaper than purchasing pre-made compost bins and several bags of commercial compost over a single season. The time investment yields continuous returns in improved soil health and reduced waste.
Step-by-Step Tutorial
Step 1 — Layout & Prep
Choosing the right location for your fall garden compost is crucial for efficiency and neighborhood aesthetics. Select an area at least 3 ft (0.9 m) away from buildings and wooden structures to ensure proper air circulation and prevent potential moisture damage.
Begin by clearing a 4 ft x 4 ft (1.2 m x 1.2 m) square area on bare soil, removing any weeds, grass, or debris. This helps establish direct contact with the ground, inviting beneficial microbes and earthworms into your compost pile. If you're building a simple bin, use four metal stakes driven 12 inches (30 cm) into the ground at each corner, forming a 3 ft x 3 ft (0.9 m x 0.9 m) square.
Step 2 — Cutting & Assembly
If using a wire mesh bin, you’ll need standard galvanized hardware cloth with a 1/2-inch (1.27 cm) mesh, measuring 12 ft (3.66 m) long by 3 ft (0.9 m) wide. Cut this into four 3 ft (0.9 m) sections using heavy-duty wire snips. Form each section into an open-ended cylinder, securing the ends with zip ties or thin gauge wire every 6 inches (15 cm). Connect these cylinders to create a four-sided bin.
For a wooden pallet bin, source four heat-treated (HT) or un-treated pallets, each measuring approximately 40 in x 48 in (102 cm x 122 cm). Stand them upright to form a square, securing them at the corners with 3-inch (7.6 cm) galvanized deck screws. Use a cordless drill on a medium torque setting (around 100 in-lbs or 11 Nm) to prevent stripping. Pre-drill pilot holes with a 1/8-inch (3 mm) drill bit to avoid splitting the wood.
Step 3 — Installation/Planting
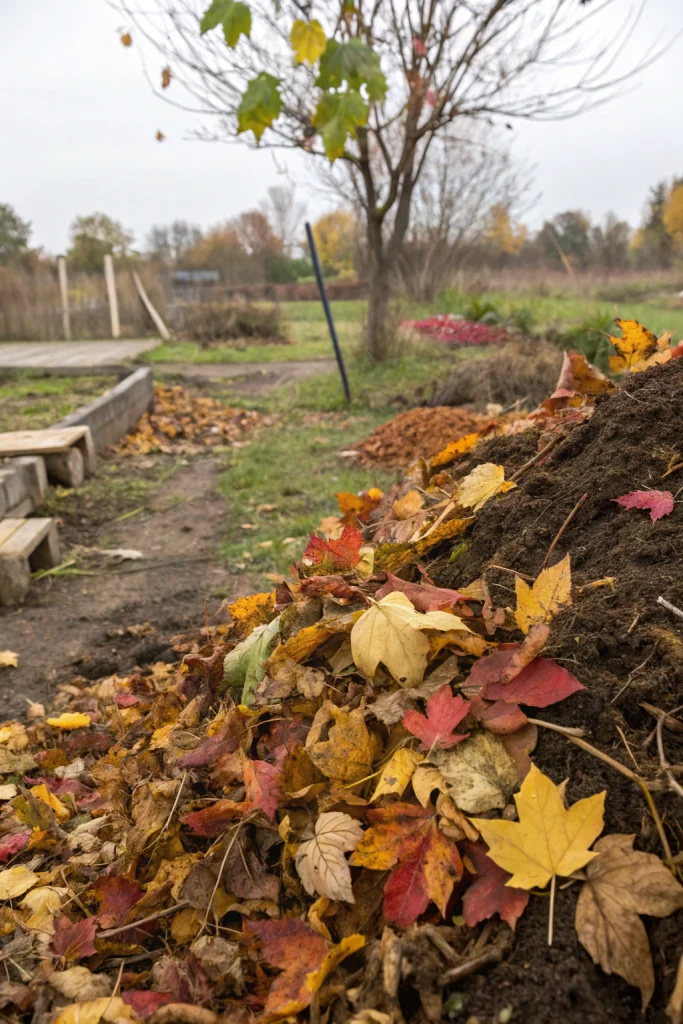
Now it’s time to layer your october garden compost with fallen leaves and other organic materials. Begin with a 6-inch (15 cm) layer of coarse “brown” material like shredded twigs or straw at the bottom for drainage and aeration. This initial layer ensures air circulation and prevents compaction.
Next, add a 6- to 8-inch (15-20 cm) layer of shredded fallen leaves. Follow this with a 2- to 3-inch (5-7.5 cm) layer of "green" materials such as fresh grass clippings, kitchen scraps, or aged manure. Repeat this layering, ensuring each "brown" layer is thoroughly moistened with about 1 gallon (3.8 L) of water from your hose.
Step 4 — Finishing & QA
Once your compost pile reaches about 3 ft (0.9 m) high, cap it with a 6-inch (15 cm) layer of brown material to help retain moisture and deter pests. Perform a final moisture check across the entire pile, ensuring consistency. Use your compost thermometer to monitor the internal temperature; ideally, it should reach 130–160°F (54–71°C) within a few days, indicating active decomposition.
This process transforms the pile from brown and green layers into a rich, dark, earthy-smelling humus within 3–6 months. If a wire bin is used, ensure all wire edges are securely tucked or filed down to prevent snags. For wooden bins, check for any protruding screws or loose boards that might pose a hazard.
Care & Schedule
Consistent care is vital for successful composting. Maintain moisture levels by adding 1-2 gallons (3.8-7.6 L) of water per week during dry periods, adjusting based on weather conditions. The pile should feel like a damp sponge. Turn the compost pile with your pitchfork every 3-7 days to aerate it and mix materials, encouraging faster decomposition and preventing anaerobic conditions.
During peak decomposition (when temperatures are high), you might need to turn it more frequently. Replenish your compost pile as more materials (kitchen scraps, autumn leaves) become available, always maintaining the green-to-brown ratio. Inspect your bin quarterly, ensuring all fasteners are secure and addressing any signs of wear.
Variations & Adaptations
For gardeners with limited space, a tumbler compost bin is an excellent option. These compact units, typically holding 30-50 gallons (113-189 L), allow for easy turning and are ideal for balconies or small patios. For hot, arid climates, consider placing your compost pile in deeper shade and adding extra layers of brown material like straw or wood chips to prevent rapid moisture loss. Conversely, in cold, wet climates, covering the bin with a tarp or building a more enclosed structure can help retain heat and prevent waterlogging.
If you lack traditional composting materials, shredded newsprint or cardboard can substitute effectively for brown materials, while spent coffee grounds from local cafes can act as a potent nitrogen source. For a "knock-down" version, instead of a permanent bin, simply layer materials in a protected corner and cover with a tarp, turning with a pitchfork as needed. Aesthetically, you can choose cedar or redwood pallets for a more attractive wooden bin, or paint a wire mesh bin with outdoor-safe, non-toxic paint in an earthy tone to blend with your garden.
Common Mistakes to Avoid
- Over-wetting: Too much moisture leads to anaerobic decay, producing foul odors. Prevent this by checking moisture regularly (like a wrung-out sponge) and ensuring good drainage.
- Incorrect C:N Ratio: An imbalance of carbon (browns) and nitrogen (greens) slows decomposition. Aim for roughly 2 parts brown to 1 part green.
- Not Turning Enough: Lack of aeration causes compaction and reduces microbial activity. Turn your pile every 3-7 days.
- Adding Inappropriate Materials: Avoid meat, dairy, oily foods, and diseased plants, as these attract pests and can introduce pathogens.
- Poor Location: Placing the pile in full sun can dry it out quickly, while excessive shade can keep it too cold to decompose efficiently. Partial shade is ideal.
- Insufficient Shredding: Large pieces of leaves or other materials decompose slowly. Shredding materials into 1-2 inch (2.5-5 cm) pieces significantly speeds up the process.
- Inadequate Size: A compost pile too small won’t generate enough heat for efficient decomposition. A minimum size of 3 ft x 3 ft x 3 ft (0.9 m x 0.9 m x 0.9 m) is recommended.
Sustainability, Safety & Regulations
Composting fallen leaves is a highly sustainable practice, diverting valuable organic matter from landfills and reducing greenhouse gas emissions. Salvaged wood pallets (ensure they are “HT” heat-treated, not “MB” methyl bromide treated) can form the structure of your bin, further reducing waste. Collect rainwater in barrels to moisten your compost, saving on municipal water usage.
Always wear ANSI Z87.1-certified safety glasses and heavy-duty ASTM F1790-rated work gloves when shredding leaves or handling sharp tools. Children and pets should be kept away from compost piles, especially if they contain kitchen scraps that might attract them. Before starting, check with your local municipality for any regulations regarding compost pile size, location (e.g., minimum setbacks from property lines), or permitted materials. Proper green-waste disposal ensures that only desirable materials enter your compost and that any excess (e.g., diseased plants) is handled responsibly.
Measure the Outcome
Quantifying the success of your composting efforts can be incredibly rewarding. Track the volume of leaves and kitchen scraps you divert from waste each week or month; a typical household can divert 200-300 lbs (90-136 kg) of organic waste annually. Observe your garden’s growth: measure the height of new plants (in/cm per month) planted in areas amended with your compost versus unamended control areas.
Monitor your water usage; compost-enriched soil retains moisture more effectively, potentially reducing your garden's water needs by 20-30% (saving 5-10 gallons, or 19-38 liters, per week per 100 sq ft). Calculate your cost savings by comparing the price of commercial compost and fertilizers to your minimal investment in materials. Ultimately, the time saved on weeding and watering, paired with the overall satisfaction of a thriving, eco-friendly garden, offers a priceless return.
Conclusion
Harnessing the power of october garden compost with fallen leaves is an incredibly simple yet impactful way to enrich your soil, reduce waste, and connect more deeply with your garden’s natural cycles. You’ve learned how to gather, layer, and maintain a compost pile that will pay dividends in vibrant plant life and significant savings.
Don't let autumn's bounty go to waste—transform it into gardening gold! Give this rewarding DIY project a try, and see the remarkable difference it makes. Share your composting journey and tips in the comments below!
FAQ
A: Almost all, yes! Harder leaves like oak or maple benefit from shredding to speed decomposition, but all common deciduous tree leaves are suitable. Avoid black walnut leaves if you plan to use the compost around sensitive plants due to juglone, a natural herbicide.
A: The most common issues are insufficient nitrogen (add more “green” materials), too dry (add water), or not enough bulk (ensure your pile is at least 3x3x3 ft / 0.9×0.9×0.9 m). Turning it can also help kickstart the process.
A: With proper layering, moisture, and regular turning, shredded leaves can break down into usable compost in 3-6 months. Without shredding or frequent turning, it can take 6-12 months or longer.
A: You can supplement with kitchen scraps, aged animal manure (from herbivores only), or even a handful of nitrogen fertilizer (like blood meal) to balance the high carbon content of fallen leaves.
A: Absolutely! Running over dry leaves with your lawnmower multiple times (preferably with a bag attachment) will effectively chop them into smaller pieces, which speeds up decomposition considerably. It’s a great low-cost, minimal-tool method.
A: A foul, rotten egg smell usually indicates that the pile is too wet and lacking oxygen (anaerobic). Turn the pile thoroughly, add more dry “brown” materials (like shredded leaves or cardboard), and reduce watering.
A: For efficient decomposition, a compost bin should ideally be at least 3 feet (0.9 m) in all dimensions (length, width, height). This volume allows the pile to generate and retain enough heat for microbial activity. Smaller bins will still compost but may take longer due to lower internal temperatures.
Internal & External Links
Discover more ways to enhance your outdoor spaces with ideas for rustic garden tables with autumn flower displays or explore our tips for autumn bulb planting to ensure vibrant spring blooms. For those looking to extend their growing season, consider building a DIY cold frame to protect delicate plants. We also recommend checking out Pinterest Boards — Garden & DIY inspiration for endless creative ideas.


