Introduction
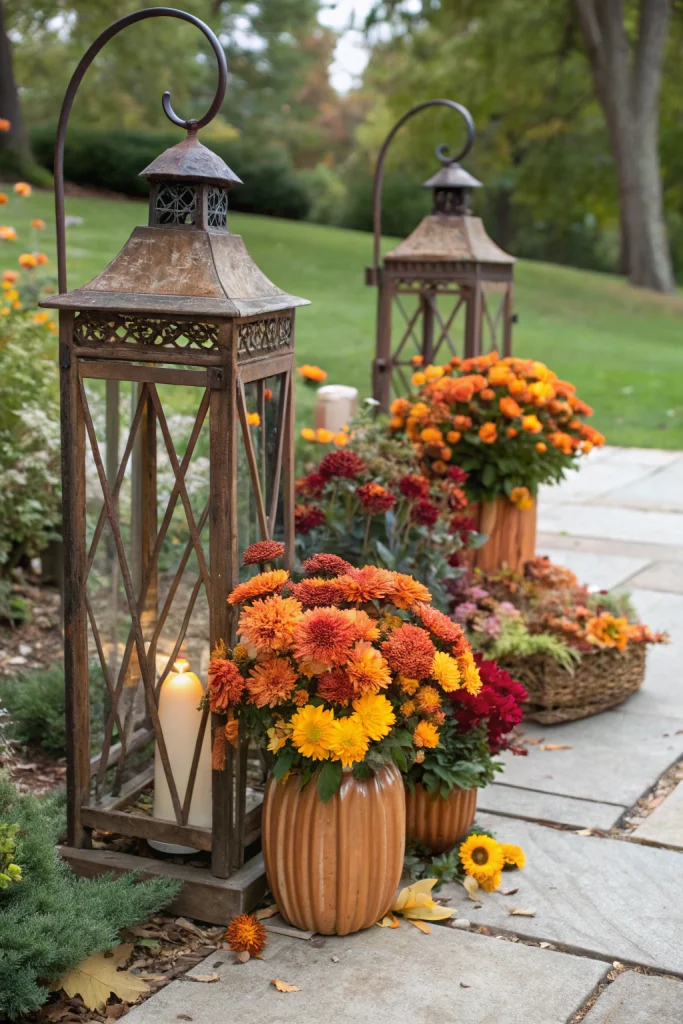
Creating charming rustic lantern holders with October garden flowers for your outdoor spaces doesn’t have to break the bank or take an entire weekend. Did you know that DIYing these decor elements can save you upwards of 70% compared to purchasing pre-made alternatives, with zero compromise on personalized aesthetics? This simple project not only enhances your garden’s autumnal beauty but also offers a significant return on your time and material investment.
[lwptoc]
This comprehensive guide is designed for garden enthusiasts and DIY novices alike, providing clear, actionable steps to construct beautiful, durable lantern holders. We’ll cover everything from material selection to planting, ensuring your October garden flowers truly shine.
You'll gain practical skills, enjoy the therapeutic process of hands-on creation, and ultimately elevate your outdoor ambiance with custom-built features. Get ready to transform your garden into a cozy, illuminated haven, perfect for crisp autumn evenings.
Quick Summary
- Achieve significant cost savings (up to 70%) over retail-bought lantern holders.
- Complete this project in a single afternoon, requiring only 2-4 hours of active work.
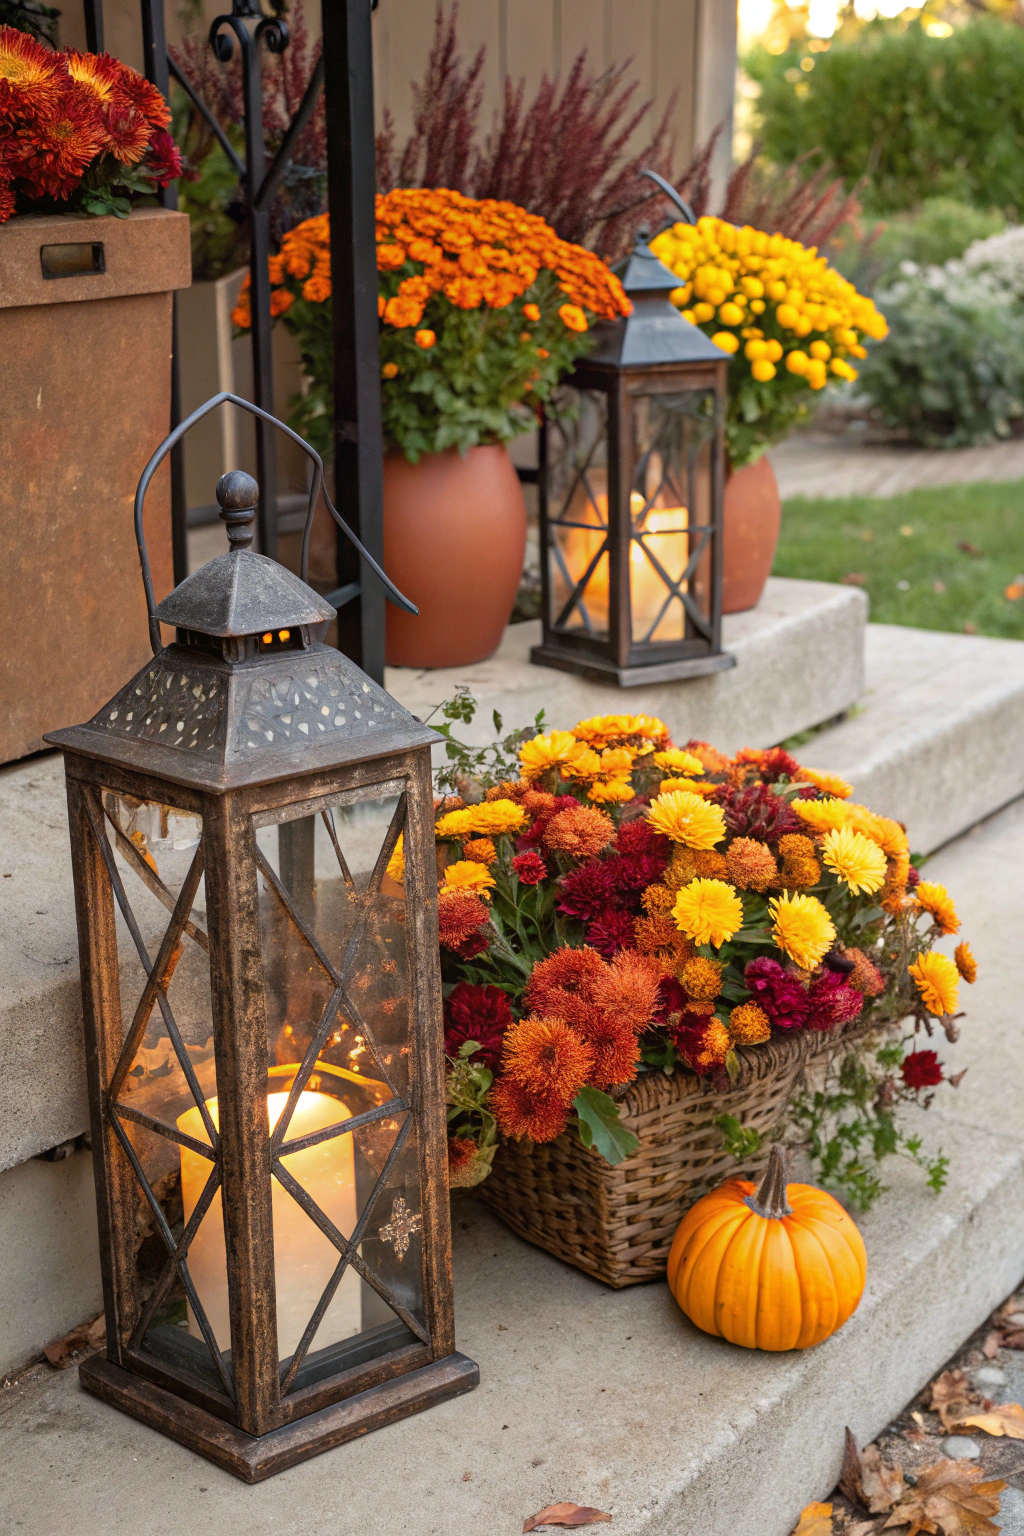
- Enhance your garden’s aesthetic with customizable, rustic charm tailored for October florals.
Context & Ideal Conditions
October is the perfect month for this project, as the cooler temperatures (typically 40-60°F / 4-15°C) are ideal for planting autumn flowers and working outdoors. Most October garden flowers, such as Mums (Chrysanthemum spp.) and Ornamental Kale (Brassica oleracea), thrive in full sun exposure for at least 6 hours daily, though some tolerate partial shade.
Ensure your chosen location has well-draining soil with a neutral to slightly acidic pH (6.0-7.0). The lantern holders themselves will be relatively lightweight, designed to hold up to 10 lbs (4.5 kg) per hook, making them suitable for various garden settings, from patios to garden beds, without requiring extensive ground preparation.
Rustic Lantern Holders with October Garden Flowers: Tools & Materials
To build a set of two rustic lantern holders, gather the following:
- Wood Posts: Two 4x4x6 ft (10x10x180 cm) pressure-treated cedar or redwood posts. These offer excellent resistance to rot and insects.
- Cross Arms: Two 2x4x24 in (5x10x60 cm) pressure-treated cedar or redwood boards.
- Galvanized Eye Bolts: Two 1/4 in (6 mm) diameter x 4 in (10 cm) long eye bolts with nuts and washers. These will secure the lanterns.
- Galvanized Lag Screws: Four 5/16 in (8 mm) diameter x 3 in (7.5 cm) long lag screws for attaching cross arms.
- Wood Screws: Box of exterior-grade 2.5 in (6.4 cm) deck screws (e.g., #8 or #9 diameter) for optional braces.
- Hand Saw or Miter Saw: For precise cuts.
- Drill/Driver: Cordless drill with drill bits (1/4 in / 6 mm for pilot holes, 5/16 in / 8 mm for lag screws) and a Phillips head or square drive bit for deck screws.
- Level: A 24 in (60 cm) spirit level for plumb and level checks.
- Measuring Tape: A 25 ft (7.6 m) tape measure.
- Post Hole Digger or Shovel: For digging foundation holes.
- Bagged Concrete Mix: One 50 lb (22.7 kg) bag per post (quick-setting type recommended).
- Gravel: 0.5 cubic ft (14 L) per post for drainage.
- Safety Gear: ANSI Z87.1-compliant safety glasses, work gloves, and closed-toe shoes.
- October Garden Flowers: 2-4 potted Mums (Chrysanthemum spp.), Pansies (Viola x wittrockiana), or Ornamental Cabbage (Brassica oleracea) in 6-8 in (15-20 cm) diameter pots.
- Potting Mix: 1 cu ft (28 L) of high-quality potting mix with good drainage.
Rustic Lantern Holders with October Garden Flowers: Time, Difficulty & Budget
| Prep | 30–45 min |
| Build/Plant | 120–180 min |
| Total | 150–225 min |
| Skill Level | Beginner |
| Budget | ≈ $75–$120 (materials/tools) |
This DIY project offers substantial savings, being approximately 50-70% cheaper than purchasing comparable pre-made lantern holders from a garden specialty store, which could retail for $250-$400 per pair.
Step-by-Step Tutorial
Step 1 — Layout & Prep
Begin by selecting the ideal locations for your rustic, lantern, holders, with, october garden flowers. Measure out the desired positions, ensuring they are at least 6 ft (1.8 m) apart for visual balance and accessibility. Dig post holes that are 24 in (60 cm) deep and 8-10 in (20-25 cm) in diameter using a post-hole digger.
Add a 4-inch (10 cm) layer of gravel to the bottom of each hole for improved drainage. Place the 4×4 posts into the holes, ensuring they are centered. Use your measuring tape to mark the desired height of the cross arm, typically 60 in (150 cm) from ground level.
Step 2 — Cutting & Assembly
Measure 6 in (15 cm) from one end of each 2×4 cross arm board. This will be the point where the eye bolt for the lantern is attached, allowing for sufficient overhang for the lantern itself. Securely clamp one 2×4 cross arm to your workbench or a stable surface.
With your drill, create a pilot hole (1/4 inch / 6 mm bit) at the 6-inch (15 cm) mark for the eye bolt. Insert the 1/4 in (6 mm) diameter eye bolt and secure it with a washer and nut, tightening firmly with a wrench. Next, position the cross arm onto the main 4×4 post at your marked height, ensuring it is level. Drill pilot holes for the 5/16 in (8 mm) lag screws, then drive in the two lag screws to secure the cross arm to the post using a drill/driver on a medium torque setting (around 600-800 RPM). Repeat this process for the second lantern holder.
Step 3 — Installation/Planting
With the cross arms attached, carefully set the posts back into their gravel-lined holes. Mix the quick-setting concrete according to package directions; typically this involves adding water to the mix in a bucket or directly in the hole. Pour the concrete around the base of each post, ensuring it fills the hole entirely.
Use your level to verify that each post is perfectly plumb (vertical) before the concrete sets, usually within 20-30 minutes. Once the concrete cures (allow 24-48 hours for full strength), your holders are ready for planting. Fill your chosen 6-8 inch (15-20 cm) pots with potting mix, leaving approximately 1 inch (2.5 cm) from the rim. Plant your October garden flowers (e.g., Chrysanthemum 'Sentinel Red', Ornamental Cabbage 'Osaka Red') and water thoroughly with about 1 quart (1 L) of water per pot.
Step 4 — Finishing & QA
After the concrete has fully cured and your plants are in place, apply a protective finish to your wooden lantern holders. Lightly sand any rough edges with 120-grit sandpaper for a smooth, rustic feel. Apply an exterior-grade wood stain or sealant to protect the wood from the elements and enhance its natural beauty. Choose a stain color that complements your garden’s aesthetic, such as a deep walnut or a natural cedar tone.
Once the finish is dry, affix your lanterns to the eye bolts. Conduct a final quality assurance check: ensure all fasteners are tight, posts are stable and plumb, and lanterns hang securely. Check for any sharp edges or splinters that could pose a safety risk. This step ensures your rustic lantern holders are not only beautiful but also safe and durable for long-term enjoyment.
Care & Schedule
Maintaining your rustic lantern holders and accompanying October flowers is straightforward. Water your potted plants approximately 1-2 times per week, providing about 0.5-1 gallon (2-4 L) of water per pot, depending on weather and soil moisture. In extended dry spells or warmer October days, increase watering frequency. Use a balanced liquid fertilizer (e.g., 5-10-5 N-P-K) once a month during the growing season; in October, this might be a final boost before winter.
Prune any spent blooms from your flowers to encourage new growth and maintain a tidy appearance. Annually, inspect your lantern holders for any signs of wear, especially fasteners and wood rot. Reapply wood sealant or stain every 1-2 years to preserve the wood's integrity. Top up mulch around the base of the posts if desired, adding a 2-inch (5 cm) layer to conserve moisture and suppress weeds.
Variations & Adaptations
For small spaces or balconies, consider constructing smaller, wall-mounted holders that attach directly to a sturdy railing or wall. Instead of concrete posts, you could use heavy-duty galvanized pipe secured into large, weighted planters. In hot climates, select drought-tolerant October blooms like Dianthus ‘Telstar’ or Sedum ‘Autumn Joy’. For colder climates, ensure your pots are frost-proof and select hardier plants such as Pansies.
Alternative materials include recycled pallets for a truly rustic feel (though requiring more prep for weather resistance) or wrought iron for an elegant, durable option. A "knock-down" version can be created using bolted connections that allow the posts and cross arms to be disassembled for storage during off-seasons. Aesthetically, play with various wood tones, from natural clear sealants to ebony stains, and pair with lanterns of different materials like copper, brass, or distressed tin.
Common Mistakes to Avoid
- Undersized Fasteners: Using insufficient screws or bolts for the cross arm can lead to instability and potential failure, particularly when supporting lanterns and potted plants. Always follow manufacturer recommendations for screw gauge and length.
- No Drainage in Pots: Planting flowers in pots without drainage holes will quickly lead to root rot. Always ensure pots have adequate drainage to prevent waterlogging.
- Wrong Wood Type: Using untreated wood directly in the ground without proper sealing or treatment will lead to rapid decay and a short lifespan for your holders. Opt for pressure-treated, cedar, or redwood.
- Poor Post Orientation: Incorrectly setting posts out of plumb or off-center can result in an angled, visually unappealing structure. Use a level extensively during installation.
- Overloading: While sturdy, each holder has a weight limit. Be mindful not to exceed 10 lbs (4.5 kg) per eye bolt, which includes the lantern and any potted arrangements.
- No Protective Finish: Skipping the exterior wood stain or sealant leaves the wood vulnerable to UV damage, moisture, and pests, significantly reducing its lifespan and aesthetic appeal.
Sustainability, Safety & Regulations
Embrace sustainability by sourcing salvaged wood, such as old fence posts or reclaimed barn wood, for your project. This reduces waste and adds character. Consider collecting rainwater to irrigate your October garden flowers, utilizing a rain barrel connected to your gutter system. Always wear appropriate Personal Protective Equipment (PPE) – safety glasses (ANSI Z87.1 certified) when cutting or drilling, and thick gloves when handling wood or concrete.
Ensure all tools are in good working order and used per manufacturer guidelines. For child and pet safety, ensure your lantern holders are stable and anchored securely to prevent tipping. Avoid placing lanterns with open flames within reach of children or pets. Check local zoning laws for any height restrictions or setback requirements for permanent outdoor structures. Dispose of wood scraps and concrete bags responsibly through local recycling programs or designated green waste facilities.
Measure the Outcome
Evaluate the success of your rustic lantern holders with October garden flowers using these simple metrics: A survival rate of 90% or more for your potted plants indicates good care and suitable conditions. You can track growth of your flowers, aiming for 1-2 inches (2.5-5 cm) of new growth per month, demonstrating plant health. Over a season, observe your water consumption; incorporating native or drought-resistant October flowers and efficient watering practices can lead to estimated water savings of 5-10 gallons (19-38 L) per month.
The cost per square foot of illuminated garden space will be significantly lower than professional landscaping. Most importantly, gauge your satisfaction and that of your family or guests enjoying the enhanced ambiance. Positive feedback and your own enjoyment are key indicators of a successful DIY project!
Conclusion
Crafting your own rustic lantern holders with October garden flowers is an incredibly rewarding project that combines practical DIY skills with creative gardening. This guide has shown you how to build visually stunning and functional outdoor decor, saving money while adding personalized charm to your garden. The autumn season offers a perfect backdrop for these illuminated displays, embracing the beauty of nature’s changing palette.
So, gather your tools, select your favorite autumnal blooms, and embark on this fulfilling project. We encourage you to try it, share your creations in the comments below, and inspire others to enhance their outdoor spaces. Happy building and gardening!
FAQ
A: Excellent choices include Chrysanthemums (Mums), pansies (Viola x wittrockiana), Ornamental Cabbage or Kale (Brassica oleracea), and even some late-blooming asters (Symphyotrichum spp.), all known for their vibrant autumn colors and resilience.
A: Absolutely! Solar lanterns are an excellent, eco-friendly option. Simply ensure they receive adequate sunlight during the day to charge effectively.
A: If your garden soil retains too much water, amend the post holes with a few extra inches of coarse gravel at the bottom, and apply a good quality potting mix in your flower pots that includes perlite for drainage.
A: Yes, untreated pine is more affordable, but it requires thorough sealing and regular maintenance (e.g., annual application of a waterproof stain or paint) to adequately protect it from weather and extend its lifespan.
A: Wilting often indicates either too much or too little water. Check soil moisture by sticking your finger about 2 inches (5 cm) deep. If dry, water thoroughly; if wet, allow it to dry out and ensure good drainage.
A: With pressure-treated wood and proper annual maintenance (re-staining/sealing), your lantern holders can last 10-15 years or more. Untreated wood will have a much shorter lifespan.
A: Yes, you can use a hand saw, though it will take more effort. Alternatively, most lumberyards offer cutting services for a small fee, ensuring precise cuts for your wood pieces.
Internal & External Links
Discover more ideas for enchanting autumn displays by exploring our guide to Rustic Garden Tables with Autumn Flower Displays. For additional seasonal inspiration for planters, check out our insights on Rustic Apple Crate Planters for Autumn Gardens. And for outdoor lighting ideas to complement your lanterns, read about LED Ambient Lighting for Autumn Evenings.
Pinterest Boards — Garden & DIY inspiration


