The Ultimate Guide to Bokashi Composting: Ferment Your Kitchen Waste Fast (2024 Edition)
Are you tired of your kitchen waste going into landfill, contributing to greenhouse gas emissions, and feeling like a missed opportunity for your garden? What if you could transform virtually *all* your food scraps, including those tricky meat and dairy products, into a nutrient-rich soil amendment in a matter of weeks? Enter bokashi composting, an anaerobic fermentation process that’s revolutionizing the way home gardeners approach compost and living soil. This article dives deep into the world of bokashi, offering a comprehensive guide to fermenting your kitchen waste quickly and efficiently. Discover how this innovative method not only reduces landfill burden but also supercharges your garden with vital nutrients, creating a thriving ecosystem from your everyday discards.
[lwptoc]
Why Bokashi Composting Matters for Your Garden and the Planet
Bokashi composting isn’t just another way to get rid of food scraps; it’s a powerful tool with far-reaching benefits for both your garden and the environment. Traditional composting often shies away from meat, dairy, and oils due to pest attraction and slow decomposition. Bokashi, however, embraces these items, turning what was once problematic waste into a valuable resource.
Firstly, it significantly diverts food waste from landfills. When organic matter decomposes anaerobically in landfills, it produces methane, a potent greenhouse gas contributing to climate change. Bokashi’s controlled fermentation process minimizes methane production, making it a more eco-conscious choice. By using effective soil amendments like fermented bokashi, you contribute to a healthier planet.
Secondly, bokashi dramatically improves soil health. The fermented material, once buried, breaks down rapidly in the soil, releasing a burst of nutrients. This process enriches the soil’s microbial life, enhancing its structure, water retention, and overall fertility. A vibrant soil microbiome is the cornerstone of healthy, resilient plants, leading to higher yields and stronger disease resistance.
Furthermore, bokashi helps to suppress soil-borne pathogens and promote beneficial microorganisms. The acidic nature of the fermented material, combined with the beneficial microbes introduced by the bokashi bran, creates an environment where desirable soil life flourishes. This translates to less need for chemical interventions and a more naturally productive garden ecosystem. It’s an excellent way to prepare your garden for seasonal planting.
What You’ll Need: Tools and Materials for Your Bokashi Journey
Getting started with bokashi composting is surprisingly simple, requiring only a few key items. The initial investment is minimal, and many components can be repurposed or DIYed. Having the right tools ensures a smooth and successful fermentation process, setting you up for excellent results.
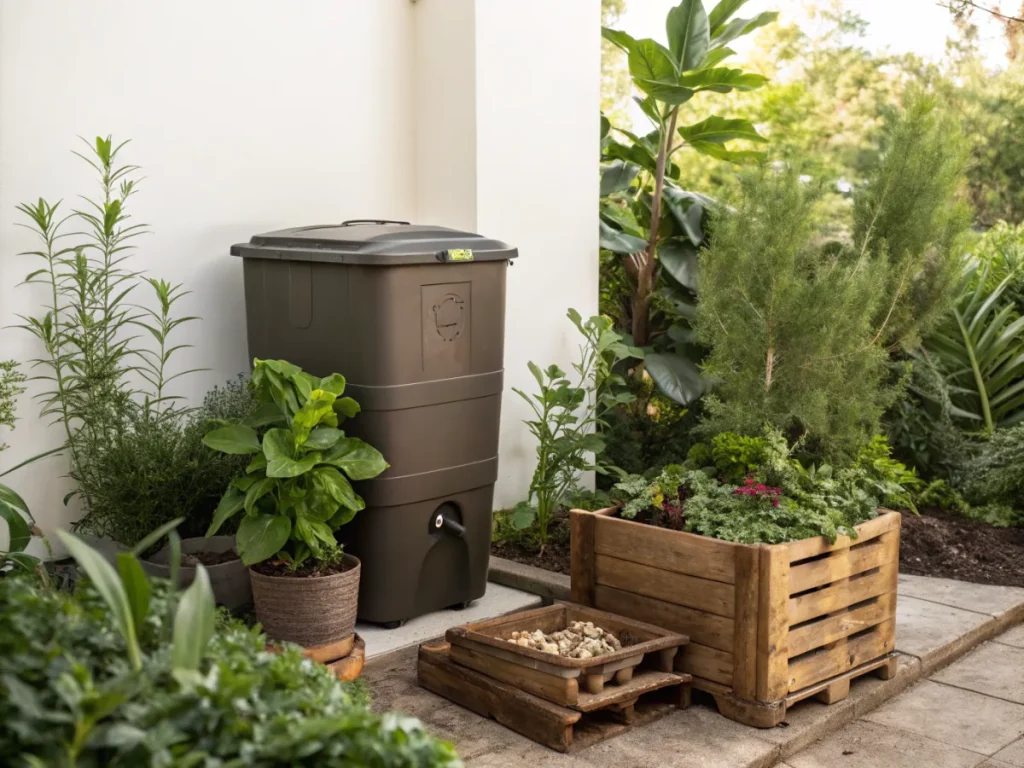
- Bokashi Bin(s): This is the heart of your operation. A dedicated bokashi bin typically has an airtight lid and a spigot at the bottom to drain bokashi tea. You can buy commercial bins, often in pairs so one can cure while the other is being filled. Alternatively, you can DIY a bin using two stacked 5-gallon buckets with holes drilled in the top one for drainage, and a spigot added to the bottom one.
- Bokashi Bran: This is the magic ingredient! Bokashi bran is a carrier (usually wheat or rice bran) inoculated with Effective Microorganisms (EM). These beneficial microbes are responsible for the fermentation. You can purchase it pre-made or, for the more adventurous, make your own.
- Food Scraps: The star of the show! This includes almost all kitchen waste: fruit and vegetable peels, cooked and uncooked meat, fish, dairy products, bread, pasta, coffee grounds, tea bags, and even small bones. The versatility of bokashi composting kitchen waste is one of its greatest advantages.
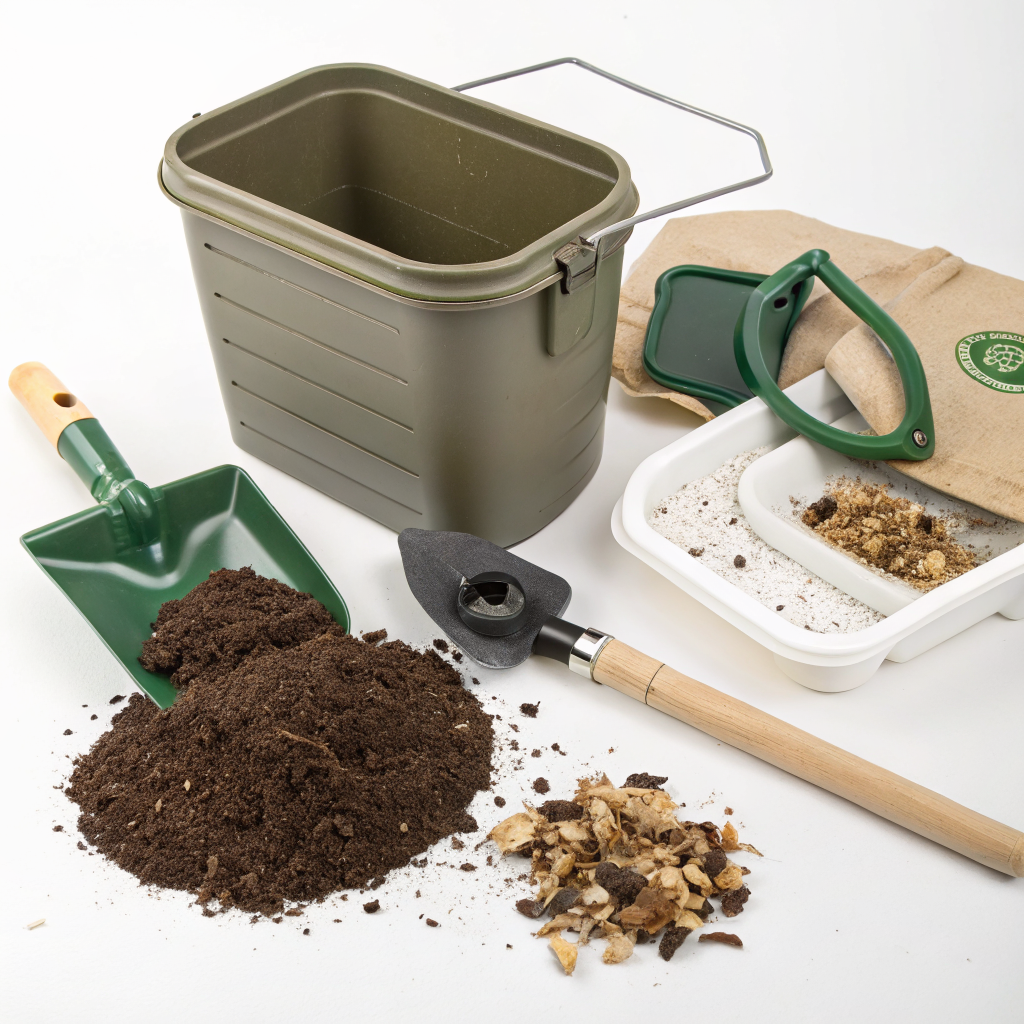
- Trowel or Scoop: For pressing down the food scraps to remove air and for transferring them.
- Container for Bokashi Tea: A small jug or bottle to collect the liquid drained from the spigot.
- Gloves (Optional): For handling the food scraps, although it’s generally a clean process.
- Airtight Storage for Bran: To keep your bokashi bran fresh and potent.
Ensure your bokashi bin is clean before use to avoid introducing unwanted bacteria. A well-sealed bin is crucial for the anaerobic process to succeed, so regularly check for cracks or ill-fitting lids. The quality of your bokashi bran directly impacts the fermentation, so purchase from a reputable source if not making your own.
Step-by-Step Guide: Fermenting Your Kitchen Waste with Bokashi
Mastering bokashi composting is an achievable goal for any home gardener, and by following these simple steps, you’ll be well on your way to transforming your kitchen waste into garden gold. The process is straightforward, but attention to detail, particularly regarding airtightness, is key. Let’s break down the journey from food scrap to fermented goodness.
Step 1: Prepare Your Bokashi Bin
- Clean Your Bin: Ensure your bokashi bin is clean and dry. Any residual food or moisture could introduce unwanted organisms.
- Add Initial Bran Layer: Sprinkle a generous layer (about 1-2 tablespoons) of bokashi bran at the bottom of your empty bin. This provides a microbial foundation for the incoming food scraps.
Step 2: Collect and Add Food Scraps
- Collect Scraps: Keep a container on your kitchen counter to collect food scraps throughout the day.
- Chop into Smaller Pieces: Smaller pieces (1-2 inches) ferment faster and more efficiently. This increases the surface area for the microbes to work on.
- Add to Bin: Empty your collected scraps into the bokashi bin. Try to add scraps in layers rather than one large dump.
- Spread Evenly: Distribute the scraps evenly across the surface of the bin.
Step 3: Sprinkle Bokashi Bran and Compress
- Cover with Bran: Sprinkle another layer of bokashi bran over the newly added food scraps. The amount depends on the volume of scraps – typically 1-2 tablespoons per 1-2 inches of food waste. For particularly wet or protein-rich items (meat, dairy), use a bit more bran.
- Compress the Scraps: Using your trowel, scoop, or even a potato masher, firmly press down on the food scraps. This is a critical step to remove as much air as possible from the bin. The anaerobic environment is essential for bokashi fermentation.
- Seal Tightly: Close the lid of your bokashi bin, ensuring it’s completely airtight.
Step 4: Repeat and Drain Bokashi Tea
- Continue Adding Scraps: Repeat Step 2 and 3 daily or as you accumulate food waste until your bin is full. Each time, add food, sprinkle bran, compress, and seal.
- Drain Bokashi Tea: Every few days, or once a week, depending on the moisture content of your scraps, drain the “bokashi tea” (also known as leachate) from the spigot. This liquid is a valuable byproduct. If you don’t drain it, it can become stagnant and lead to undesirable odors or interrupt the fermentation.
- Utilize the Tea: Bokashi tea is an excellent liquid fertilizer for plants (dilute 1:100 with water) or a powerful drain cleaner (undiluted).
Step 5: Fermentation (Curing) Period
- Seal for Curing: Once the bin is full, ensure a final layer of bokashi bran is present, compress the scraps one last time, and seal the lid tightly.
- Store and Wait: Place the sealed bin in a cool, dark place (e.g., under the sink, in a utility room) for 10-14 days. Avoid opening the lid during this period, as it will introduce air and disrupt the anaerobic process.
- Check for Success: After the curing period, you should notice a sweet, pickley, or yeasty smell, similar to pickles or sourdough. The food scraps may look largely unchanged, but they will be “pickled” and pre-digested by the microbes. White mold on the surface is a sign of successful fermentation; black or green mold indicates an issue.
Step 6: Bury or Incorporate into a Compost Pile
- Dig a Trench: Dig a trench or hole in your garden bed approximately 6-12 inches deep.
- Bury the Fermented Scraps: Empty the contents of your bokashi bin into the trench.
- Cover with Soil: Cover the fermented scraps with at least 6 inches of soil. This is crucial to prevent pests and allow the material to break down properly.
- Wait to Plant: Wait 2-4 weeks before planting directly into the area where the bokashi was buried. This allows the material to fully integrate into the soil, preventing root burn due to the initial acidity.
- Alternative: Add to Compost Pile: If you don’t have garden space for burying, you can add the fermented bokashi to an existing hot compost pile. The bokashi will supercharge the decomposition process, speeding up the breakdown of all organic matter.
Following these steps diligently will ensure successful bokashi composting kitchen waste, turning your daily discards into a valuable resource for a thriving garden.
Pro Tips and Common Mistakes to Avoid
While bokashi composting is relatively straightforward, a few expert tips can enhance your experience and help you avoid common pitfalls. Understanding these nuances will ensure your system runs smoothly and effectively, yielding the best results for your garden.
Pro Tips:
- Small Pieces, Fast Fermentation: Always chop food scraps into smaller pieces. This increases the surface area for the EM to access, speeding up the fermentation process. Think 1-2 inch pieces for optimal results.
- Drain the Tea Regularly: Don’t forget to drain the bokashi tea every few days. Excess liquid can lead to putrefaction instead of fermentation, creating foul odors and potentially inhibiting the EM.
- Use as a Soil Amendment: Remember that bokashi is not traditional compost; it’s a fermented pre-compost. It needs to be buried in soil or added to a regular compost pile to complete its breakdown.
- Balance Wet and Dry Scraps: While bokashi can handle wet scraps, try to balance them with drier ones. Excessively wet bins might require more bran and more frequent tea draining.
- Keep Your Bran Fresh: Store your bokashi bran in an airtight container in a cool, dark place to maintain the viability of the EM. Expired or poorly stored bran will be less effective.
- Dilute Bokashi Tea: Always dilute bokashi tea before using it on plants as a liquid fertilizer. A 1:100 ratio is generally safe, but you can experiment with 1:50 for very hungry plants. Don’t use it undiluted on plants, as it can cause nutrient burn.
- Listen to the Smell: A sweet, pickly, or yeasty smell is good. A foul, rotten, or ammonia-like smell indicates something went wrong, usually too much air or insufficient bran.
Common Mistakes to Avoid:
- Not Enough Bran: Under-dosing with bokashi bran is a common error. Err on the side of using slightly more, especially for proteinaceous or very wet scraps. The microbes need fuel!
- Not Compressing Scraps: Air is the enemy of bokashi. Failing to press down the food scraps thoroughly leaves air pockets, promoting putrefaction rather than fermentation.
- Opening the Bin During Curing: Resist the urge to peek during the 10-14 day curing period. Each time you open the lid, you introduce oxygen, disrupting the anaerobic environment.
- Burying Too Shallowly: Burying fermented bokashi too close to the surface can attract pests. Ensure at least 6 inches of soil cover to keep critters away.
- Planting Too Soon: The initial acidity of buried bokashi can harm seedling roots. Always wait 2-4 weeks after burying before planting in that spot.
- Using Moldy/Expired Bran: If your bokashi bran smells off or looks moldy (other than white mold, which is normal for activated bran), it might not be effective. Start with fresh bran.
- Ignoring the Tea: Forgetting to drain the bokashi tea can lead to a waterlogged bin and an anaerobic environment that turns putrefactive, causing bad odors.
- Adding Non-Organic Materials: While bokashi is versatile, it won’t break down plastics, metals, or excessive amounts of paper towels. Stick to organic food waste.
By keeping these tips in mind and actively avoiding common pitfalls, you will master the art of bokashi composting kitchen waste, making it a seamless and rewarding part of your sustainable gardening efforts.
Eco-Friendly Variations and Enhancements
Bokashi composting is an inherently eco-friendly practice, but there are ways to make your system even more sustainable and efficient. These variations focus on reducing waste, utilizing resources effectively, and enhancing the overall environmental impact of your bokashi journey.
- DIY Bokashi Bran: Instead of purchasing bran, you can make your own. This typically involves inoculating sawdust, rice hulls, or wheat bran with EM liquid culture and molasses. This reduces packaging waste and can be more cost-effective in the long run. Many online resources and books offer detailed recipes for homemade bokashi bran. This truly makes composting more accessible.
- Repurposed Bokashi Bins: Instead of buying a new commercially produced bin, consider making one from repurposed 5-gallon buckets. This diverts plastic from landfills and familiarizes you with the mechanics of the system. Just ensure they are food-grade buckets and that you can achieve an airtight seal.
- Multi-Bin System: For an uninterrupted flow, maintain at least two bokashi bins. While one bin is fermenting, you can continue filling the second. This ensures you always have a place for your kitchen scraps and a continuous supply of fermented material for your garden.
- Supercharging Your Compost Pile: If you have a traditional compost pile, bokashi can act as an accelerator. Adding fermented bokashi to your compost pile introduces a boost of beneficial microbes, helping to break down other organic matter much faster. This is especially useful for tougher materials like woodier stalks.
- Integrating with Vermicomposting: Once the bokashi is fermented and buried in the soil, worms absolutely love it! The pre-digested material is a feast for earthworms, further enhancing soil health and nutrient cycling. You can even add small amounts of fermented bokashi directly to a worm bin, but introduce it slowly to avoid acidity shocking the worms.
- Bokashi Tea for Cleaning: Don’t just use the bokashi tea for plants; it’s also an excellent natural drain cleaner. Its acidic and microbial properties can break down clogs and eliminate odors in your pluming, offering an eco-friendly alternative to harsh chemical cleaners.
- Community Composting Integration: If you don’t have a garden to bury the bokashi, check with local community garden projects or composting initiatives. Many welcome pre-composted bokashi material as it enhances their systems without the common issues of raw food waste.
These variations demonstrate the adaptability and far-reaching benefits of bokashi composting, allowing you to tailor the system to your specific needs and maximize its positive environmental impact. By embracing these eco-friendly enhancements, you can take your sustainable gardening practices to the next level.
Seasonal Considerations for Bokashi Composting
While bokashi composting is a remarkably flexible process, a few seasonal considerations can help optimize its effectiveness and ensure a smooth operation year-round. Understanding how temperature and moisture variations impact the process will lead to greater success.
- Winter: During colder months, when ambient temperatures drop, the fermentation process might slow down slightly. Store your bokashi bins indoors in a consistently warm spot, such as a utility room, heated garage, or under a kitchen sink. Avoid unheated basements or sheds if temperatures dip below freezing, as extreme cold can inhibit the EM activity. You might also find less bokashi tea produced as food scraps tend to be less watery in winter, but continue to check and drain as needed. When it comes to burying, if the ground is frozen solid, you’ll need to store your fermented bokashi in airtight containers or bags until the spring thaw before incorporating it into your garden beds.
- Spring: As temperatures rise, the fermentation process will be at its peak efficiency. Spring is an ideal time to bury your cured bokashi into garden beds as you prepare for planting. The soil is awakening, and the beneficial microbes introduced by the bokashi will quickly integrate, providing a nutrient boost just as your plants need it. Also, observe your plants for the first signs of growth, as this is when they will most benefit from bokashi-enriched soil.
- Summer: High temperatures can sometimes accelerate fermentation, but also increase the risk of off-odors if the bin isn’t properly sealed or if too much air is introduced. Store your bins in a shaded, cool location to prevent overheating. During summer, garden beds are actively growing, making it a great time to ‘side-dress’ plants by digging small trenches next to them, burying fermented bokashi, and covering with soil. Water regularly to help with integration. You’ll also likely produce more bokashi tea due to the higher moisture content of many summer fruits and vegetables; remember to dilute and use this nutrient-rich liquid often.
- Autumn: This is an excellent time to prepare your garden for winter. Burying fermented bokashi in your garden beds during autumn will enrich the soil over the colder months, making it incredibly fertile by spring. The beneficial microbes will continue to work, breaking down the material and building soil structure. You can also mix it into cover crop beds or dedicated compost piles. Ensure good soil coverage to prevent pests during this period of reduced activity in the garden.
By being mindful of the seasons and adjusting your bokashi practices accordingly, you can maintain a consistent and effective system year-round, transforming kitchen waste into a continuous source of fertility for your garden. This seasonal awareness is crucial for successful bokashi composting kitchen waste, ensuring optimal performance regardless of the weather outside.
Expert Resources for Deeper Learning
To further enhance your understanding and mastery of bokashi composting, several excellent resources offer in-depth information, scientific insights, and practical tips. These expert sources will help you troubleshoot, innovate, and connect with the broader sustainable gardening community.
- Gardening Know How: Bokashi Composting Is One Easy Way To Reduce Household Waste. This article provides a fantastic overview of bokashi, perfect for beginners looking for a solid introduction to the principles and benefits. It touches upon the ‘why’ and ‘how’ in an accessible manner.
- Royal Horticultural Society (RHS): Compost. While not exclusively about bokashi, the RHS offers comprehensive advice on composting and soil health that provides context for how bokashi fits into a holistic gardening approach. Understanding general composting principles enhances one’s bokashi practice.
- University of Minnesota Extension: Soil, Compost & Mulch. This university extension offers scientifically-backed information on soil biology, composting, and mulching, which are all directly relevant to understanding the impact of bokashi on your garden’s ecosystem. It’s a great resource for the ‘science’ behind good soil.
Exploring these resources will not only deepen your knowledge but also inspire you to integrate bokashi composting even more effectively into your sustainable living practices. Continuous learning is a hallmark of any successful gardener.
Conclusion: Embrace the Power of Bokashi for a Thriving Garden
Bokashi composting is much more than just a waste disposal method; it’s a transformative process that empowers you to take control of your kitchen waste and turn it into a valuable asset for your garden. By embracing this anaerobic fermentation technique, you’re not only reducing your environmental footprint by diverting food scraps from landfills but also actively building healthier, more productive soil.
Imagine a garden where your nutrient-hungry plants thrive on the very scraps you once discarded, where soil life flourishes, and where pest and disease issues are naturally mitigated. This is the promise of bokashi. From the speedy fermentation of all food types, including challenging meat and dairy, to the creation of nutrient-dense “bokashi tea,” every aspect of this method is designed for efficiency and ecological benefit.
Whether you’re a seasoned gardener looking to supercharge your soil or a beginner seeking an easy entry into sustainable practices, bokashi offers a compelling solution. The initial steps are simple, the maintenance is minimal, and the rewards are profound. So, gather your bokashi bin, inoculate your bran, and start your journey towards a more sustainable home and a truly vibrant garden. Your soil, your plants, and the planet will thank you.
Frequently Asked Questions About Bokashi Composting
Q1: What exactly is bokashi bran, and why is it so important?
A1: Bokashi bran is a carrier material (like wheat bran, rice hulls, or sawdust) that has been inoculated with a specific consortium of microorganisms, primarily lactic acid bacteria, yeasts, and photosynthetic bacteria, collectively known as Effective Microorganisms (EM). These EM are crucial because they initiate the anaerobic fermentation process, “pickling” the food scraps rather than letting them rot. This prevents foul odors, preserves nutrients, and predigests the waste, making it readily available to soil microbes once buried. Without EM, the process would be putrefactive, producing undesirable smells and material.
Q2: Can I put any type of food waste into a bokashi bin?
A2: Almost! Bokashi is incredibly versatile. You can add fruit and vegetable scraps, cooked and uncooked meat, fish, dairy products, eggs (shells included), bread, pasta, rice, coffee grounds, and tea bags. Unlike traditional composting, it handles meat and dairy without attracting pests or causing putrid odors during fermentation. However, avoid adding large bones (they take too long to break down), excessive liquids (which can make the bin too wet), paper towels or excessive paper (unless soiled with food, as they aren’t food for the microbes), or anything non-organic like plastics or metals. Always cut larger items into smaller pieces for faster fermentation.
Q3: My bokashi bin smells bad, like rotten food. What went wrong?
A3: A foul, putrid, or ammonia-like smell indicates that the fermentation process has gone awry, likely due to anaerobic respiration (rotting) rather than fermentation. The most common causes are an imperfect airtight seal on your bin, insufficient bokashi bran, or not compressing the food scraps enough, leaving too much air. It could also be from forgetting to drain the bokashi tea regularly, allowing the scraps to sit in stagnant liquid. Try adding a generous layer of fresh bokashi bran, ensuring the lid is sealed tightly, and pressing down the contents to expel air. If the smell persists, you might need to discard the contents and start fresh, ensuring all steps are followed for an anaerobic environment.
Q4: What should I do with the Bokashi tea (leachate)?
A4: Bokashi tea is a valuable byproduct! It’s a nutrient-rich liquid fertilizer, packed with beneficial microbes. Always dilute it before applying to plants; a ratio of 1:100 (1 part tea to 100 parts water) is a good starting point, but you can go up to 1:50 for very hungry plants. Apply it to the soil around the base of plants, not directly on leaves. It’s also an excellent, eco-friendly drain cleaner; pour it undiluted down your sinks, toilets, or showers. The beneficial microbes will break down organic matter and eliminate odors in your plumbing system. Don’t let it sit too long after draining; use it within a day or two for best results.


