The Ultimate Guide to Applying Compost: 10 Techniques for Thriving Gardens
Compost, often referred to as “gardener’s gold,” is undeniably one of the most effective ways to enrich your soil, bolster plant health, and create a truly vibrant garden. However, simply tossing some compost onto your garden beds isn’t enough to unlock its full potential. To truly maximize its benefits, understanding the correct apply compost timing techniques is paramount. This comprehensive guide will delve into the science and art of compost application, ensuring every shovelful contributes meaningfully to your green haven.
[lwptoc]
Why Optimal Compost Application Matters for Your Garden
Applying compost with precision isn’t just about boosting soil fertility; it’s about fostering a thriving ecosystem beneath your feet. správné application enhances soil structure, improves drainage in heavy clays, and increases water retention in sandy soils. This leads to healthier roots, more resilient plants, and a significant reduction in the need for synthetic fertilizers.
Beyond nutrient provision, compost introduces beneficial microorganisms that actively suppress plant diseases and pests. It acts as a slow-release fertilizer, feeding your plants consistently over time, preventing nutrient leaching, and building long-term soil health. Ultimately, a well-composted garden is a more productive, beautiful, and sustainable garden.

What You’ll Need to Master Your Compost Application
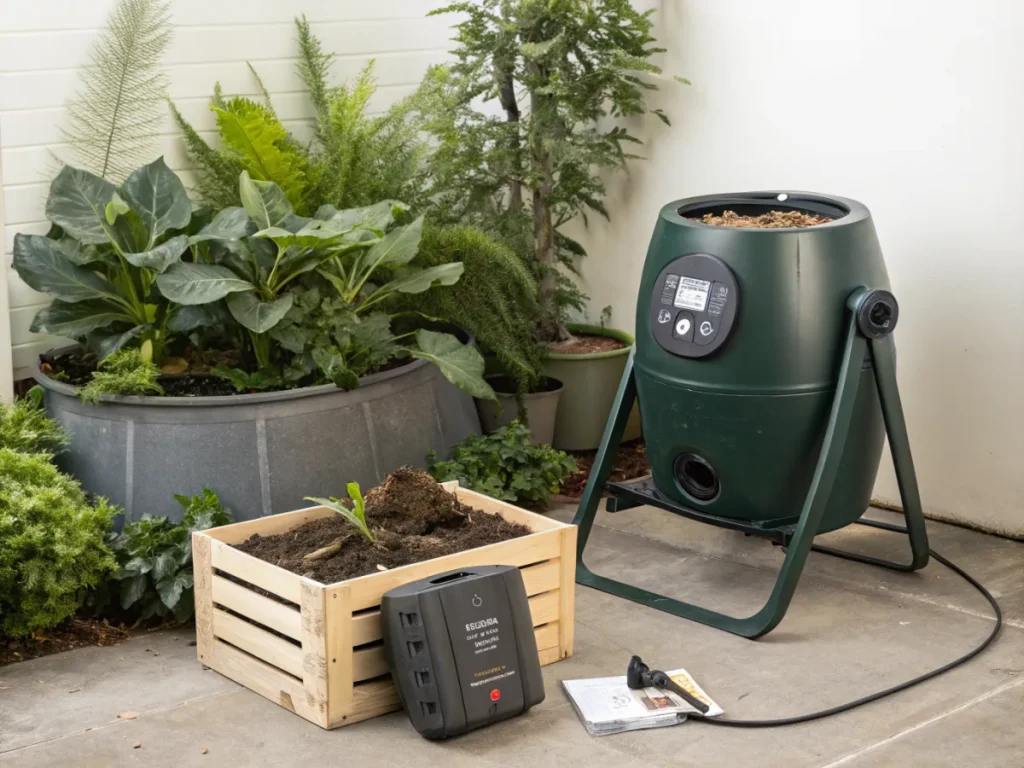
Before you begin, gathering the right tools and knowing a little about your garden will streamline the process and ensure success. No fancy equipment is required, but a few basics will make the job much easier and more effective.
Essential Tools:
- Shovel or Spade: For moving and spreading larger quantities of compost.
- Garden Fork: Excellent for aerating and gently incorporating compost into existing soil.
- Wheelbarrow or Tarp: To transport compost efficiently from your pile to the garden beds.
- Gloves: Protect your hands from dirt and potential irritants.
- Rake: For spreading and leveling compost evenly.
- Watering Can or Hose: To moisten compost and activate microbial activity.
- Soil Test Kit (Optional but Recommended): Understanding your current soil composition helps tailor your compost application precisely.
Materials and Considerations:
- Finished Compost: Ensure your compost is dark, crumbly, and smells earthy – not sour or ammonia-like. Partially decomposed material can tie up nitrogen.
- Plant & Garden Type: Different plants and garden areas (vegetable beds, perennial borders, lawns) may benefit from different application methods and timings.
- Existing Soil Condition: Observe your soil. Is it sandy, clayey, or loamy? This will influence how deeply you incorporate compost.
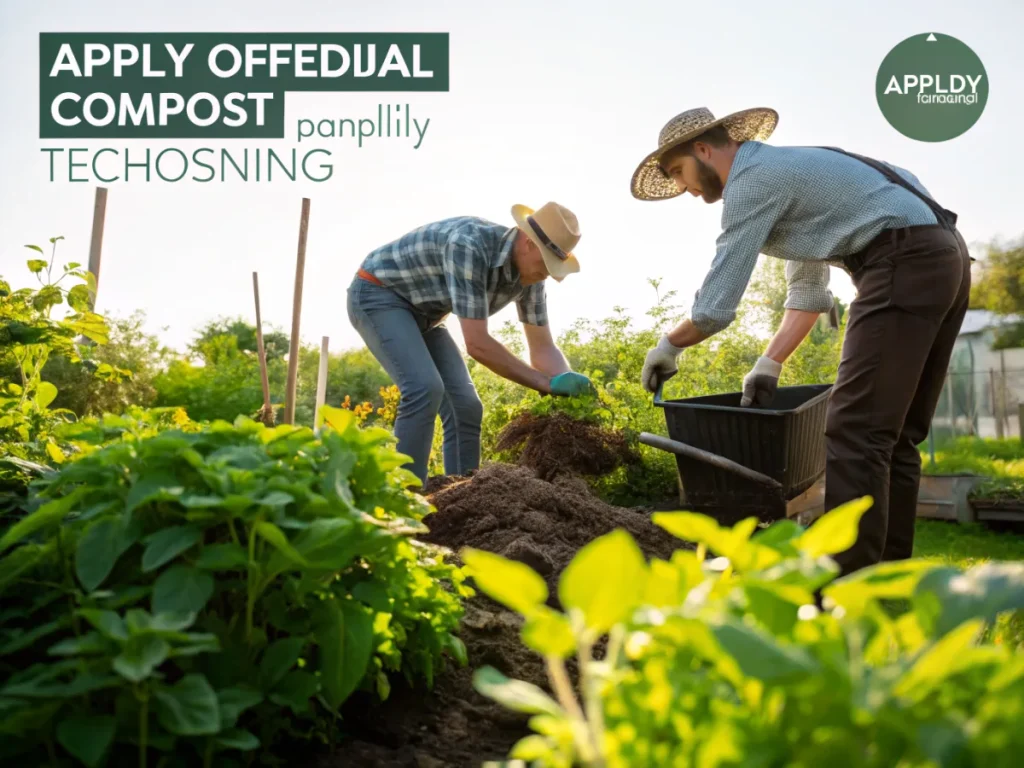
Step-by-Step Guide: Mastering Apply Compost Timing Techniques
Understanding the interplay between “how” and “when” is crucial for maximizing the benefits of your compost. Here are the key steps and techniques for applying compost effectively, considering both the method and the optimal timing.
Step 1: Assess Your Soil and Garden Needs (Timing: Any Pre-Application)
Before applying any compost, take a moment to assess your garden. What kind of plants are you growing, or planning to grow? What does your soil currently look like? Is it compact and clayey, or loose and sandy? A simple soil test can provide invaluable information about pH levels and nutrient deficiencies, guiding your compost application strategy. This preliminary assessment helps you decide on the quantity and specific application technique.
For instance, a new vegetable bed will benefit from a more substantial initial incorporation of compost than an established perennial border. Observing plant vigor and any signs of stress can also indicate where compost is most needed.
Step 2: Decide on Your Application Method (Timing: Dependent on Method)
There isn’t a one-size-fits-all approach to applying compost. The best method depends on your garden’s specific needs, the type of plants, and the season. Choosing the right technique is a critical aspect of effective apply compost timing techniques. From top-dressing to trenching, each method serves a distinct purpose.
Consider the desired outcome: Do you want to amend existing soil deeply, provide a slow-release feed, or improve surface drainage? Your choice of method will directly impact these results. Explore various techniques and select the one that aligns best with your gardening goals.
Step 3: Prepare the Application Area (Timing: Just Before Application)
Proper preparation of the area ensures that the compost can integrate effectively with the existing soil and reach the plant roots. This step is often overlooked but plays a significant role in successful application.
- Weeding: Clear any weeds from the area. You don’t want them competing with your desired plants for the nutrients in the compost.
- Light Cultivation (Optional): For new beds or areas with very compacted soil, a light cultivation of the top 2-4 inches can help compost blend in more easily. Avoid deep tilling, which can disrupt soil structure and beneficial microbes.
- Moistening: If the existing soil is bone dry, lightly water it before applying compost. This prevents the compost from leaching nutrients away from dry soil and helps it integrate better.
Step 4: Execute Your Chosen Application Technique (Timing: Critical for Success)
Technique 1: Top-Dressing (Most Common & Versatile)
When to Apply: Ideal in spring to kickstart growth, mid-summer for a nutrient boost, or fall to prepare beds for winter.
How to Apply: Spread a 1/2 to 1-inch layer of finished compost over the surface of garden beds (vegetables, perennials, shrubs, lawns). For lawns, a thinner layer (1/4 inch) is more appropriate. Lightly rake it to distribute evenly and water it in. The goal is to provide a slow, steady release of nutrients and improve the topsoil structure. This method minimizes disturbance to existing roots and soil life.
Top-dressing is excellent for established plants as it gradually incorporates into the soil with watering, rain, and the action of earthworms. It acts as a mulch, helping to retain moisture and suppress weeds. This is a prime example of an effective apply compost timing techniques strategy for ongoing soil health.
Technique 2: Soil Amendment/Incorporation (For New Beds & Heavy Clay)
When to Apply: Best done in early spring before planting, or in fall to allow winter weather to further break down and integrate the compost.
How to Apply: For new garden beds or severely depleted soil, spread a 2-4 inch layer of compost over the surface. Then, using a spade or garden fork, gently incorporate it into the top 6-12 inches of existing soil. Avoid aggressive tilling, which can destroy beneficial soil structure. The aim here is to significantly improve soil texture, drainage, and nutrient content throughout the root zone. This is a foundational apply compost timing techniques for establishing new growing areas.
For clay soils, incorporation helps break up heavy clods and improves aeration. For sandy soils, it increases water and nutrient retention. Ensure thorough mixing for best results, as uneven amendment can lead to inconsistent growth.
Technique 3: Side-Dressing (For Established Plants Needing a Boost)
When to Apply: During the growing season, especially for heavy feeders like vegetables when they start flowering and fruiting.
How to Apply: Gently spread a 1/2 to 1-inch layer of compost around the drip line of individual plants, being careful not to pile it directly against the stems or trunks. Lightly scratch it into the top inch of soil if desired, then water thoroughly. This provides a targeted nutrient delivery to active roots without disturbing the plant’s base. It’s a precise apply compost timing techniques for ongoing plant support.
Side-dressing is particularly useful for container plants, where nutrients can leach out more quickly, and for annuals that have a high demand for fertility during their short life cycle. See more about successful container gardening here.
Technique 4: Potting Mix Amendment (For Containers & Seed Starting)
When to Apply: Any time you are preparing potting mixes for containers or seed starting.
How to Apply: Mix 10-30% finished compost with your chosen potting soil or seed-starting mix. For seed starting, use a finer sifted compost to ensure small seeds can germinate easily. Compost adds essential nutrients, improves water retention, and introduces beneficial microbes to container environments which often become sterile over time. This targeted method optimizes conditions from the very beginning.
Ensure the compost is fully broken down and free of large debris when used for seed starting to prevent uneven growth. This is a crucial apply compost timing techniques for plant propagation.
Technique 5: Compost Tea (Liquid Nutrient Boost)
When to Apply: During the growing season, especially for foliar feeding or drenching stressed plants.
How to Apply: Create “compost tea” by steeping finished compost in water for 24-48 hours, preferably with aeration. Strain the liquid and use it to water plants or apply as a foliar spray. This provides an immediate burst of nutrients and beneficial microbes to plant leaves and roots. For detailed methods on creating effective teas, visit nouvelles-technologie.com’s guide to natural plant food.
Compost tea is excellent for rejuvenating sickly plants or giving seedlings a gentle nutrient boost. Dilute appropriately, especially for young plants, to avoid over-fertilization. It’s a fast-acting apply compost timing techniques for quick results.
Technique 6: Trench Composting (Deep Amendment for Root Vegetables)
When to Apply: Before planting crops with deep root systems, especially in spring.
How to Apply: Dig a trench 12-18 inches deep in the area where you plan to plant root vegetables like carrots, potatoes, or leeks. Fill the trench about halfway with finished compost (or even unfinished kitchen scraps and then cover with finished compost). Backfill with soil and let it settle for a few weeks before planting. This provides a rich, nutrient-dense zone for deep-rooting plants. This trench method demonstrates a strategic apply compost timing techniques for specific crop needs.
The slow decomposition of buried compost also benefits the soil structure at deeper levels, encouraging stronger, healthier roots. This is particularly effective for improving heavy clay soils over time.
Technique 7: Berm or Raised Bed Building (Foundation for New Gardens)
When to Apply: Whenever building new garden beds or enhancing existing ones.
How to Apply: When constructing new raised beds or berms, incorporate a generous amount of compost (25-50% by volume) with other organic materials and topsoil. This creates an immediately rich and fertile growing environment from the ground up, providing the ideal foundation for vigorous plant growth. This fundamental apply compost timing techniques establishes long-term soil health.
Building with compost ensures excellent drainage, continuous nutrient supply, and a deep, friable rooting zone, which is crucial for maximizing yield in raised beds. Learn more about optimal raised bed garden setup here.
Technique 8: Fall Application for Winter Soil Building
When to Apply: Late autumn after harvest and before the ground freezes.
How to Apply: Spread a 1-2 inch layer of compost over bare garden beds or around perennial plants and shrubs. Leave it on the surface; there’s no need to incorporate it. The winter weather (freezing, thawing, snow, and rain) will naturally work the compost into the top layers of the soil, preparing it for spring planting. This passive method utilizes nature’s processes. This is a highly effective apply compost timing techniques for seasonal soil conditioning.
This approach also acts as a winter mulch, insulating roots and protecting the soil from erosion. By spring, the soil will be richer, more friable, and teeming with beneficial microbial life, ready for the next growing season.
Technique 9: Lawn Top-Dressing (Enhancing Turf Health)
When to Apply: Early spring after the last frost, or early fall as grass growth slows but before dormancy.
How to Apply: Spread a very thin layer (1/8 to 1/4 inch) of finely screened compost evenly over your lawn. Use the back of a rake or a push broom to work it into the turf, ensuring it falls between the grass blades and reaches the soil surface. Water thoroughly afterwards. This improves soil structure, enhances nutrient availability to grass roots, and mitigates compaction. This specialized apply compost timing techniques rejuvenates lawns naturally.
Compost adds organic matter, which helps the lawn tolerate drought better and reduces the need for synthetic fertilizers. It also introduces beneficial microbes that can break down thatch and promote healthier root growth.
Technique 10: “Compost Socks” or Filter Bags (Erosion Control & Runoff Filtration)
When to Apply: During construction, landscaping projects, or seasonal heavy rainfall.
How to Apply: Fill mesh tubes (like old nylon stockings or specialized filter fabric) with compost. Place these “socks” along contours, slopes, or around storm drains where erosion or runoff is a concern. The compost acts as a living filter, slowing down water flow, trapping sediment, and allowing beneficial microbes to break down pollutants. This innovative apply compost timing techniques combines environmental protection with soil enhancement.
Over time, the compost in the socks will continue to break down, enriching the soil in situ and stabilizing the area. This method is particularly effective for establishing vegetation on disturbed sites and preventing water quality degradation.
Step 5: Water Thoroughly (Timing: Immediately Post-Application)
After applying compost, always water the area thoroughly. This helps to settle the compost, integrate it with the existing soil, and activate the microbial life within it. Watering also helps prevent the compost from drying out and blowing away, ensuring it stays where it can do the most good.
Pro Tips for Maximum Compost Efficacy & Common Mistakes to Avoid
Even with the best intentions, small details can make a big difference in compost application. Here are some seasoned gardener tips and pitfalls to steer clear of.
Pro Tips:
- Moist, Not Wet Compost: Ensure your compost is consistently moist (like a wrung-out sponge) when applied. This kickstarts microbial activity.
- Think in Layers: Rather than one heavy application, consider lighter, more frequent top-dressings throughout the growing season for a steady nutrient supply.
- Complement, Don’t Replace: While compost is amazing, it’s not always a complete fertilizer for all plants. Some heavy feeders might still benefit from targeted organic nutrient supplements.
- Observe and Adjust: Pay attention to how your plants respond. If they look robust, your compost program is working! If they seem to need more, adjust your frequency or quantity.
- Sift for Finer Applications: For lawns, seed starting, or delicate seedlings, passing compost through a screen will remove larger chunks, providing a finer, more uniform product.
Common Mistakes to Avoid:
- Applying Unfinished Compost: “Hot” or unfinished compost can burn plants, steal nitrogen from the soil as it decomposes, and attract pests. Always use fully decomposed, dark, crumbly compost.
- Applying Too Thickly: Especially with top-dressing, a layer thicker than 1-2 inches can suffocate plants, prevent water penetration, and create anaerobic conditions. Less is often more.
- Piling Against Stems/Trunks: Much like mulch, piling compost directly against plant stems or tree trunks can encourage rot and pest issues. Leave a small gap.
- Deep Tilling After Application: If applying as a top-dressing, avoid deep tilling, which destroys the beneficial soil structure and microbial networks you’re trying to build.
- Applying to Waterlogged Soil: Working compost into already saturated soil can lead to further compaction and create anaerobic conditions. Wait until the soil is workable.
Note on Organic Matter & Soil Biology
The beauty of compost lies not just in its nutrient content but in the alive, active biology it introduces. Think of it as inoculating your soil with beneficial bacteria, fungi, and other microorganisms that improve nutrient cycling, disease suppression, and overall soil health. Every application is an investment in a living, breathing garden ecosystem.
Eco-Friendly Variations: Maximizing Sustainability
Gardening with compost is inherently eco-friendly, but there are ways to amplify its sustainable impact even further. These variations focus on closed-loop systems, water conservation, and enhanced biodiversity.
- On-Site Composting: The most eco-conscious approach is to create your own compost from kitchen scraps and garden waste. This reduces landfill waste and eliminates transportation impacts.
- No-Dig Gardening: Combine top-dressing compost with the “no-dig” method to build incredibly fertile beds over time, minimizing soil disturbance and maximizing soil health. This method reduces labor and fuel required for tilling.
- Compost as Mulch Substitute: Instead of separate mulch and compost applications, use a thicker layer of compost (1-2 inches) as both a soil amendment and a weed-suppressing, moisture-retaining mulch.
- Rainwater for Compost Tea: Boost your compost tea’s eco-credentials by using collected rainwater instead of tap water for brewing. This conserves treated water and avoids potential chlorine issues.
- Vericompost Integration: Incorporate worm castings (vermicompost) into your regular compost applications. Vermicompost is exceptionally rich in microbial life and nutrients, offering an added biological boost to your soil.
Seasonal Considerations for Apply Compost Timing Techniques
The rhythm of the seasons plays a crucial role in deciding the best time to apply compost. Tailoring your application schedule to the climatic changes ensures that plants benefit precisely when they need it most.
- Spring: The Wake-Up Call
- Timing: Early spring, after the last hard frost and when soil begins to warm.
- Techniques: General top-dressing before planting annuals; deep incorporation for new vegetable beds; side-dressing around emerging perennials.
- Why: Provides essential nutrients for vigorous new growth, establishes a healthy soil base for the growing season, and helps warm the soil.
- Summer: Sustaining the Growth
- Timing: Mid-summer, when plants are actively growing, flowering, or fruiting.
- Techniques: Side-dressing for heavy feeders (e.g., tomatoes, squash); light top-dressing around established plants to maintain soil moisture and fertility.
- Why: Replenishes nutrients leached by heavy watering or used by rapidly growing plants, reduces water stress, and maintains vibrant foliage and fruit production.
- Fall: Preparing for Rest and Rejuvenation
- Timing: Late fall, after harvest and before the ground freezes solid.
- Techniques: Broad top-dressing over all garden beds; incorporating compost into areas where cover crops will be planted; preparing new beds for spring.
- Why: Allows compost to slowly integrate into the soil over winter, improving structure and building fertility; provides winter protection for plant roots; encourages earthworm activity.
- Winter: The Dormant Period (Limited Application)
- Timing: Generally avoided, unless specific circumstances arise.
- Techniques: Only apply compost as a dormant mulch around very hardy perennials or fruit trees in mild climates if snow cover is reliable.
- Why: Less effective as microbial activity is low; risks of compost washing away with heavy rains or creating anaerobic conditions if sealed by snow. Focus on composting your organic waste indoors or in a closed system instead.
By aligning your apply compost timing techniques with these seasonal rhythms, you’re not just adding nutrients; you’re harmonizing with nature’s cycle, fostering a more resilient and productive garden year-round.
Expert Resources for Deeper Learning
To further your knowledge and hone your compost application skills, consult these reputable external resources:
- Gardening Know How: For a wealth of practical tips and troubleshooting advice on all aspects of gardening, including comprehensive guides on composting and soil health. Visit Gardening Know How
- Royal Horticultural Society (RHS): A leading UK gardening charity offering authoritative information on horticultural practices, including detailed scientific insights into the benefits and application of organic matter. Explore the RHS website
- University of Minnesota Extension: Provides research-based information on home gardening, including detailed guides on soil improvement, composting, and sustainable practices tailored to various climates. Access UMN Extension resources
Conclusion: The Art and Science of Compost Mastery
Applying compost is far more than a simple chore; it’s a fundamental practice in ecological gardening, combining both art and science. By mastering the various apply compost timing techniques, you empower your garden to thrive naturally, reducing the need for chemical inputs and fostering a rich, living soil ecosystem.
Remember that consistency, observation, and a willingness to adapt are your greatest tools. Whether you’re top-dressing a seasoned perennial bed in spring or building a new vegetable plot in fall, each thoughtful application builds a healthier, more resilient garden. Embrace the power of compost, and watch your garden flourish with vigor and life.
Frequently Asked Questions About Applying Compost
<p><strong>Q1: How much compost should I apply?</strong></p>
<p><strong>A:</strong> For general top-dressing, a 1/2 to 1-inch layer is usually sufficient. For new beds or poor soil, incorporate 2-4 inches into the top 6-12 inches. Lawns benefit from a thinner 1/8 to 1/4 inch layer. The exact amount depends on your current soil health and the specific needs of your plants. It's often better to apply less more frequently than to apply too much at once.</p>

<p><strong>Q2: Can I apply compost at any time of year?</strong></p>
<p><strong>A:</strong> While compost can be beneficial year-round, optimal timing varies. Spring is excellent for pre-planting soil amendment and kickstarting growth, summer for mid-season boosts, and fall for soil building and winter protection. Winter application is generally less effective due to low microbial activity, unless used as a mulch in mild climates.</p>

<p><strong>Q3: Should I mix compost into the soil, or just leave it on top?</strong></p>
<p><strong>A:</strong> Both methods are effective, depending on your goal. Top-dressing (leaving it on top) is great for established plants, lawns, and general soil improvement over time, allowing worms and weather to incorporate it. Incorporating compost is best for new beds, severely depleted soil, or when establishing deep-rooting plants, providing a quicker, more thorough amendment. Avoid deep tilling with either method.</p>

<p><strong>Q4: What's the difference between compost and manure?</strong></p>
<p><strong>A:</strong> Both are organic soil amendments, but they differ. Compost is a stable, decomposed organic material (plant and food scraps) that improves soil structure, drainage, and provides a slow release of nutrients. Manure is animal waste, which is generally richer in immediate nutrients but can be "hot" (high in nitrogen) if not thoroughly composted, potentially burning plants or containing pathogens. Always use well-rotted or composted manure, and remember it's primarily a fertilizer, whereas compost is a comprehensive soil builder.</p>