The Ultimate 7-Step Guide to Starting a Cut Flower Garden From Seed
There’s an unparalleled joy in walking into your garden, snipping a fresh bouquet, and bringing the beauty indoors. Building your own cut flower garden from seed is an incredibly rewarding endeavor, offering a kaleidoscope of colors, textures, and fragrances that are far more unique than anything you’d find at a florist. Not only is it a cost-effective way to fill your home with blooms, but it also allows you to cultivate a diverse array of varieties, some of which are simply unavailable commercially. This comprehensive guide will walk you through everything you need to know to establish a thriving cut flower garden, starting right from tiny seeds.
[lwptoc]
Why Growing a Cut Flower Garden From Seed Matters for Your Garden and Your Soul
Starting a cut flower garden from seed is more than just a gardening task; it’s a journey that connects you deeply with nature’s cycles. The satisfaction of nurturing a tiny seed into a magnificent bloom ready for your vase is immense. Economically, growing from seed is exponentially cheaper than buying starter plants or pre-cut bouquets, allowing you to experiment with a vast array of species without breaking the bank.
Beyond the financial benefits, seed starting offers an incredible diversity of plant choices. Seed catalogs burst with unique varieties, heirloom treasures, and rare cultivars that you simply won’t find at your local garden center. This allows you to tailor your cut flower garden precisely to your aesthetic preferences, choosing specific colors, bloom shapes, and even fragrances.
Furthermore, cultivating flowers from seed provides healthier, more resilient plants. They adapt better to your specific garden conditions from an early stage, developing strong root systems and a natural resistance to local pests and diseases. This foundational strength translates into more vigorous growth and an abundance of blooms, ensuring your vases are always full.
Environmentally, choosing to grow from seed reduces your carbon footprint associated with transport of plants and plastic waste from nursery pots. It also encourages biodiversity in your garden, a magnet for pollinators like bees and butterflies, contributing to a healthier local ecosystem. An eco-conscious garden is a happy garden, and by growing from seed, you’re making a positive impact.
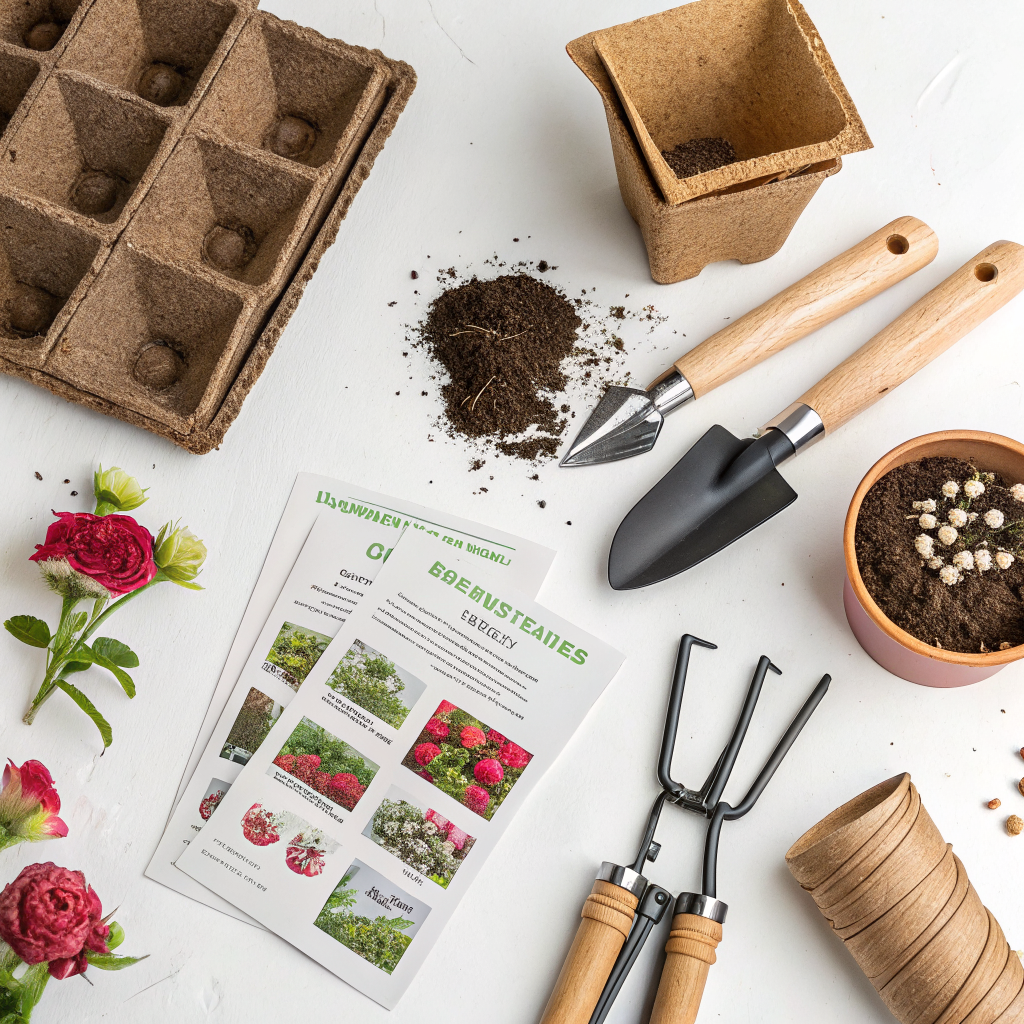
What You Need: Tools, Materials, and the Right Seeds
Embarking on your cut flower garden journey requires a few essential items. Having these ready before you start will make the process smoother and more enjoyable, setting you up for success from the very beginning.
Essential Tools & Materials:
- Seed Starting Trays or Pots: These come in various sizes, from small cell packs to larger propagation trays. Biodegradable pots like peat or coir are an excellent eco-friendly option.
- Seed Starting Mix: A fine, sterile, and well-draining growing medium formulated specifically for seeds. Do not use garden soil as it can contain pathogens and pests.
- Light Source: If starting indoors, a grow light is crucial. Window sills often don’t provide enough consistent light, leading to leggy, weak seedlings. Fluorescent or LED grow lights work well.
- Heat Mat (Optional but Recommended): For seeds that require warmth for germination, a heat mat can significantly improve germination rates and speed up the process.
- Watering Can with Fine Sprayer: Delicate seedlings need gentle watering to avoid dislodging them or compacting the soil.
- Labels and Permanent Marker: Essential for keeping track of what you’ve planted, especially if you’re growing multiple varieties.
- Shears or Scissors: For harvesting blooms and tidying up plants.
- Trowel and Rake: For preparing your garden beds.
- Compost or Well-Rotted Manure: For enriching your garden soil.
Choosing the Right Seeds:
The success of your cut flower garden hinges on selecting appropriate seeds. Look for varieties explicitly labeled “cut flower” or known for their long vase life and strong stems. Consider your local climate and growing conditions when making selections.
- Easy-to-Grow Annuals for Beginners: Sunflowers (single stem varieties), Zinnias, Cosmos, Marigolds, Calendula, Bachelor’s Buttons (Cornflowers), Nigella, Amaranth. These germinate readily and grow quickly, offering a fast turnaround from seed to bouquet.
- Perennials (Often best started early indoors): Echinacea, Rudbeckia, Delphinium, Lavender, Salvia. While perennials take longer to establish and won’t produce cutting material in their first year, they offer long-term beauty and structure.
- Filler Flowers: These add texture and depth to your bouquets. Think Dara (Ammi visnaga), Bupleurum, Dusty Miller (for foliage), Bells of Ireland, or various grasses.
- Focal Flowers: Larger, statement blooms like Dahlias (though often grown from tubers, some varieties can be grown from seed), large Zinnias, or Sunflowers.
Always check the seed packet for specific instructions regarding planting depth, spacing, and germination time. Pay attention to the “days to maturity” listed, especially if you want staggered blooms throughout the season.
Step-by-Step Guide: Launching Your Cut Flower Garden
Step 1: Planning Your Garden Layout and Soil Preparation
Before any seeds touch soil, a little planning goes a long way. Assess your chosen location for sunlight. Most cut flowers require at least 6-8 hours of direct sunlight daily. Consider the mature size of your plants to ensure adequate spacing, preventing overcrowding and promoting good air circulation.
Once you’ve identified your sunny spot, it’s time to prepare the soil. Good drainage is paramount for healthy flower growth. Amend heavy clay soils with organic matter like compost, well-rotted manure, or peat moss to improve structure and drainage. Sandy soils will also benefit from added organic matter to help retain moisture and nutrients. Aim for a soil pH between 6.0 and 7.0, which is ideal for most flowers. A simple soil test kit can help you determine your current pH and nutrient levels.
Double-digging or tilling can be beneficial for breaking up compacted soil, but often, simply adding a substantial layer of compost and working it into the top 6-12 inches is sufficient. Remove any weeds, rocks, or debris that could hinder seedling growth. Creating raised beds is another excellent option for cut flower gardens, offering superior drainage and easier soil management.
Step 2: Starting Seeds Indoors vs. Direct Sowing
Deciding whether to start seeds indoors or direct sow is crucial and depends heavily on your climate and the specific flower varieties you choose. Check your seed packets for recommendations.
- Starting Seeds Indoors: This is ideal for plants with long growing seasons, those that need warm temperatures to germinate, or for getting a head start on your spring blooms. It allows you to protect delicate seedlings from harsh weather, pests, and diseases. Typically, seeds are started 6-8 weeks before your last anticipated frost date. Use sterile seed-starting mix in clean trays or pots. Provide adequate light (grow lights are best) and consistent moisture.
- Direct Sowing: Many annuals, especially those with larger seeds or taproots (like sunflowers or poppies), do best when sown directly into the garden bed after the danger of frost has passed. Ensure the soil is warm enough for germination. Follow packet instructions for planting depth and spacing. Thin seedlings according to recommended guidelines to prevent overcrowding and ensure strong growth.
For more specific guidance on seed starting indoors, you might find this article on Gardening Know How helpful.
Step 3: Planting Your Seeds (Indoors or Out)
Whether indoors or out, precise planting is vital.
For indoor starting: Fill trays with moistened seed-starting mix. Create shallow depressions according to seed packet depth. Place 1-2 seeds per cell to allow for germination failures, then lightly cover with soil. Label immediately. Place trays on a heat mat if needed, and under grow lights. Maintain consistent moisture, but avoid overwatering, which can lead to damping-off disease. A clear humidity dome can help maintain moisture until germination.
For direct sowing: Once the soil is prepared and warmed, follow seed packet instructions for spacing. Create shallow furrows or scatter seeds lightly for smaller varieties. Gently rake soil over the seeds to the recommended depth. Water gently to settle the soil. Mark planted areas with labels to avoid accidental weeding of seedlings.
Step 4: Nurturing Your Seedlings
Once your seeds have germinated, attentive care is essential.
For indoor seedlings: Ensure they receive 12-16 hours of light daily. Raise grow lights as they grow to maintain ideal distance (usually 2-4 inches above the plant tops). Water from the bottom or very gently from the top to prevent disturbing delicate roots. Once seedlings develop their first true leaves, they can be fertilized with a weak solution of liquid fertilizer (half strength). Thin seedlings to one per cell/pot to allow for stronger growth. Proper watering techniques are crucial.
For direct-sown seedlings: Keep the area consistently moist but not waterlogged. Protect young plants from pests by monitoring regularly. Thin seedlings once they have a few sets of true leaves, following the spacing recommendations on your seed packets. This step is often overlooked but is crucial for robust growth and plentiful blooms.
Step 5: Hardening Off and Transplanting
Hardening off is a critical transition for indoor-started seedlings before they move permanently outdoors. This process gradually acclimates them to outdoor conditions like wind, direct sun, and fluctuating temperatures. Over 7-14 days, expose your seedlings to increasing periods outdoors, starting with a sheltered, shady spot for an hour or two, gradually increasing time and sun exposure. Bring them in if temperatures drop drastically or severe weather is expected.
Once hardened off and all danger of frost has passed, transplant your seedlings into your prepared garden beds. Dig a hole slightly larger than the root ball, gently place the seedling, backfill with soil, and water thoroughly. Spacing is extremely important for cut flowers; allow enough room for growth and air circulation to prevent disease. Learn more about pest control for young plants here.
Step 6: Ongoing Care and Maintenance
Consistent care during the growing season will yield a bounty of beautiful blooms.
Watering: Most cut flowers prefer consistent moisture, especially during dry spells. Deep watering less frequently is better than shallow, frequent watering, as it encourages deeper root growth.
Fertilizing: Depending on your soil, a balanced organic fertilizer every few weeks can promote continuous blooming. Avoid over-fertilizing with nitrogen, which can lead to lush foliage at the expense of flowers.
Weeding: Keep beds free of weeds, which compete for water and nutrients. Mulching can significantly reduce weeding time and retain soil moisture.
Pinching: Many annuals, like Zinnias and Cosmos, benefit from “pinching” when they are young (around 6-12 inches tall). This involves snipping off the main central stem, which encourages the plant to branch out, resulting in more stems and more flowers.
Staking: Taller varieties like Delphiniums or some Sunflowers may require staking to prevent them from flopping over in wind or rain. Use bamboo stakes or netting.
Step 7: Harvesting Your Blooms
The moment you’ve been waiting for! To ensure the longest vase life, harvest your cut flowers at the right stage of development, typically in the cool morning or evening hours.
- Zinnias & Cosmos: Harvest when the blooms are fully open and firm. Do the “wiggle test” – if the stem just below the flower is firm and doesn’t bend, it’s ready.
- Sunflowers: Harvest when petals are just beginning to unfurl or when the head is about 75% open.
- Dara & Bupleurum: Harvest when flowers are about 75% open.
- Ammi (False Queen Anne’s Lace): Harvest when the flower heads are fully open but before they begin to shed pollen.
Use clean, sharp snips or scissors. Place stems immediately into a bucket of water with flower food. Allow them to “condition” in a cool, dark place for a few hours before arranging. Regular harvesting, often called “cut and come again,” encourages many annuals to produce even more blooms throughout the season.
Pro Tips and Common Mistakes to Avoid
Pro Tips for a Bountiful Harvest:
- Succession Planting: For continuous blooms, plant smaller batches of your favorite annuals every 2-3 weeks. This ensures a steady supply of cut flowers throughout the growing season instead of one massive flush.
- “The Wiggle Test”: As mentioned, this is crucial for knowing when to harvest many cut flowers. If the stem below the bloom is firm, it’s ready for the vase.
- Deadheading vs. Harvesting: While deadheading removes spent blooms to promote new ones, harvesting often involves cutting a longer stem deeper into the plant, which is usually more stimulating for growth.
- Consider Foliage Plants: Don’t forget greenery! Eucalyptus, Dusty Miller, and various herbs like Mint or Basil can add wonderful texture and fragrance to your bouquets.
- Record Keeping: Keep a journal. Note what you planted, when, germination rates, bloom times, and what varieties performed best for cutting. This information is invaluable for planning future gardens.
- Embrace a Diversity of Forms: Include focal flowers, disc flowers, spires, and fillers to create dynamic and interesting bouquets.
Common Mistakes to Avoid:
- Overwatering Seedlings: This is the number one killer of young plants, leading to “damping-off” disease. Allow the top layer of soil to dry slightly between waterings.
- Insufficient Light for Indoor Seeds: Leggy, pale seedlings stretch for light and are weak. Invest in a good grow light if starting indoors.
- Planting Too Early: Resist the urge to plant out tender annuals before all danger of frost has passed. One cold night can wipe out weeks of hard work.
- Neglecting Soil Health: Poor soil leads to poor plants. Regular amendment with compost is vital.
- Not Thinning Seedlings: Overcrowding leads to weak, spindly plants that don’t produce well. Be ruthless when thinning!
- Improper Harvesting: Cutting blooms too early means they won’t last in the vase. Cutting too late means they might shed pollen or petals quickly. Master the wiggle test and harvest at the right stage.
- Ignoring Pests & Diseases: Early detection and mild organic treatments are key to keeping problems from spiraling out of control.
Eco-Friendly Variations for a Sustainable Cut Flower Garden
Cultivating a cut flower garden from seed lends itself naturally to eco-conscious practices. By prioritizing sustainability, you contribute to a healthier environment and enjoy an even more fulfilling gardening experience.
- Composting: Start a compost pile for all your garden waste, including spent blooms, trimmed leaves, and kitchen scraps. This nutrient-rich amendment will feed your soil naturally, reducing the need for synthetic fertilizers. Here’s a guide to starting your own compost pile.
- Rainwater Harvesting: Install a rain barrel to collect water for your garden. This conserves precious tap water and provides plants with chlorine-free hydration.
- Organic Pest Control: Instead of chemical pesticides, encourage beneficial insects like ladybugs and lacewings by planting their preferred flowers (e.g., dill, fennel, cosmos). Use organic deterrents like neem oil or insecticidal soap for any outbreaks.
- No-Till Gardening: Minimize soil disturbance to protect soil structure and beneficial microbes. Instead of tilling, simply add layers of compost and mulch to your beds.
- Native Plant Integration: While your primary goal is cut flowers, consider dedicating a small area to native flowers. These support local wildlife, require less water and care once established, and are integral to ecological balance.
- Seed Saving: Learn to save seeds from your open-pollinated varieties (avoid F1 hybrids, which don’t come true from seed). This closes the loop, saving you money and preserving unique plant genetics.
- Biodegradable Pots: Use peat, coir, or even newspaper pots for starting seeds indoors to avoid plastic waste.
Seasonal Considerations for Year-Round Blooms (or Most of it!)
A well-planned cut flower garden can offer blooms for much of the year, depending on your climate zone.
- Spring: Focus on hardy annuals like poppies, snapdragons, and sweet peas, which can be sown directly in late autumn or very early spring. Pansies and violas also make delightful early spring cuts.
- Summer: This is the peak season! Your zinnias, cosmos, sunflowers, celosia, and amaranth will be in full swing. Succession plant these for continuous harvests.
- Autumn: Extend the season with mums (chrysanthemums), asters, ornamental grasses, and late-flowering rudbeckia. Many summer annuals will continue to produce until the first hard frost. Consider planting cool-weather tolerant annuals late in the summer for a fall harvest.
- Winter (for enthusiasts in warmer zones or with protection): In frost-free zones, some annuals can continue. In colder climates, focus on planning next year’s garden, ordering seeds, and perhaps growing a few cut flower varieties indoors under lights.
Understanding your USDA Plant Hardiness Zone is crucial for timing your plantings correctly. This map helps gardeners determine which plants are most likely to thrive in their location. Generally, the later your last frost date, the later you should plan to direct sow or transplant seedlings outdoors. Conversely, the earlier your first fall frost, the sooner you’ll need to succession plant for extended harvests.
Expert Resources for Further Learning
To deepen your knowledge and refine your cut flower gardening skills, explore these reputable resources:
- The Royal Horticultural Society (RHS): A world-leading gardening charity, their website offers extensive information on plant cultivation, pest and disease identification, and specific growing guides. Check out their resources for flowers for floristry.
- University Extension Offices: Many universities across the US and similar agricultural bodies globally provide free, research-based horticultural information tailored to local conditions. For example, the University of Minnesota Extension has excellent guides on cut flowers. Search for your local university extension for personalized advice.
- Gardening Know How: A comprehensive online resource with articles covering a vast array of gardening topics, suitable for both beginners and experienced gardeners. Explore their guides on general gardening techniques.
Conclusion: Your Garden of Endless Bouquets Awaits
Embarking on the journey of starting a cut flower garden from seed is an investment of time and love that pays dividends in beauty, satisfaction, and connection to the natural world. From the careful planning of your garden beds to the joyous act of snipping your first homegrown bouquet, each step is imbued with purpose and promise. You’ll save money, discover unique varieties, and cultivate a garden that not only enhances your home but also supports local pollinators and environmental health.
Remember that gardening is a continuous learning process. There will be successes and challenges, but each experience builds your knowledge and intuition. Don’t be afraid to experiment with new varieties, adjust your methods, and most importantly, enjoy the process. With patience, a little dirt under your nails, and the guidance outlined in this article, you are well on your way to creating a vibrant, abundant cut flower garden that provides endless beauty for your home and joy for your soul. Start small, learn as you grow, and soon your vases will overflow with the freshest, most personal blooms imaginable.
Frequently Asked Questions About Starting a Cut Flower Garden From Seed
<p><strong>Q1: What are the absolute easiest cut flowers to grow from seed for beginners?</strong></p>
<p>A1: For absolute beginners, Zinnias (especially 'Benary's Giant' or 'Queen' series), Cosmos (particularly 'Sensation Mix' or 'Double Click'), Sunflowers (single-stemmed varieties like 'ProCut'), and Marigolds ('Crackerjack' or African marigolds) are highly recommended. They germinate easily, grow quickly, and are very productive bloomers.</p>

<p><strong>Q2: How much space do I need for a productive cut flower garden?</strong></p>
<p>A2: You don't need a huge area to start! Even a small 4x8 foot raised bed can yield a surprising amount of flowers, especially if you focus on intensive planting and succession sowing. As you gain experience, you can expand. The key is prioritizing sunny spots and good soil.</p>

<p><strong>Q3: When should I start my cut flower seeds indoors?</strong></p>
<p>A3: Generally, most annual cut flower seeds are started indoors 6-8 weeks before your average last frost date. Some slower-growing varieties or those needing a longer head start (like Lisianthus, though more challenging) might need 10-12 weeks. Always check individual seed packets for precise timing for your specific climate zone.</p>

<p><strong>Q4: How do I ensure my cut flowers last as long as possible in a vase?</strong></p>
<p>A4: Several factors contribute to a long vase life. Harvest in the cool morning or evening, when flowers are fully turgid. Use clean, sharp snips and immediately place stems into a bucket of clean water. Condition flowers in a cool, dark place for a few hours before arranging. Recut stems at an angle every few days, change the water, and use floral preservative (flower food) for best results.</p>