10 Ultimate Steps to Build a Garden Tool Wall Organizer for Your Shed
Is your garden shed a chaotic jungle of tangled hoses, misplaced trowels, and hidden pruning shears? Do you spend more time hunting for tools than actually tending to your plants? You’re not alone. The struggle of a disorganized shed is a common plight for even the most dedicated gardeners. But what if there was a simple, DIY solution that could transform your cluttered space into a beacon of order and efficiency?
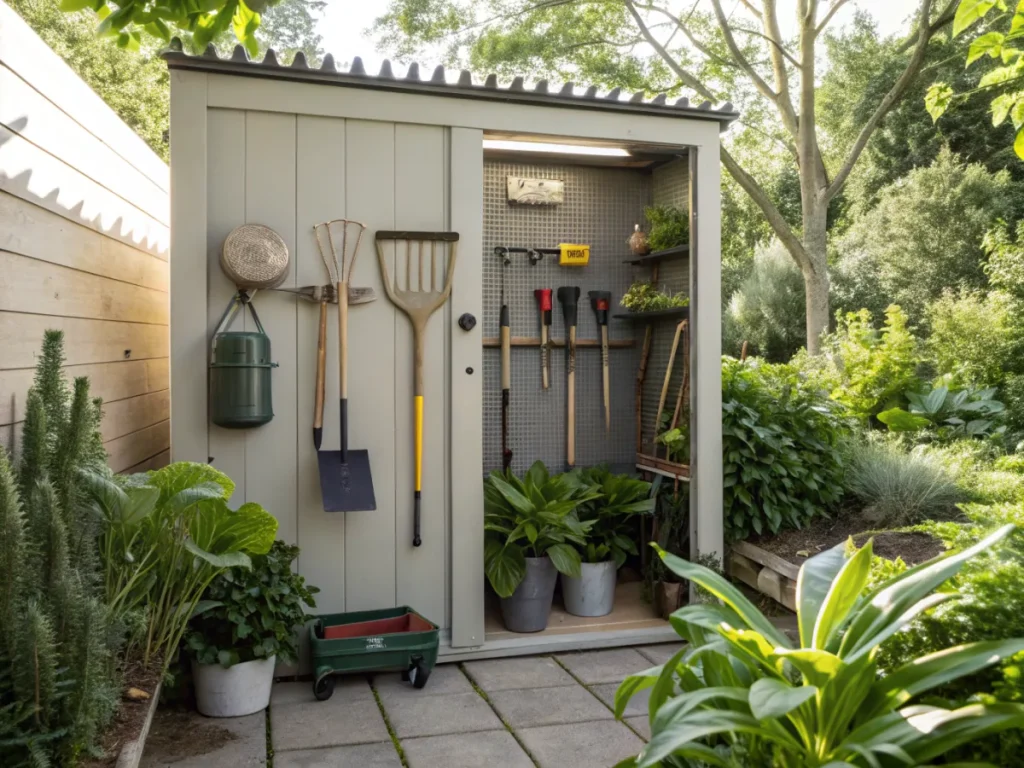
Imagine a world where every rake, shovel, and hand tool has its designated spot, easily visible and within arm’s reach. This isn’t just a fantasy; it’s the reality you can create with a custom-built garden tool wall organizer for your shed. This project isn’t just about tidiness; it’s about reclaiming your time, protecting your tools, and making your gardening experience more enjoyable and productive. Get ready to banish the clutter and embrace the serenity of an organized shed!
[lwptoc]
Why This Matters for Your Garden (and Your Sanity!)
Building a garden tool wall organizer for your shed isn’t merely a weekend project; it’s an investment in your gardening success and overall well-being. A well-organized space streamlines your workflow, making every gardening task from planting seeds to harvesting produce a more pleasant experience. No more fumbling around, losing precious daylight trying to locate that elusive dibber!
First and foremost, accessibility is key. When your tools are neatly arranged on a wall, you can see exactly what you have and where everything is stored. This immediate visibility saves significant time and reduces frustration, allowing you to focus on the joy of gardening rather than the hunt for equipment. Think of the extra moments you’ll have to admire your flourishing plants or simply relax with a cup of tea!
Beyond convenience, proper storage protects your valuable gardening tools. Leaving tools scattered on the shed floor or piled haphazardly can lead to damage. They can rust from contact with moisture, get bent, or even become safety hazards if you trip over them. A wall organizer keeps them off the ground, promoting air circulation and preventing unnecessary wear and tear, extending their lifespan significantly. This means less money spent on replacements and more money for new plants!
Furthermore, an organized shed fosters a sense of calm and control. Stepping into a tidy, functional space before you begin your gardening tasks can set a positive tone for your entire session. It transforms a potentially daunting chore into a relaxing ritual, enhancing your connection with your garden. A clean and orderly environment contributes to a more productive and enjoyable hobby, making you more likely to spend time outside nurturing your green oasis.
Finally, a dedicated storage system for your tools can even improve safety. Sharp tools like pruners and shovels, when left lying around, pose a risk of injury. By hanging them securely on a wall, away from foot traffic, you minimize these hazards. This is especially important if children or pets have access to the shed. Your peace of mind, knowing that your shed is both functional and safe, is invaluable.
What You Need: Tools and Materials
Before embarking on any DIY project, a thorough inventory of necessary tools and materials is crucial. This helps prevent frustrating mid-project trips to the store and ensures a smooth building process. For this garden tool wall organizer, we’ll focus on readily available, durable materials that can withstand the shed environment.
Materials:
- Plywood Sheets: Two 4×8 foot sheets of 3/4-inch exterior-grade plywood. This provides a strong, stable backing for your organizer and resists moisture. You might need more or less depending on the size of your shed wall.
- 2×4 Lumber: Several 8-foot lengths of 2x4s for main support battens and additional shelves/brackets. The number will vary depending on your design.
- Assorted Hooks and Hangers: A variety pack of heavy-duty utility hooks, J-hooks, S-hooks, and tool clips. Consider specific sizes for long-handled tools, hand tools, and smaller items.
- Wood Screws: 1 1/2-inch and 2 1/2-inch exterior-grade wood screws. Ensure they are galvanized or coated to prevent rust.
- Wood Glue: High-quality, waterproof wood glue for added strength in joints.
- Pegboard (Optional): A smaller section of pegboard (e.g., 2×4 feet) for smaller hand tools, wrenches, and spare parts.
- Pegboard Hooks (Optional): Assorted hooks specific to pegboard systems.
- Paint or Stain (Optional but Recommended): Exterior-grade paint or wood stain with a sealant to further protect the plywood from moisture and enhance its lifespan. Choose a light color to brighten your shed.
- Sandpaper: Medium and fine grit for smoothing edges.
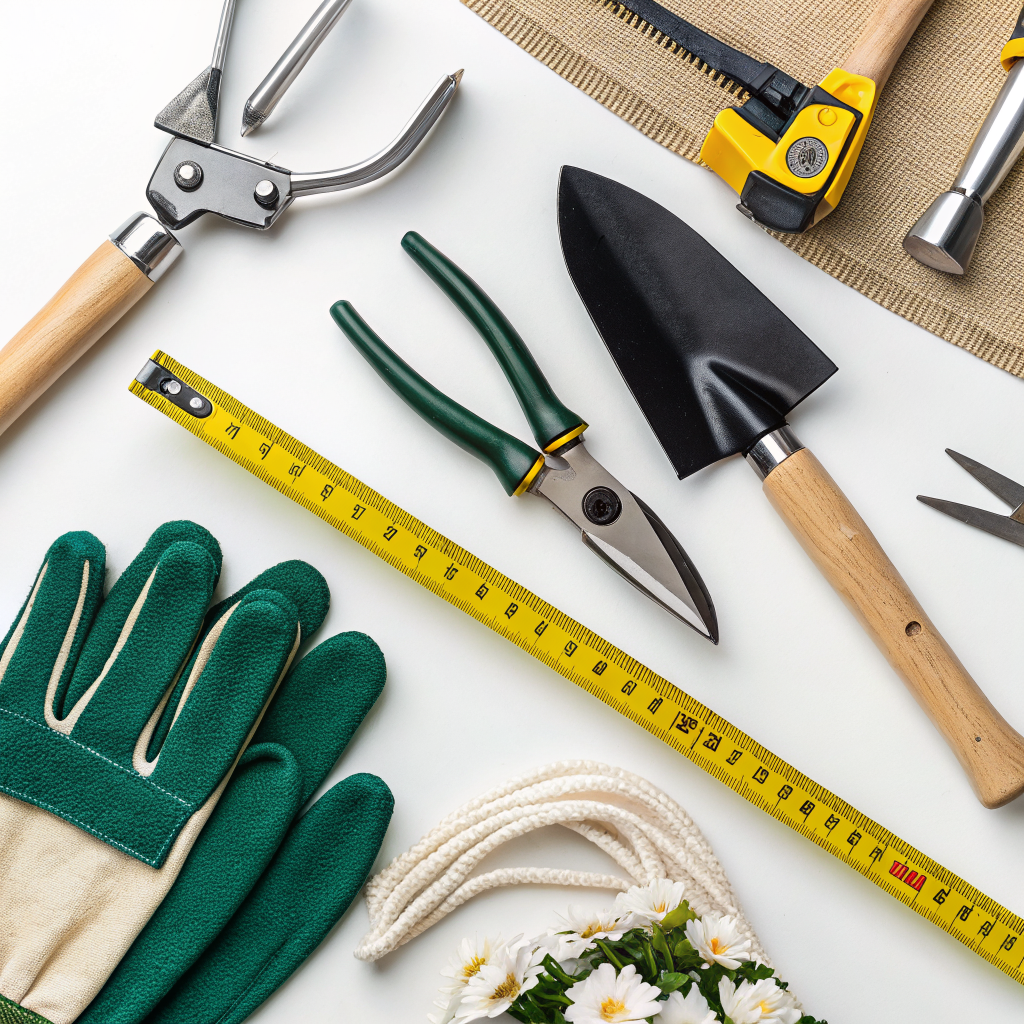
Tools:
- Circular Saw or Table Saw: For cutting plywood sheets and 2x4s accurately. If you don’t own one, many hardware stores offer cutting services.
- Drill/Driver: With various drill bits for pilot holes and screw driving bits.
- Tape Measure: Essential for accurate measurements.
- Pencil: For marking cuts and screw locations.
- Level: To ensure your organizer is hung straight.
- Stud Finder (Optional but Recommended): Useful if you want to mount directly into existing shed studs for maximum support.
- Safety Glasses and Gloves: Always prioritize personal safety when working with power tools and lumber.
- Clamps: F-clamps or C-clamps are useful for holding pieces together while drilling or screwing.
- Orbital Sander (Optional): For faster and smoother sanding.
Step-by-Step Guide: Building Your Garden Tool Wall Organizer
This detailed guide will walk you through the process of constructing a robust and functional garden tool wall organizer. Take your time with each step, paying attention to measurements and safety, and you’ll soon have a shed that’s the envy of your gardening peers.
Step 1: Plan Your Layout and Measure Your Wall
Before cutting anything, take precise measurements of the available wall space in your shed. Consider height, width, and any obstructions like windows or electrical outlets. Then, conduct a thorough inventory of all your garden tools. Lay them out on the ground or a large table, categorize them (long-handled, hand tools, specific purpose tools like pruners), and visualize how you’d like to store them. This step is critical; it informs your design and ensures all your tools will have a dedicated spot. Sketch out a rough design on paper, allocating specific zones for different tool types.
Step 2: Prepare the Plywood Backing
Based on your measurements from Step 1, cut your 3/4-inch plywood sheets to the desired size. If you’re covering a large wall, you might need to use multiple sheets. Use a circular saw or table saw for clean, straight cuts. Once cut, sand the edges and surfaces to remove splinters and prepare for optional finishing. This backing will be the canvas for your tool organization system.
Step 3: Install Vertical Support Battens
Attach 2×4 lumber vertically to the shed wall. These battens will serve two main purposes: providing a strong anchoring point for the plywood and creating an air gap between the organizer and the shed wall to prevent moisture buildup. Ensure these battens are plumb (perfectly vertical) using your level. Space them approximately 16-24 inches apart, aligning them with existing studs in your shed wall if possible for maximum strength. Use 2 1/2-inch exterior-grade screws to secure them firmly to the wall, driving screws into studs where available. Learn more about optimizing your shed’s interior for longevity.
Step 4: Mount the Plywood Panels
With the vertical battens in place, it’s time to mount your prepared plywood panels. Lift and position the first plywood section onto the battens. Use 1 1/2-inch wood screws to fasten the plywood to each vertical batten, ensuring the screws are flush with the surface. Start from one corner and work your way across, checking for levelness as you go. If using multiple plywood sheets, ensure their edges meet cleanly on a batten for support. This creates a solid foundation for your tools.
Step 5: Design and Install Horizontal Rails/Shelves
Now, based on your initial tool layout, strategically install horizontal rails using leftover 2x4s or thinner strips of plywood. These rails will support your hooks and various tool holders. For long-handled tools, you might need two parallel rails to capture the handles and heads. For hand tools, a single rail with hooks beneath it works well. You can also build shallow shelves from plywood for smaller items or buckets. Attach these rails securely to the plywood backing using wood glue and 1 1/2-inch screws, driving them into the vertical battens behind the plywood where possible. Consider different heights to accommodate tools of varying lengths.
Step 6: Incorporate Specialty Storage Features
This is where you customize the organizer to truly fit your needs. Integrate a section of pegboard if you want dedicated storage for small hand tools, wrenches, or frequently used items. Cut the pegboard to size and mount it on the plywood using small spacers (like washers) to allow hooks to fit properly. You can also craft custom holders for specific tools. For example, use short sections of PVC pipe cut lengthwise to create holsters for shovels or rakes. Secure these with screws and glue. Think about creating a small bin at the bottom for gloves or twine.
Step 7: Arrange and Install Hooks and Holders
Begin placing your assorted hooks and hangers according to your planned layout from Step 1. Start with the largest tools first, such as shovels, rakes, and hoes, ensuring they have ample space and don’t interfere with other tools. Then, move on to hand tools, pruners, and other smaller items. Experiment with different hook types to find the best fit for each tool. Mark the screw locations, pre-drill pilot holes to prevent splitting, and then securely fasten each hook. Remember, functionality and ease of access are paramount here. Check out DIY vertical garden ideas for further inspiration on hanging items.
Step 8: Optional: Paint or Seal Your Organizer
To further protect your investment, consider painting or staining your new organizer. An exterior-grade paint or stain will provide an additional barrier against moisture and UV rays, especially important if your shed experiences temperature fluctuations. A light-colored paint can also significantly brighten the interior of your shed, making it feel larger and more welcoming. Apply two coats for best results, allowing ample drying time between coats. This step also gives your organizer a polished, finished look.
Step 9: Load Up Your Tools and Fine-Tune
The moment of truth! Begin loading your garden tools onto your newly organized wall. This is the time to make any final adjustments. You might find that a hook needs to be moved slightly, or a certain tool fits better in a different spot. Don’t be afraid to tweak the arrangement until it feels intuitive and everything is easily accessible. Regularly used tools should be placed in the most convenient locations. This iterative process ensures optimal functionality. For more tips on organizing your outdoor space, refer to smart irrigation solutions.
Step 10: Maintain and Enjoy
Your garden tool wall organizer is complete! To keep it in top shape, periodically check the screws and hooks to ensure they remain tight, especially with heavy tools. Dust and wipe down the surfaces as needed. Encourage good habits among all users to return tools to their designated spots immediately after use. This simple maintenance will keep your shed functional and tidy for years to come, allowing you to fully enjoy your gardening endeavors without the frustration of disorganization.
Pro Tips and Common Mistakes
Even with a detailed guide, a few expert insights can elevate your DIY project from good to great. Avoiding common pitfalls will save you time, effort, and potential headaches down the line.
Pro Tips:
- Think Vertically: Maximize vertical space. Most sheds have ample wall height, but floor space is usually limited. Utilize every inch from floor to ceiling for storage.
- Customize for Your Tools: Don’t just buy generic hooks. Take the time to measure specific tools and create custom holsters or brackets for odd-shaped items like a post-hole digger or a specific type of pruner. PVC pipe sections are excellent for this.
- Leave Room for Growth: As a gardener, your tool collection is likely to grow. Plan for some empty spaces or flexible sections to accommodate new additions without having to completely overhaul your system.
- Shadow Boards: For frequently used hand tools, outline their shape directly on the plywood (or a small pegboard section) with a marker. This makes it immediately obvious where each tool belongs and when one is missing.
- Color Coding: If you have multiple sets of tools or share tools, consider color-coding handles or specific storage zones to quickly identify items.
- Lighting: A well-organized shed is only truly effective if you can see your tools. Consider adding battery-operated LED lights or solar-powered lighting strips inside your shed to illuminate the organizer, especially in darker corners.
- Consider Wheels: If you have a particularly heavy item that you need to move frequently, integrate small wheeled carts or dollies into a lower section of your organizer’s design, keeping them contained when not in use.
Common Mistakes to Avoid:
- Underestimating Tool Weight: Don’t just use small nails or weak hooks. Long-handled tools, especially, can be heavy. Always use appropriate, heavy-duty screws and hooks that are rated for the weight they will hold.
- Lack of Planning: Rushing into the build without a detailed layout is a recipe for disaster. You’ll likely end up with an inefficient system or run out of space. Thorough planning (Step 1) is crucial.
- Ignoring Moisture: Sheds can be damp environments. Using untreated lumber or failing to seal/paint your plywood can lead to rot, mold, and rust on tools. Exterior-grade materials and finishes are essential.
- Overcrowding: While the goal is to utilize space, don’t pack tools so tightly that they are difficult to remove or replace. Leave enough clearance around each tool.
- Inconsistent Heights: Hanging tools at wildly different, inconvenient heights. Place frequently used tools at a comfortable working height. Only very long or rarely used tools should be at the very top or bottom.
- Not Using Pilot Holes: Skipping pilot holes, especially when screwing into plywood near an edge, can cause the wood to split. Always pre-drill slightly smaller holes than your screws.
- Forgetting Safety Gear: DIY projects involve power tools and sharp objects. Never skip safety glasses, gloves, and hearing protection when operating saws or drills.
Eco-Friendly Variations
Embracing sustainability in your DIY projects not only benefits the environment but can also add unique character and cost savings. Creating an eco-friendly garden tool wall organizer is entirely achievable with a few thoughtful choices.
- Reclaimed Wood: The most significant eco-friendly variation is using reclaimed wood. Scout local architectural salvage yards, demolition sites (with permission!), or online marketplaces for old fencing, pallets, or discarded lumber. Pallet wood, while sometimes needing more preparation, can be an excellent free source of material. Ensure any reclaimed wood is free from significant rot, pests, or lead-based paints.
- Recycled Fasteners and Hardware: Look for opportunities to reuse old hooks, brackets, or even nails from other projects. If buying new, opt for galvanized or stainless steel options for longevity, reducing the need for replacements.
- Non-VOC Finishes: If you choose to paint or seal your organizer, select low-VOC (Volatile Organic Compound) or zero-VOC paints and stains. These are much better for air quality, both in your shed and in the environment. Natural oil finishes are also a great eco-conscious choice.
- Upcycled Containers: Instead of buying new bins for small items like twine, gloves, or seed packets, repurpose existing containers. Old coffee cans (cleaned and perhaps painted), plastic milk jugs cut appropriately, or even woven baskets can be given a new lease on life as storage vessels.
- Natural Fiber Rope/Twine: For hanging lighter items or creating loops, choose natural fiber options like sisal, jute, or hemp over synthetic ropes. They are biodegradable and have a lovely rustic aesthetic.
- DIY Hooks: Get creative by bending old metal pieces into hooks. Thick gauge wire, old rebar scraps (if you have the tools to bend them), or even sturdy branches can be fashioned into unique, natural-looking hooks.
- Tool Sharpening Station: Integrate a small, dedicated space for tool maintenance. This encourages regular sharpening and cleaning, which extends tool life and reduces waste associated with frequently replacing dull or rusted tools.
By incorporating these eco-friendly variations, your garden tool wall organizer becomes more than just a storage solution; it’s a testament to sustainable living and resourceful DIY. It demonstrates that functionality and environmental responsibility can go hand in hand, creating a truly unique and meaningful addition to your garden shed. This approach not only saves resources but often results in a more characterful and personalized end product.
Seasonal Considerations for Your Organizer
A garden tool wall organizer isn’t just about static storage; it needs to adapt to the dynamic rhythm of the gardening year. Thinking seasonally ensures your organizer remains efficient and your tools are always ready for the task at hand.
- Spring Awakening: As spring approaches, bring your planting and weeding tools to the forefront. Ensure your trowels, dibbers, seed sowers, and smaller cultivators are easily accessible. Sharpen your pruners and loppers in preparation for spring pruning. Consider designating a “spring prep” zone for items like seed packets, labels, and small pots.
- Summer Bloom: During the peak growing season, watering tools (hoses, watering cans, sprinklers), pest management supplies, and harvesting tools (harvesting knives, baskets) become priority. Create designated spots for these. Sun hats and gardening gloves should also have a prominent, easy-to-grab location.
- Autumn Retreat: As the garden winds down, focus shifts to cleanup and preparation for winter. Rakes, leaf blowers, larger shovels for digging, and autumn planting tools (bulb planters) should be easily retrievable. This is also a good time to make space for protective gear like row covers and frost blankets.
- Winter Slumber: Winter is the ideal time for tool maintenance. During this period, ensure your sharpening stones, rust removers, and oil for wooden handles are easily found. Store all tools clean and dry. You might shift some less-used summer tools to higher, less accessible spots, making room for winter projects, perhaps even a small woodworking area on a workbench below the organizer.
- Moisture Management: Regardless of the season, moisture is the enemy of metal tools. Ensure your shed is adequately ventilated. Consider adding a small dehumidifier in winter if your shed is prone to dampness. Always wipe tools clean and dry before returning them to the organizer.
- Flexibility is Key: Because tool usage changes throughout the year, build a system that allows for some flexibility. Hooks that can be easily moved or added, and shelves that can be reconfigured, will make seasonal adjustments much simpler and more efficient.
By consciously adapting your garden tool wall organizer to the changing seasons, you ensure that your shed remains a highly functional workspace, always supporting your gardening efforts, no matter what nature throws your way. This proactive approach not only maintains order but also protects your tools and enhances your overall gardening experience.
Expert Resources for Advanced Gardening
For those looking to deepen their gardening knowledge and truly understand the intricacies of plant care, these external resources are invaluable. They offer science-backed advice, practical tips, and detailed information to help you cultivate a thriving garden.
- Gardening Know How: This comprehensive website is a treasure trove of information for gardeners of all levels. From troubleshooting common plant problems to detailed guides on specific plant varieties, they cover a vast array of topics. Their articles are well-researched and easy to understand, making complex horticultural concepts accessible. You can find advice on everything from soil health to pest control, ensuring you have the knowledge to keep your plants healthy.
- Royal Horticultural Society (RHS): As one of the world’s leading gardening charities, the RHS offers authoritative advice rooted in extensive research and horticultural excellence. Their website features an extensive plant finder, detailed growing guides, and information on sustainable gardening practices. Joining the RHS or exploring their free resources can provide access to unparalleled expertise, helping you make informed decisions about your garden’s design and care.
- University of Minnesota Extension – Garden: University extension programs across the United States are fantastic resources for regionally specific, research-based gardening information. The University of Minnesota’s garden section, for example, offers scientifically sound advice on topics like composting, vegetable gardening, tree care, and managing garden pests, often tailored to specific climates and soil conditions. Search for your local university extension office for advice relevant to your exact location.
These resources, combined with your newly organized shed, will empower you to tackle any gardening challenge with confidence and knowledge. Equip yourself with the best tools, both physical and informational, for gardening success.
Conclusion
Congratulations! You’ve embarked on a journey to transform your garden shed from a zone of chaos into an oasis of order and efficiency. Building a dedicated garden tool wall organizer is more than just a DIY project; it’s an investment in your gardening passion, your peace of mind, and the longevity of your valuable tools. No longer will you waste precious gardening time rummaging for a misplaced trowel or tripping over a errant rake. Every item will have its designated, easily accessible home, ready for action.
By carefully planning your layout, selecting durable materials, and thoughtfully implementing each step, you’ve created a custom storage solution perfectly tailored to your unique collection of gardening essentials. Remember the power of good design: visible tools are used tools, and organized spaces inspire action. The eco-friendly variations you adopted not only reduce your environmental footprint but also add character and personal touch to your shed, reflecting your commitment to sustainable living.
As you step into your newly organized shed, take a moment to appreciate the calm and clarity it offers. This order extends beyond the physical space, influencing your entire gardening experience. You’ll find yourself more motivated, more efficient, and ultimately, more connected to your garden. So go ahead, embrace the joy of an organized workspace, and let your vibrant, well-tended garden be the true testament to your efforts. Happy gardening, and may your newly organized shed bring you countless seasons of productive and joyful outdoor time!
FAQ: Garden Tool Wall Organizer Shed
Q1: How long does it typically take to build this garden tool wall organizer?
The time required can vary significantly based on your DIY experience, the complexity of your design, and whether you pre-cut materials. A basic organizer for a small shed might take a weekend (1-2 days) for an experienced DIYer. A larger, more customized system with painting and intricate features could extend to 3-4 days, especially if you take your time with planning and adjustments. Always prioritize safety and quality over speed.
Q2: What is the best way to clean and maintain the organizer?
Regular cleaning is key. Periodically wipe down wooden surfaces with a damp cloth to remove dust and dirt. If you painted or sealed the wood, a mild soap solution can be used. For hooks and metal components, check for rust and address it promptly with a wire brush and rust-inhibiting spray if necessary. Inspect all screws and fasteners annually to ensure they are tight and secure, especially after seasonal changes which can cause wood to expand and contract.
Q3: Can this organizer be adapted for small sheds?
Absolutely! The principles of vertical storage and custom organization are even more critical in small sheds. Instead of using large plywood sheets, you might use smaller panels or directly mount rails and hooks onto the shed studs. Focus on multi-purpose hooks, compact shelving, and ensure that every item has a dedicated, space-efficient spot. Consider folding shelves or removable components to maximize flexibility in confined areas.
Q4: What if my shed walls aren’t flat or are made of flimsy material?
If your shed walls are uneven or lack structural integrity (e.g., thin particle board), you’ll need to create a sturdy sub-frame. Instead of just vertical battens, you might build a full frame of 2x4s directly attached to the shed’s structural posts, and then attach your plywood backing to this frame. This provides a solid and level base for your organizer, distributing the weight evenly and preventing damage to flimsy walls. Use a stud finder or tap test to locate load-bearing elements in your shed.