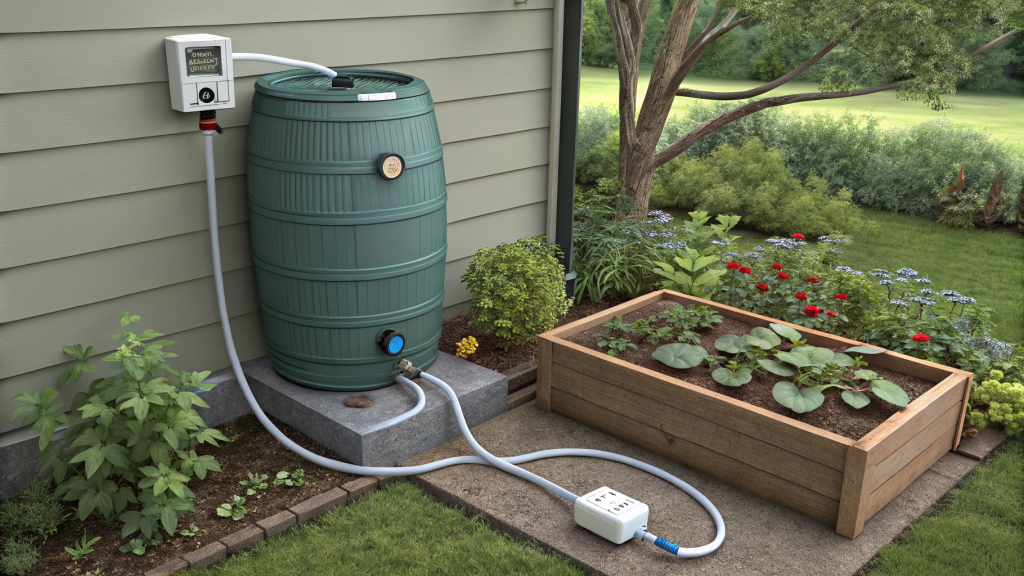
Transform your rain barrel into a smart watering system with a DIY drip irrigation rain barrel setup that uses gravity and a simple timer. This low-cost, eco-friendly hack delivers water directly to plant roots without pumps or complex plumbing, saving time and reducing water waste. Follow this guide to build a reliable system that keeps your garden thriving even when you’re away.
Table of Contents
ToggleWhy Gravity-Fed Drip Irrigation Works
Gravity creates consistent water pressure from an elevated rain barrel. A timer controls flow, allowing precise scheduling. Key benefits:
- No electricity needed – ideal for remote garden beds
- Water conservation – drip emitters reduce evaporation and runoff
- Low maintenance – simple components are easy to replace
Materials and Tools
Gather these items before starting:
- Rain barrel (50–100 gallons) with a spigot or hole near the bottom
- Drip irrigation kit (1/4″ or 1/2″ tubing, emitters, connectors)
- Battery-powered or mechanical timer (for hose or direct connection)
- Garden hose or PVC pipe to connect barrel to timer
- Filter (Y-type or inline) to prevent clogging
- Pressure reducer (if height exceeds 10 feet)
- Riser or sturdy stand to elevate barrel (at least 2 feet high)
- Drill, hole saw, Teflon tape, and zip ties
Step-by-Step Setup
1. Position and Elevate the Rain Barrel
Place the barrel on a level, stable surface near your garden. Elevate it using a cinder block stand or a purpose-built frame. A height of 2–4 feet provides adequate pressure (0.5–1 psi per foot). Ensure the spigot is at least 6 inches above the ground for easy hose attachment.
2. Install the Spigot and Filter
If your barrel lacks a spigot, drill a hole near the bottom (1–2 inches up) using a hole saw. Wrap threads with Teflon tape and screw in a brass or plastic spigot. Attach a filter directly to the spigot to catch debris.
3. Connect the Timer
Use a short hose length to connect the spigot to the timer. Choose a timer with a minimum flow setting (e.g., 1–60 minutes). For gravity systems, avoid timers that require high pressure; a simple mechanical timer works best. Set the timer to water early morning or evening to reduce evaporation.
4. Run the Drip Lines
From the timer, run 1/2″ or 1/4″ mainline tubing along plant rows. Use connectors to branch off to individual plants. Insert drip emitters (0.5–2 GPH) near each plant base. Secure tubing with ground stakes or zip ties.
5. Test and Adjust
Open the spigot and timer manually first. Check for leaks and emitter flow. Adjust elevation or add a pressure reducer if flow is too slow or fast. Bury tubing under mulch to prevent sun damage and reduce evaporation.
Integrating a Timer Effectively
A timer automates your drip irrigation rain barrel system. Follow these tips:
- Battery-powered timers – Last a season; replace batteries yearly.
- Mechanical timers – No batteries needed; set watering duration manually.
- Smart timers – Connect to Wi-Fi for remote control (requires hose attachment with consistent pressure).
- Placement – Keep timer out of direct sun to extend battery life.
Set the timer to water deeply but infrequently (e.g., 30 minutes every 2–3 days) to encourage deep root growth. Adjust based on rainfall and plant needs.
Maintenance and Troubleshooting
Common Issues
- Low pressure – Increase barrel height or reduce emitter count.
- Clogged emitters – Clean or replace; install a finer filter.
- Timer not working – Check batteries or replace mechanical timer.
- Leaking connections – Tighten fittings or use Teflon tape on threads.
Seasonal Care
- Drain barrel and disconnect timer before winter to prevent freeze damage.
- Flush tubing in spring by running water without emitters.
- Replace filter annually.
Takeaway
A DIY drip irrigation rain barrel with gravity feed and timer is an affordable, sustainable way to water your garden. By reusing rainwater and automating delivery, you save money, conserve resources, and enjoy healthier plants. Start with a simple setup and expand as needed—your garden will thank you.


