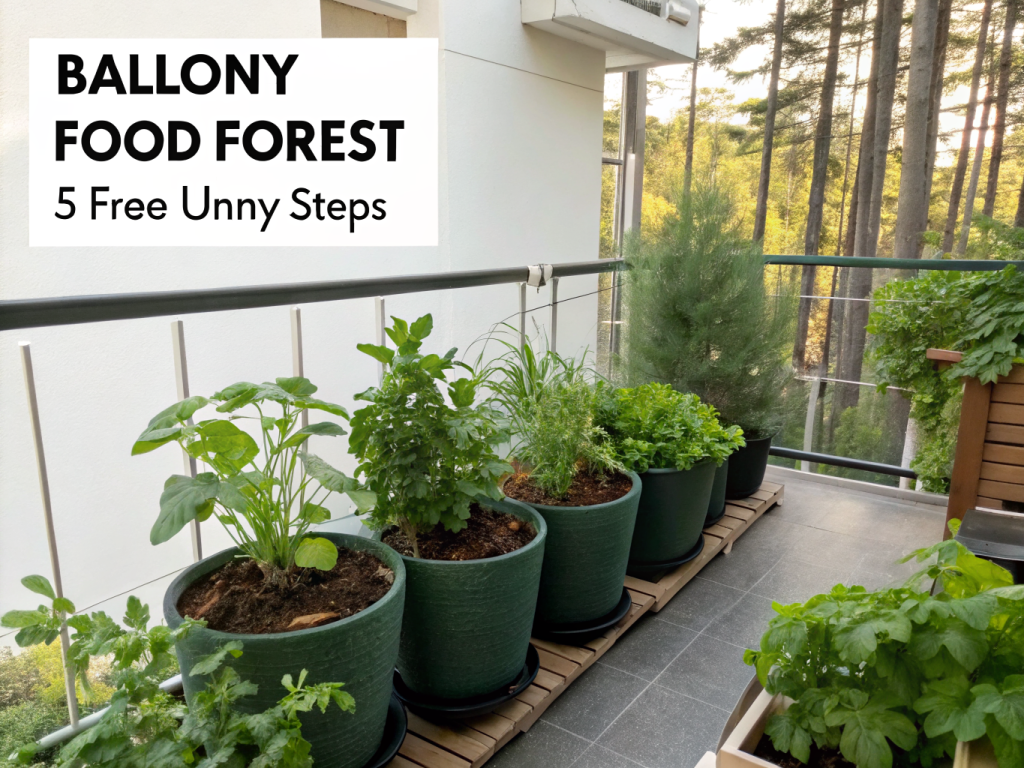
The Ultimate Balcony Food Forest: 5 Steps to Urban Abundance
Imagine stepping onto your balcony and harvesting fresh, organic produce just steps from your kitchen. This isn’t a pipe dream; it’s the reality of a balcony food forest. For urban dwellers craving a deeper connection to nature and a sustainable food source, transforming a small balcony into a thriving ecosystem is an incredibly rewarding endeavor. This comprehensive guide will walk you through the essential steps, from initial planning to joyful harvesting, making your balcony food forest setup a smashing success.
[lwptoc]
Why This Matters for Your Garden (and Your Life!)
In our increasingly urbanized world, access to fresh, healthy food can be a challenge. A balcony food forest offers a powerful solution, bringing the principles of permaculture – a design science that mimics natural ecosystems – directly to your doorstep. This isn’t just about growing plants; it’s about creating a resilient, productive, and beautiful system that benefits both you and the environment.
Beyond the fresh produce, a food forest on your balcony contributes to urban biodiversity, provides habitat for beneficial insects, and helps mitigate the urban heat island effect. It’s a living laboratory for sustainable living, offering a continuous learning experience and a tangible connection to the cycles of nature. The satisfaction of eating food you’ve grown yourself, free from pesticides and packaged sustainably, is unparalleled.
Furthermore, the act of gardening itself is a well-documented stress reliever and a fantastic way to engage in mindful activity. Your balcony food forest becomes a sanctuary, a green oasis in the concrete jungle. It’s an investment in your health, your environment, and your community, fostering a sense of self-sufficiency and empowering you to take control of your food supply.

What You Need: Tools, Materials, and Plants for Your Balcony Food Forest
Starting any successful project requires the right foundation, and your balcony food forest is no exception. Here’s a breakdown of what you’ll need to gather:
Essential Tools:
- Hand Trowel and Cultivator: For planting, digging, and aerating soil.
- Pruning Shears/Snips: For harvesting, shaping plants, and removing dead growth.
- Watering Can or Small Hose with Noodle Arm: Efficient and targeted watering.
- Gloves: Protect your hands from dirt, thorns, and pests.
- Sturdy Rulers or Measuring Tape: For planning plant spacing.
- Spray Bottle: For misting, applying organic pest deterrents, or foliar feeds.
Key Materials:
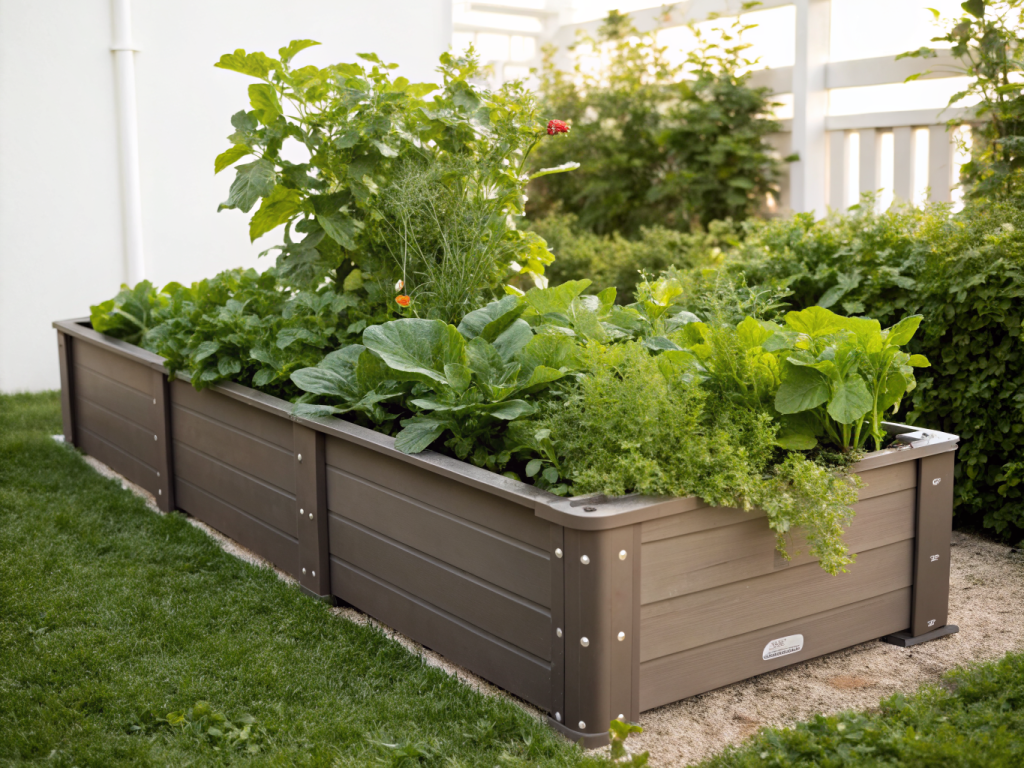
- Containers: This is paramount for a balcony. Think large fabric grow bags (breathable, portable), self-watering planters (reduces watering frequency), terracotta pots (classic, but can dry out quickly), or recycled food-grade barrels/buckets (with drainage holes). Vary sizes to accommodate different plant layers. Consider vertical planters for maximizing space.
- High-Quality Potting Mix: Do not skimp on this! A good organic potting mix with excellent drainage and water retention is crucial. Look for mixes fortified with compost and mycorrhizal fungi.
- Compost: Essential for enriching your soil over time. Start with a store-bought bag or consider a small DIY worm compost bin if space allows.
- Organic Fertilizers: Slow-release granular fertilizers, liquid kelp, fish emulsion, or compost tea will provide ongoing nutrients.
- Mulch: Straw, wood chips (untreated), or even shredded leaves help retain moisture, suppress weeds, and regulate soil temperature.
- Support Structures: Trellises, stakes, tomato cages, or even sturdy string for climbing plants. Consider a small arbor for a truly lush feel.
- Drainage Trays/Saucers: Protect your balcony floor from water damage and staining.
- Lightweight Shelving or Bench: To elevate some containers and create more planting layers.
Plant Selection (Layered Approach):
This is where the “forest” concept comes alive. Think in layers:
- Canopy Layer (Small Trees/Tall Shrubs) – (Optional, depends on balcony size and weight limits): Dwarf fruit trees (lemon, fig, olive) or tall berry bushes (blueberry, elderberry in large containers). Choose varieties known for container growth.
- Shrub Layer (Medium-Sized Plants): Berry bushes (miniature raspberries, currants), chili peppers, eggplant, perennial herbs like rosemary or lavender.
- Herbaceous Layer (Annuals and Perennial Herbs/Vegetables): Leafy greens (lettuce, spinach, kale), root vegetables (carrots, radishes in deep containers), bush beans, culinary herbs (basil, thyme, cilantro, parsley).
- Groundcover Layer (Sprawling Plants): Strawberries, trailing nasturtiums, mint (in its own pot!), thyme, chamomile.
- Rhizosphere/Root Layer (Underground Crops): Carrots, radishes, potatoes, onions.
- Climber Layer (Vertical Growers): Pole beans, cucumbers, peas, small gourds, passionfruit, kiwi (dwarf varieties) on trellises.
Step-by-Step Guide: How to Set Up Your Balcony Food Forest in 5 Steps
Building a successful balcony food forest is a journey, and these five steps will guide you from empty space to abundant harvest.
Step 1: Assess Your Balcony and Plan Your Layout
Before buying a single seed, take a critical look at your balcony. This initial assessment is the most crucial step for a thriving balcony food forest setup.
- Sunlight Analysis: How many hours of direct sunlight does your balcony receive? Track it over a day, and ideally over a few days in different seasons if possible. Full sun (6+ hours) opens up many options, while partial sun (3-6 hours) or shade (less than 3 hours) requires selecting shade-tolerant plants. Map out sunny and shadier spots.
- Weight and Structural Considerations: Balconies have weight limits. Understand your building’s regulations. Heavy ceramic pots and wet soil can quickly add up. Opt for lighter materials like fabric grow bags or plastic pots where possible, especially for larger plants. Distribute weight evenly.
- Wind Exposure: Is your balcony a wind tunnel? Strong winds can desiccate plants and knock over containers. Consider windbreaks like sturdy trellises with climbing plants or strategically placed larger pots.
- Water Access: How will you water your plants? A nearby tap is ideal. If not, consider how you’ll comfortably carry water, or invest in a small rainwater collection system if allowed.
- Space and Aesthetics: Measure your usable space. Draw a simple sketch, mapping out where different sized containers, trellises, and seating areas might go. Think vertically from the start. Consider your aesthetic preferences – do you want a wild jungle look or a more organized arrangement?
- Plant Selection based on Conditions: Based on your sun, wind, and space analysis, begin to research suitable plants for each layer. For example, if you have limited sun, focus on leafy greens, herbs, and certain berries. If you have full sun, a wider array of vegetables and dwarf fruit trees are possible.
Step 2: Gather Your Materials and Prepare Your Containers
Once your plan is sketched out, it’s time to acquire the physical components for your balcony food forest setup.
- Acquire Containers: Purchase or repurpose a variety of containers, ensuring they have adequate drainage holes. For fabric bags, consider their size relative to the plant’s mature root system. For plastic or terracotta, drill extra holes if needed. Place drainage saucers under all pots to protect the balcony surface.
- Source Quality Potting Mix and Amendments: Buy a high-quality organic potting mix. Supplement with compost (e.g., worm castings if available), perlite for drainage, or coco coir for moisture retention, depending on your plant’s needs and the base mix. Avoid garden soil; it’s too dense for containers.
- Prepare Support Structures: Assemble trellises, stakes, or cages. Position them near where you intend to plant climbers. If hanging planters, ensure your hooks and anchoring points are secure and rated for the weight of the filled planter.
- Organize Tools: Have your trowel, gloves, watering can, and pruners ready. A small caddy for tools can keep things tidy.
Remember that the weight of wet soil is significant, so position larger containers before filling them. If buying smaller plants, ensure they arrive healthy and pest-free from a reputable nursery.
Step 3: Planting Your Layers – Mimicking Nature
This is where the magic truly begins as you bring your vision to life. The key to a food forest is layering.
- Start with the Canopy/Tallest Plants: Position your largest containers for dwarf fruit trees or tall berry bushes first. Ensure they have enough space for growth and are not overshadowed by balcony railings or other structures. Plant them firmly in their containers with plenty of good potting mix.
- Incorporate the Shrub and Herbaceous Layers: Arrange medium to large containers for shrubs (e.g., peppers, eggplants, larger herbs) and herbaceous plants (e.g., leafy greens, bush beans). Group plants with similar sun and water requirements together if possible. Don’t be afraid to plant multiple smaller plants in larger containers – companion planting can be beneficial (e.g., basil near tomatoes).
- Add the Groundcover and Rhizosphere Layers: Plant spreading groundcovers like strawberries or thyme, or trailing nasturtiums around the base of taller plants where they won’t compete excessively. For root vegetables (carrots, radishes), use deep containers.
- Install Climbers and Vining Plants: Plant them at the base of your trellises or support structures. Gently guide their initial growth onto the support. As they grow, you’ll continue to train them.
- Fill with Potting Mix and Water Thoroughly: Once all plants are in position, fill containers with your prepared potting mix, leaving about an inch or two from the rim. Water deeply until water drains from the bottom of the containers. This settles the soil and eliminates air pockets.
Step 4: Establish Key Systems: Watering and Mulching
Consistent care is vital for a thriving food forest, and proper watering and mulching are at the top of the list.
- Watering Strategy: In containers, plants dry out much faster than in the ground. Water deeply when the top inch or two of soil feels dry. The frequency will depend on plant type, container size, temperature, and wind. Consider small self-watering inserts for some pots, or a drip irrigation system timed to run automatically while you’re away. Water early in the morning or late in the evening to minimize evaporation.
- Mulching for Moisture Retention: Apply an organic mulch (straw, aged wood chips, shredded leaves) to the surface of your soil. This drastically reduces water evaporation, keeps soil temperatures more stable, suppresses weeds, and breaks down over time to add organic matter.
- Nutrient Management: Container plants quickly deplete soil nutrients. Begin with a quality potting mix, but plan for regular feeding. Use a balanced organic liquid fertilizer (e.g., fish emulsion, liquid kelp) every 2-4 weeks, or incorporate slow-release organic granules at the beginning of the season. Compost tea is also an excellent, gentle way to add nutrients and beneficial microbes.
- Monitoring: Regularly observe your plants. Look for signs of stress (wilting, discolored leaves), pests, or disease. Early detection is key to preventing major issues.
Remember, overwatering can be as detrimental as underwatering, leading to root rot. Feel the soil, and lift smaller pots to gauge their weight, which indicates moisture levels.
Step 5: Ongoing Care, Harvest, and Evolution
Your food forest is a living, evolving system that requires continuous interaction and observation.
- Pruning and Shaping: Regularly prune plants to encourage bushier growth, remove dead or diseased branches, and manage size. For fruit trees, learn appropriate pruning techniques for maximizing yield. This also improves air circulation, reducing disease risk.
- Pest and Disease Management: Employ organic pest control methods. Introduce beneficial insects (e.g., ladybugs) as a natural defense. Use neem oil, insecticidal soap, or horticultural oils for outbreaks. Ensure good air circulation and avoid overhead watering to prevent fungal issues. Learn about common pests and natural solutions here.
- Succession Planting and Harvesting: As annuals finish producing, remove them and replant with new crops. This ensures a continuous harvest. Harvest frequently and regularly to encourage further production. For example, picking outer leaves of lettuce or spinach keeps the plant producing longer.
- Composting and Soil Replenishment: As plants grow and you harvest, the soil will naturally deplete. Top up containers with fresh compost or enriched potting mix annually. Consider investing in a small balcony compost bin for kitchen scraps to create your own nutrient-rich soil amendment.
- Observation and Adaptation: Your balcony’s microclimate will change with seasons. Observe how your plants respond and adapt your care routines. This iterative process is the heart of permaculture. Enjoy the process of learning and discovery!
Pro Tips and Common Mistakes to Avoid
Even with the best intentions, new gardeners can stumble. Here are some insights to help you on your journey:
Pro Tips:
- Start Small, Scale Up: Don’t try to plant everything at once. Begin with a few reliable plants and expand as you gain confidence and understanding of your balcony’s microclimate.
- Embrace Verticality: Maximise every inch! Wall-mounted planters, hanging baskets, multi-tiered shelving, and trellises are your best friends on a balcony.
- Mulch, Mulch, Mulch: Seriously, this is a game-changer for container gardening. It saves water, stabilizes soil temperature, and enriches the soil.
- Use Fabric Grow Bags: They are lightweight, allow for air pruning of roots (preventing root bound plants), and offer excellent drainage. They’re also easy to move.
- Attract Pollinators: Plant flowering herbs and small flowers alongside your edibles. Basil, thyme, marigolds, and nasturtiums will bring in essential bees and other beneficial insects.
- Keep a Gardening Journal: Note planting dates, watering schedules, fertility applications, pest issues, and harvest yields. This data is invaluable for future seasons.
- Connect with Other Urban Gardeners: Join online forums or local groups. Sharing experiences and tips is incredibly helpful and encouraging.
Common Mistakes to Avoid:
- Underestimating Weight: Wet soil in numerous large, heavy containers can exceed balcony weight limits, posing a structural risk. Always err on the side of caution.
- Poor Drainage: Pots without adequate drainage holes lead to waterlogged roots, suffocating plants and causing rot. Ensure every container drains freely.
- Using Garden Soil: Garden soil is too heavy and compacts easily in containers, inhibiting root growth and drainage. Always use a high-quality potting mix.
- Inadequate Sunlight: Planting sun-loving vegetables in a shady spot leads to leggy, unproductive plants. Be realistic about your balcony’s light conditions.
- Neglecting Fertilization: Container plants are heavy feeders. Unlike garden beds where nutrients can be replenished naturally, pots require regular feeding to sustain healthy growth and production.
- Overcrowding: While it’s tempting to pack in as many plants as possible, overcrowding leads to poor air circulation (increasing disease risk), competition for nutrients, and reduced yields. Give plants room to breathe and grow.
- Ignoring Pests: Small pest populations can quickly explode in a confined balcony environment. Regular inspection and prompt, organic intervention are crucial.
Eco-Friendly Variations for Your Balcony Food Forest
Embracing ecological principles is at the core of a food forest. Here are ways to make your balcony even greener:
- Rainwater Harvesting: If possible and permitted, set up a small rainwater collection barrel or even strategically placed buckets. Rainwater is superior for plants as it’s chlorine-free and contains beneficial dissolved gasses.
- DIY Sub-Irrigation Planters (SIPs): Convert ordinary containers into self-watering systems. These use a water reservoir at the bottom, wicking moisture up to the soil, significantly reducing watering frequency and water waste.
- Composting on the Balcony: A small worm composter (vermiculture) is ideal for balconies. It’s odorless when managed correctly and producesnutrient-rich worm castings and “worm tea” for your plants. A small Bokashi system can also break down kitchen scraps.
- Seed Saving: Become a seed saver! Collect seeds from your open-pollinated plants at the end of the season. This reduces reliance on external sources and adapts plants to your specific microclimate over generations.
- Repurposing Materials: Look for opportunities to turn waste into resources. Old tires can be stacked for potato towers, plastic bottles can become self-watering wicks or mini greenhouses, and sturdy crates can be planters.
- No-Dig/No-Till Principles: Minimize disturbance to the soil in your containers. This helps preserve the delicate soil food web you’re trying to build and reduces weed seed germination.
- Plant for Pollinators and Biodiversity: Beyond edibles, include a few small native flowering plants known to attract local pollinators. This supports the broader ecosystem and improves pollination of your food crops.
Seasonal Considerations for Balcony Food Forests
A balcony food forest isn’t static; it shifts with the seasons, presenting new opportunities and challenges.
- Spring: The Awakening:
- Planting: This is prime planting season. Start seeds indoors, gradually harden off seedlings, and introduce spring crops like lettuce, spinach, peas, radishes, and early herbs.
- Maintenance: Clean containers, refresh potting mix, and apply initial organic fertilizer. Check for overwintered pests.
- Watering: Start with moderate watering as temperatures rise.
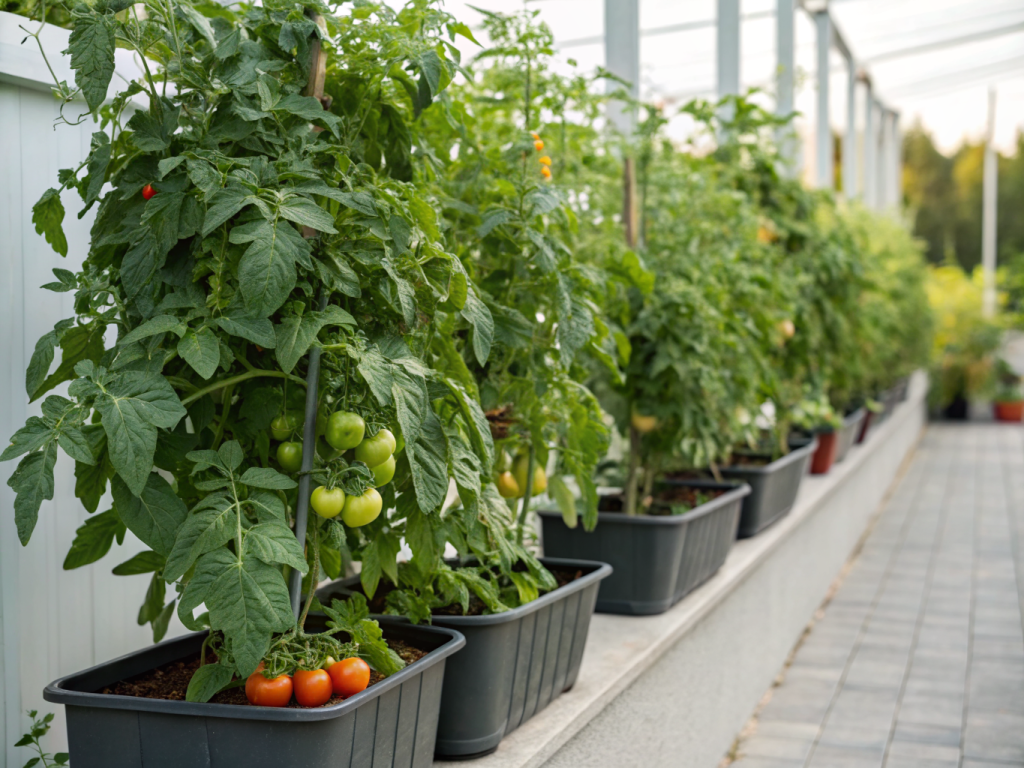
- Summer: Peak Production:
- Planting: Plant warm-season crops: tomatoes, peppers, eggplant, cucumbers, squashes, beans, basil.
- Maintenance: Water frequently and deeply, sometimes twice a day in peak heat. Fertilize regularly. Prune and train vining plants. Monitor for pests (aphids, spider mites) due to high temperatures. Provide shade cloth if plants are getting scorched.
- Harvesting: Harvest daily or every few days to encourage continued production.
- Autumn: Winding Down and Preparing:
- Planting: Transition to cool-season crops: kale, collards, Swiss chard, broccoli, late-season lettuce. Plant garlic (if space allows) for a spring harvest.
- Maintenance: Begin clearing out spent summer annuals. Mulch heavily to protect roots as temperatures drop. Reduce watering as days shorten and temperatures cool.
- Harvesting: Enjoy the final bounty of summer, and begin harvesting fall greens.
- Winter: Rest and Planning (or Year-Round for Mild Climates):
- Mild Climates: Continue growing cold-hardy greens, root vegetables, and herbs. Use cloches or mini-greenhouses to extend the season.
- Cold Climates: Bring tender perennials indoors. Empty and clean annual containers, storing them if possible. Plan for next season, ordering seeds, and reviewing your journal. Protect perennial roots with extra mulch. Reduce watering significantly for dormant plants.
Expert Resources for Further Learning
To deepen your knowledge and hone your skills, here are some excellent external resources:
- Gardening Know How: Gardening Know How offers a vast library of articles on all aspects of gardening, including container gardening, pest control, and specific plant care.
- Royal Horticultural Society (RHS): The RHS website is a treasure trove of expert advice, plant profiles, and sustainable gardening practices, highly respected globally.
- University Extension Offices (e.g., University of Minnesota Extension): Many university extension services, like the University of Minnesota Extension, provide research-backed, localized gardening information, often including urban and container gardening guides. Search for your local university extension for region-specific advice.
Conclusion
Setting up a balcony food forest is more than just a gardening project; it’s an embrace of urban permaculture principles, a step towards greater self-sufficiency, and a daily connection to the natural world. By following these five steps – from careful planning and plant selection to consistent care and seasonal adaptation – you can transform a sterile balcony into a thriving, beautiful, and productive ecosystem.
The journey may have its challenges, but the rewards are immense: fresh, organic food, a reduction in your carbon footprint, a deeper appreciation for nature’s cycles, and a peaceful green sanctuary tailored to your tastes. So, roll up your sleeves, get your hands dirty, and embark on the joyous adventure of cultivating your own balcony food forest. Your taste buds, your well-being, and the urban environment will thank you.
FAQ – Balcony Food Forest
A: Start with easy-to-grow, productive plants like leafy greens (lettuce, spinach, kale), bush beans, radishes, cherry tomatoes (compact varieties), basil, mint (in its own pot!), and strawberries. These are forgiving and offer quick rewards.
A: Regular inspection is key. Hand-picking larger pests, using a strong spray of water to dislodge aphids, applying neem oil or insecticidal soap for outbreaks, and encouraging beneficial insects by planting flowering herbs are effective organic strategies. Maintain good air circulation and plant health to make plants less susceptible.
A: Absolutely! While full sun offers the most options, many plants thrive in partial shade (3-6 hours) or even shadier conditions. Focus on leafy greens (lettuce, spinach, kale, Swiss chard), many culinary herbs (mint, parsley, cilantro), some root vegetables (radishes, carrots in looser soil), and certain berries (strawberries, some blueberries). Supplement with grow lights if feasible and desired.
A: Container plants deplete nutrients faster than in-ground plants. Generally, you should fertilize every 2-4 weeks with a balanced organic liquid fertilizer (like fish emulsion or liquid kelp) during the active growing season. For longer-term feeding, incorporate slow-release organic granules or rich compost into your potting mix at the beginning of the season. Always follow product instructions and observe your plants for signs of nutrient deficiency.