The Ultimate Guide to Using Coffee Grounds in Your Garden: 21 Eco-Friendly Hacks
Are you looking for an easy, eco-friendly, and cost-effective way to boost your garden’s health and vitality? Look no further than your morning cup of joe! Spent coffee grounds, often discarded as waste, are a true hidden gem for any gardener.
This comprehensive guide, the definitive coffee grounds garden complete guide, will tell you everything you need to know about transforming these everyday discards into a powerful gardening asset. From soil enrichment to pest deterrence, coffee grounds offer a plethora of benefits that can revolutionize your approach to organic gardening.
[lwptoc]
Why This Matters For Your Garden: Unlocking the Power of Coffee Grounds
The concept of using coffee grounds in the garden isn’t new, but its popularity is surging as more gardeners embrace sustainable and organic practices. Rather than sending these nutrient-rich materials to landfills, where they contribute to methane gas production, you can actively recycle them into your garden ecosystem. This simple act of repurposing has significant environmental benefits and offers a wealth of advantages for your plants and soil.
Coffee grounds are typically slightly acidic, which can be beneficial for acid-loving plants. They also contain a good amount of nitrogen, along with varying levels of potassium, phosphorus, and other trace minerals essential for plant growth. Beyond their nutritional content, coffee grounds significantly improve soil structure, enhance drainage, and promote the growth of beneficial microorganisms.
Perhaps one of their most celebrated benefits is their ability to deter common garden pests. From slugs and snails to ants and even some mammals, coffee grounds can act as a natural, non-toxic deterrent. By understanding the versatile applications of coffee grounds, you can cultivate a healthier, more vibrant garden while reducing household waste.
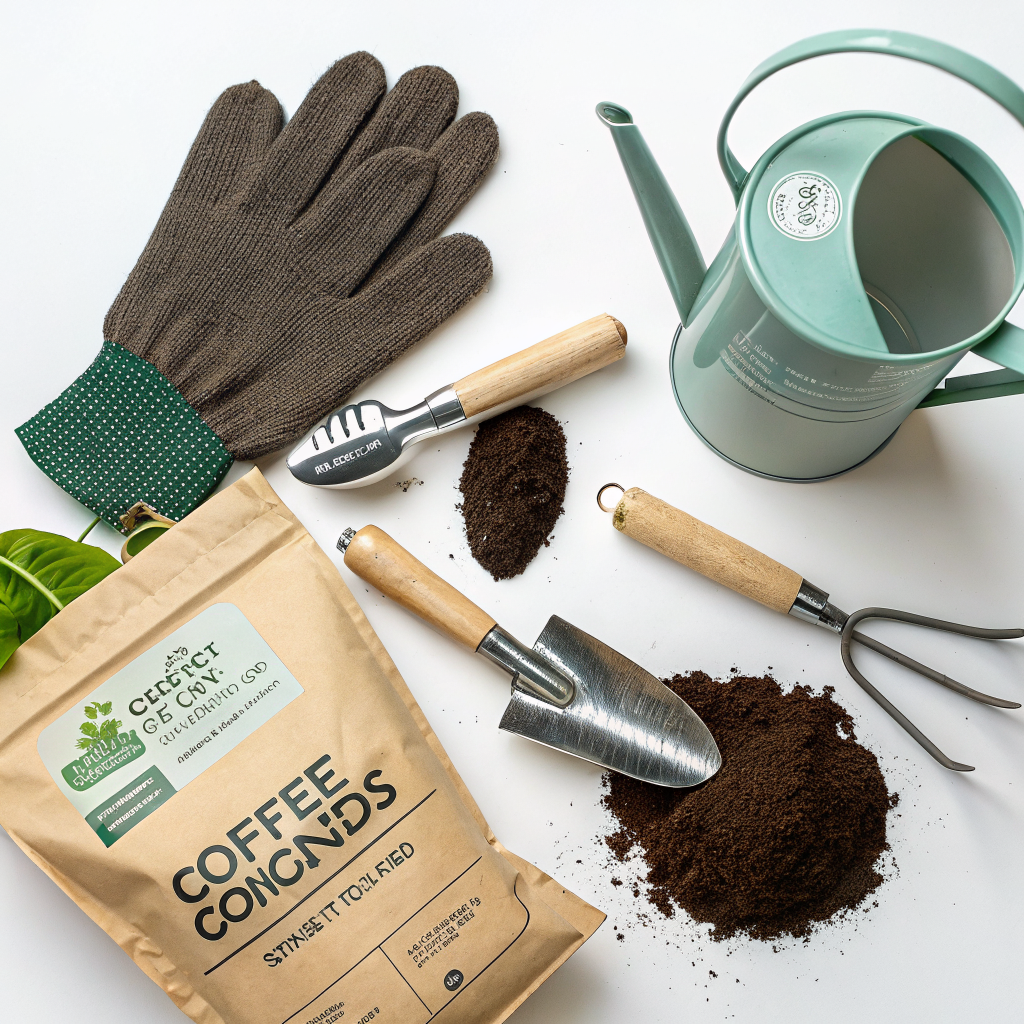
What You Need: Gathering Your Gardening Arsenal
One of the beauties of using coffee grounds in your garden is how little you need to get started. Most of the “tools” are likely already in your kitchen!
Essential Materials:
- Spent Coffee Grounds: The star of our show! Collect them daily from your coffee maker. If you don’t drink coffee often, ask local coffee shops; many are happy to give away their spent grounds for free.
- A Container for Storage: A bucket with a lid, a large jar, or even a breathable bag will work. Ensure it can store grounds until you’re ready to use them.
- Gloves: While not strictly necessary for handling grounds, they’re always good for general gardening tasks.
- Trowel or Hand Fork: For mixing grounds into the soil or creating small furrows.
- Watering Can or Hose: To water in the grounds after application, especially if using them for soil amendment.
- Compost Bin (Optional but Recommended): If you plan to incorporate grounds into your composting routine, a dedicated bin is ideal. For more on composting, check out this composting guide.
Plants That Love Coffee Grounds:
While coffee grounds are beneficial for many plants, some truly thrive with their slightly acidic nature and nutrient boost. These include:
- Azaleas & Rhododendrons: Classic acid-lovers, they respond wonderfully to a coffee ground boost.
- Blueberries: Essential for their growth and fruit production.
- Hydrangeas: Can even influence flower color towards bluer hues in acidic soil.
- Camellias: Enjoy the added acidity and nutrients.
- Roses: Benefit from the nitrogen and improved soil structure.
- Evergreens: Many conifers and broadleaf evergreens prefer acidic conditions.
- Carrots & Radishes: Some gardeners report better growth and texture.
- Tomatoes & Peppers: Can benefit from the nitrogen boost early in their growth cycle.
- Strawberries: Love acidic soil and the slow-release nutrients.
Plants That Might Not Like Coffee Grounds:
It’s important to remember that not all plants prefer acidic conditions. Avoid applying large quantities of grounds directly to plants that prefer alkaline or neutral soil, such as lavender, rosemary, and some clematis varieties. Always observe your plants’ reactions and adjust accordingly.
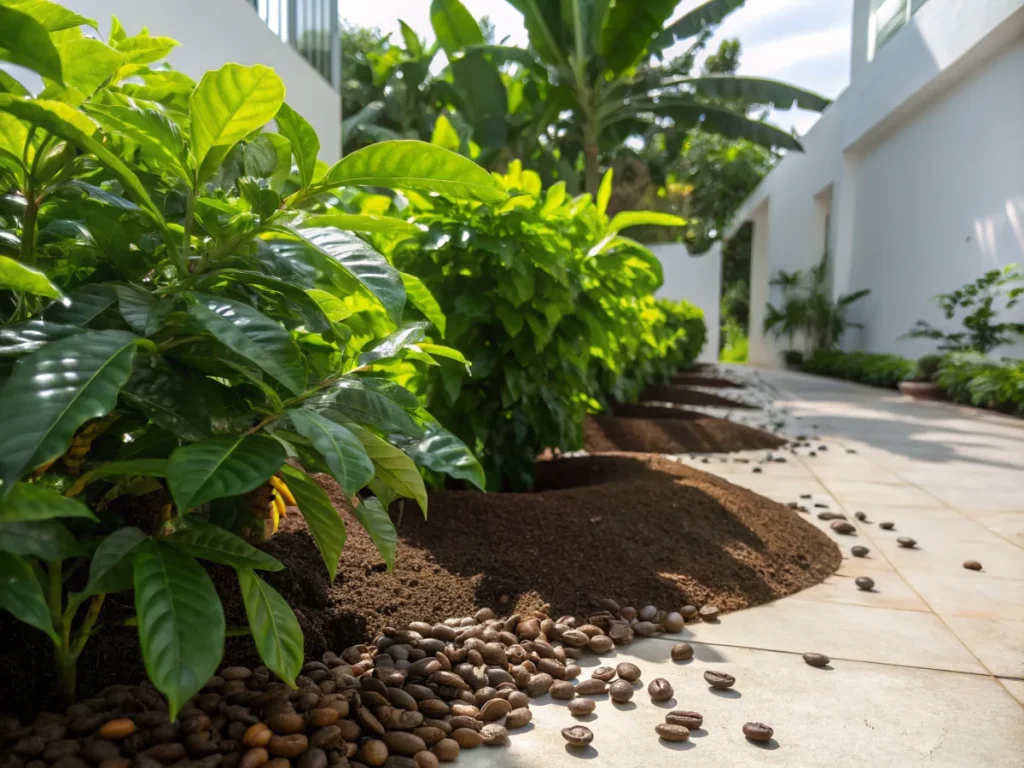
Step-by-Step Guide: How to Integrate Coffee Grounds into Your Garden
Integrating coffee grounds into your garden is straightforward and can be done in several ways, each with distinct benefits. Always ensure grounds are spent and cooled before use.
Step 1: Preparing Your Coffee Grounds
Before using coffee grounds, it’s crucial to ensure they are cool and, ideally, somewhat dried out. Fresh, wet grounds can sometimes lead to mold growth if applied too thickly, especially in humid conditions. Spread them thinly on a tray or newspaper to dry for a day or two, or simply store them in a breathable container until ready. Collect your grounds over several days or weeks until you have a usable amount.
Step 2: Soil Amendment and Nutrient Boost
Coffee grounds are excellent for improving soil structure, increasing aeration, and adding a slow-release source of nitrogen and other trace minerals. They also encourage earthworm activity, which further enhances soil health.
- Direct Application: For acid-loving plants, lightly sprinkle a thin layer (about 1/2 inch) of grounds around the base of the plant, being careful not to pile them against the stem.
- Incorporation: Gently work the grounds into the top few inches of soil using a trowel or hand fork. This helps distribute nutrients and improves soil texture.
- New Beds: When preparing new garden beds, mix coffee grounds thoroughly into the soil along with compost and other organic matter. Aim for about 10-20% coffee grounds by volume in your soil mix.
- Watering In: After applying, water the area thoroughly. This helps leach the nutrients into the soil and prevents the grounds from forming an impenetrable crust.
Step 3: Composting with Coffee Grounds
Composting is arguably one of the best ways to utilize coffee grounds, integrating their nutrients and beneficial properties into a well-balanced soil amendment. Coffee grounds are considered a “green” material in composting, rich in nitrogen.
- Layering: Add coffee grounds in layers with “brown” materials like dried leaves, straw, and shredded newspaper. A good rule of thumb is a 1:2 ratio of greens to browns.
- Mixing: Ensure they are well mixed into your compost pile to prevent compaction and anaerobic conditions. This also helps distribute their nutrients evenly throughout the finished compost.
- Worm Composting (Vermicomposting): Worms absolutely love coffee grounds! Add them sparingly to your worm bin, as too much at once can over-acidify the bin or increase temperatures. A small handful every few days is usually sufficient. Learn more about vermicomposting here to maximize your efforts.
Step 4: Pest and Critter Deterrent
The coarse texture and strong scent of coffee grounds can effectively deter several common garden pests and even some larger critters.
- Slugs and Snails: Create a barrier by sprinkling a ring of dried coffee grounds around susceptible plants. They dislike crawling over the abrasive texture and are repelled by the caffeine.
- Ants: Anecdotal evidence suggests coffee grounds can disrupt ant trails and deter them from nesting in certain areas. Sprinkle grounds directly on ant mounds or along their pathways.
- Cats, Rabbits, and Deer: While not a foolproof solution, some gardeners report success in deterring these animals by sprinkling coffee grounds around garden beds. The strong scent can be off-putting. For additional pest control ideas, explore natural pest control methods.
Step 5: Liquid Fertilizer (Coffee Ground Tea)
For a quick nutrient boost, especially for container plants or seedlings, you can brew a “coffee ground tea.”
- Preparation: Soak 1-2 cups of spent coffee grounds in 5 gallons of water for a day or two.
- Straining: Strain out the grounds (which can then be composted or used as a soil amendment).
- Application: Use the dark liquid to water your plants. This mild, nutrient-rich solution can be applied every few weeks. Remember to dilute it further if using on very young seedlings.
Pro Tips and Common Mistakes
While coffee grounds are fantastic, a little knowledge goes a long way in maximizing their benefits and avoiding potential pitfalls.
Pro Tip 1: Dry First, Then Apply. Wet, clumpy coffee grounds can form a hard, impenetrable crust on top of soil, preventing water and air from reaching plant roots. Always aim to dry them out a bit before applying directly to the garden surface, or ensure they are well-mixed into the soil or compost.
Pro Tip 2: Moderation is Key. While grounds are beneficial, too much of a good thing can be detrimental. Excessive application can temporarily increase soil acidity beyond desirable levels for some plants. Aim for thin layers and consistent, moderate applications.
Pro Tip 3: Observe Your Plants. Your plants are the best indicators of what they need. Watch for signs of improved growth, or conversely, any yellowing or stunted growth that might indicate an imbalance. Adjust your application methods and frequency based on their response.
Pro Tip 4: Mix with Brown Materials in Compost. Coffee grounds are nitrogen-rich (“greens”). To maintain a healthy compost pile and prevent it from becoming slimy or smelly, always balance them with carbon-rich “browns” like dried leaves, wood chips, or shredded paper.
Common Mistake 1: Applying Too Much Directly to Soil Surface. As mentioned, this can create a water-repellent layer and hinder gas exchange. Always mix them in lightly or use them in compost.
Common Mistake 2: Assuming All Plants Love Acid. While many plants benefit, some prefer neutral or alkaline soil. Using coffee grounds extensively around these plants can lead to nutrient lockout or stunt their growth. Research your plants’ pH preferences.
Common Mistake 3: Using Flavored Coffee Grounds. Grounds from flavored coffees can contain added sugars or artificial ingredients that are not beneficial for your garden and may attract unwanted pests. Stick to plain, unflavored coffee grounds.
Common Mistake 4: Expecting Instant Results. The nutrients in coffee grounds are released slowly as they decompose. This is a long-term soil improvement strategy, not a quick-fix fertilizer. Be patient and consistent.
Eco-Friendly Variations: Beyond the Basic Brew
The eco-conscious gardener can take the use of coffee grounds even further, integrating them into a broader sustainable lifestyle. Every little bit helps reduce waste and enhance your garden’s natural resilience.
- Used Tea Leaves: Just like coffee grounds, used tea leaves are a fantastic source of nitrogen and trace minerals. They can be added to compost, directly to soil around plants (especially roses and acid-lovers), or brewed into a “tea” for liquid feeding.
- Eggshells: While not coffee-related, eggshells are another common kitchen waste item that’s excellent for the garden. Crushed eggshells add calcium and can help deter slugs. Combine them with coffee grounds for a super-powered soil amendment.
- Banana Peels: Rich in potassium, banana peels are wonderful for flowering and fruiting plants. Chop them up and bury them near the roots, or add them to your compost pile alongside coffee grounds.
- Cardboard and Newspaper: These “brown” materials are perfect for balancing the “green” coffee grounds in your compost. Shred them to speed up decomposition. They also make excellent weed barriers beneath mulch.
- Collecting from Local Cafes: Extend your eco-friendly impact by asking local coffee shops for their spent grounds. Many are eager to participate in waste reduction programs. Just bring your own bucket!
- Coffee Filter Composting: Don’t throw away those paper coffee filters! If they’re unbleached, they can go directly into your compost pile right along with the grounds. They count as a “brown” material.
Seasonal Considerations for Coffee Grounds
The best time and method for applying coffee grounds can vary slightly depending on the season and your specific gardening goals.
- Spring: This is a prime season for incorporating coffee grounds. As you prepare garden beds for planting, mix grounds into the soil to give seedlings and young plants a nitrogen boost and improve soil structure. It’s also a great time to start a coffee ground tea for newly potted plants.
- Summer: During the growing season, focus on using coffee grounds for pest deterrence and as a gentle side dressing for established plants. Apply thin layers around the base of acid-loving plants or use coffee ground tea as a liquid feed every few weeks. Avoid heavy applications during extreme heat, as grounds can dry out quickly and form a crust.
- Autumn: As garden beds are winding down, autumn is an excellent time to amend the soil with coffee grounds in preparation for next year. Dig them into vacant beds or add larger quantities to your compost pile along with fallen leaves. This allows them to break down over winter, enriching the soil for spring planting.
- Winter: If you have active indoor plants or a worm bin, continue feeding them coffee grounds throughout the winter. For outdoor gardens in dormant colder climates, you can still add grounds to your compost, or simply store them in a cool, dry place until spring.
Expert Resources: Deepening Your Coffee Grounds Knowledge
To further explore the science and practical applications of coffee grounds in the garden, consult these authoritative resources:
- Gardening Know How: The Use Of Coffee Grounds For Plants – A comprehensive overview of how coffee grounds benefit plants and soil.
- Royal Horticultural Society (RHS): Coffee grounds – Provides a concise perspective from a leading horticultural authority on using coffee grounds.
- University of Minnesota Extension: Composting Basics – While not solely focused on coffee grounds, this resource offers excellent information on composting principles, which directly relates to effectively using coffee grounds in your compost.
Conclusion: Brew a Better Garden with Coffee Grounds
By now, it should be clear that coffee grounds are a true powerhouse in the organic gardener’s toolkit. They offer a multitude of benefits, from enriching soil and feeding plants to deterring pests and contributing to a more sustainable household. Embracing coffee grounds means transforming what was once waste into a valuable resource, nurturing your garden in an eco-friendly and cost-effective way.
Start small, observe your garden’s response, and don’t be afraid to experiment. With a little consistency and care, you’ll soon discover the profound impact that your daily brew can have on creating a healthier, more vibrant garden. Happy gardening!
FAQ: Coffee Grounds in the Garden
<p><strong>Q1: Are fresh coffee grounds bad for plants?</strong><br>
A1: While fresh coffee grounds are richer in caffeine and acidity, spent (used) grounds are generally preferred for direct application, as they are less acidic and have fewer compounds that could inhibit plant growth. Fresh grounds are best for composting or creating liquid fertilizer, diluted generously.</p>

<p><strong>Q2: Do coffee grounds attract worms?</strong><br>
A2: Yes, absolutely! Earthworms are highly attracted to spent coffee grounds. The grounds provide a food source and improve soil texture, creating a beneficial environment for worms. Their activity, in turn, further enriches the soil.</p>

<p><strong>Q3: Can coffee grounds deter slugs and snails?</strong><br>
A3: Many gardeners report success using coffee grounds as a deterrent for slugs and snails. The abrasive texture and caffeine content are believed to be effective at repelling these pests. Create a barrier around susceptible plants for best results.</p>

<p><strong>Q4: How often should I put coffee grounds in my garden?</strong><br>
A4: For direct soil application, a thin layer (about 1/2 inch) every 2-4 weeks is generally sufficient, especially for acid-loving plants. When composting, add them regularly in layers with "brown" materials. For liquid fertilizer, apply every few weeks. Always observe your plants for their response and adjust frequency as needed.</p>